1992 Heritage Edition Restoration
Click Here to See Full Restoration Photo Album
Click Here To See Our 1992 Era Camaro Memorabilia Collection
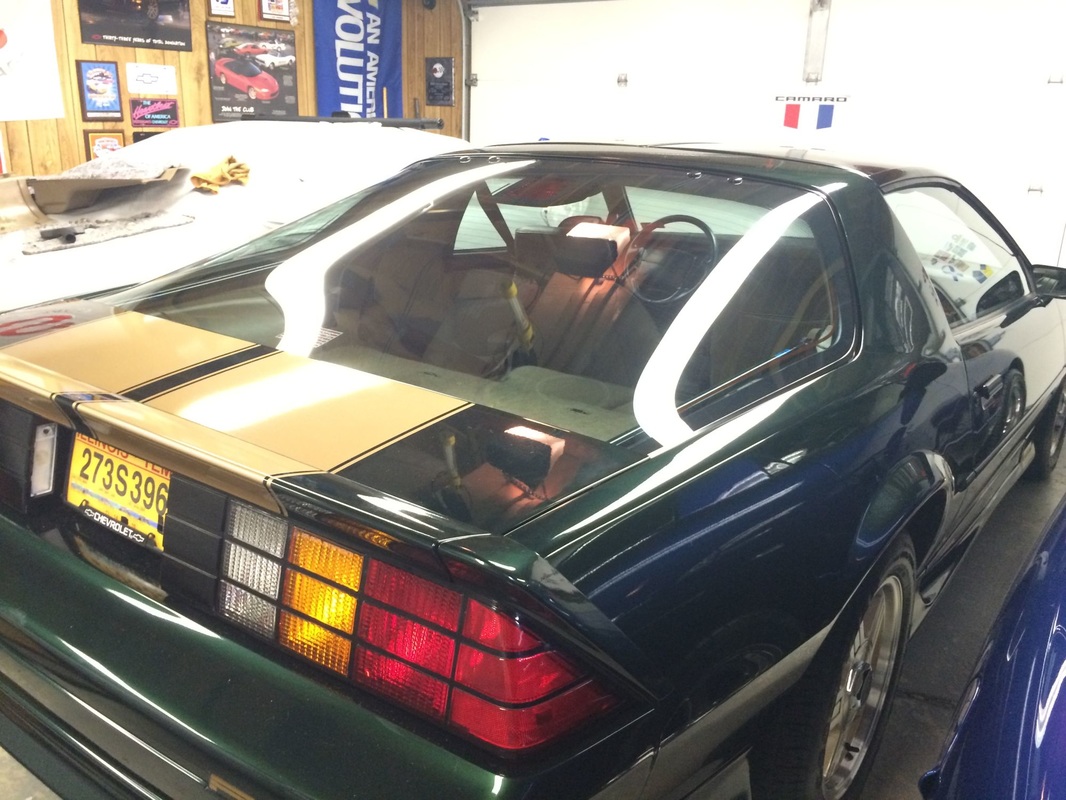
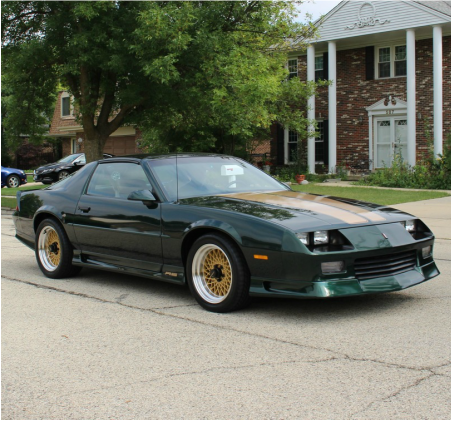
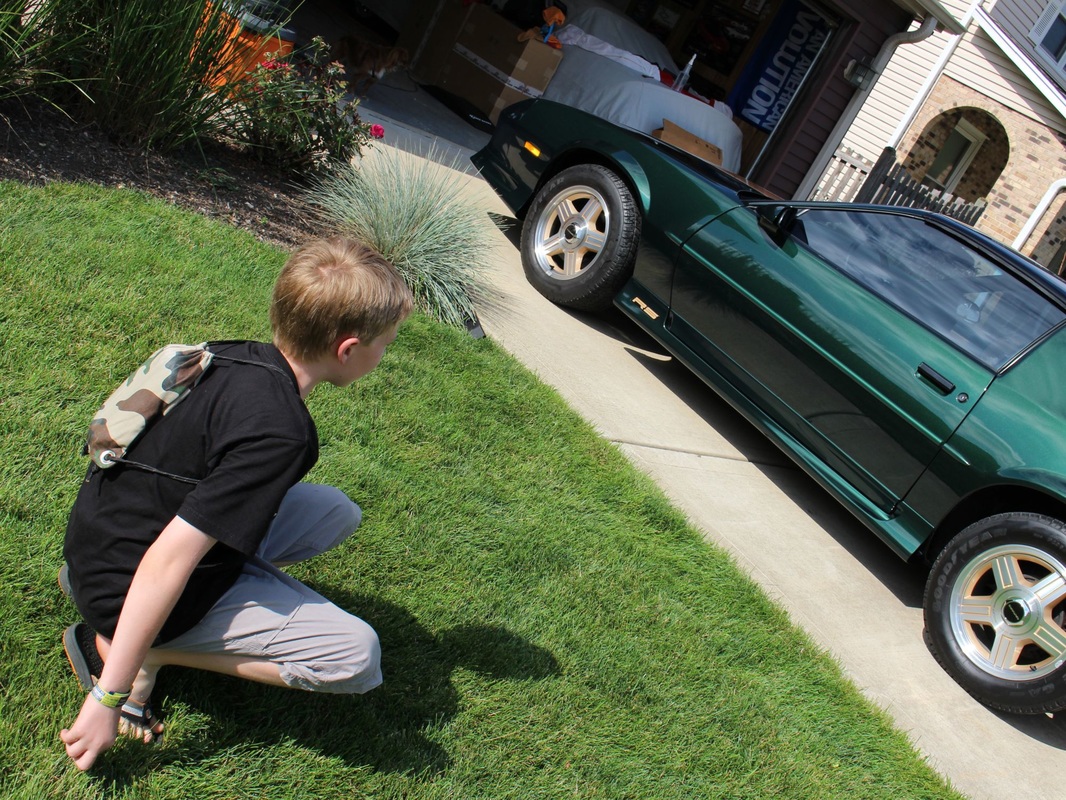
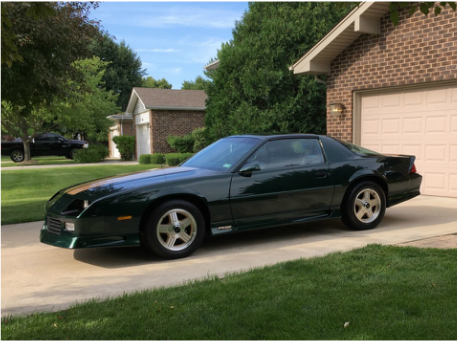
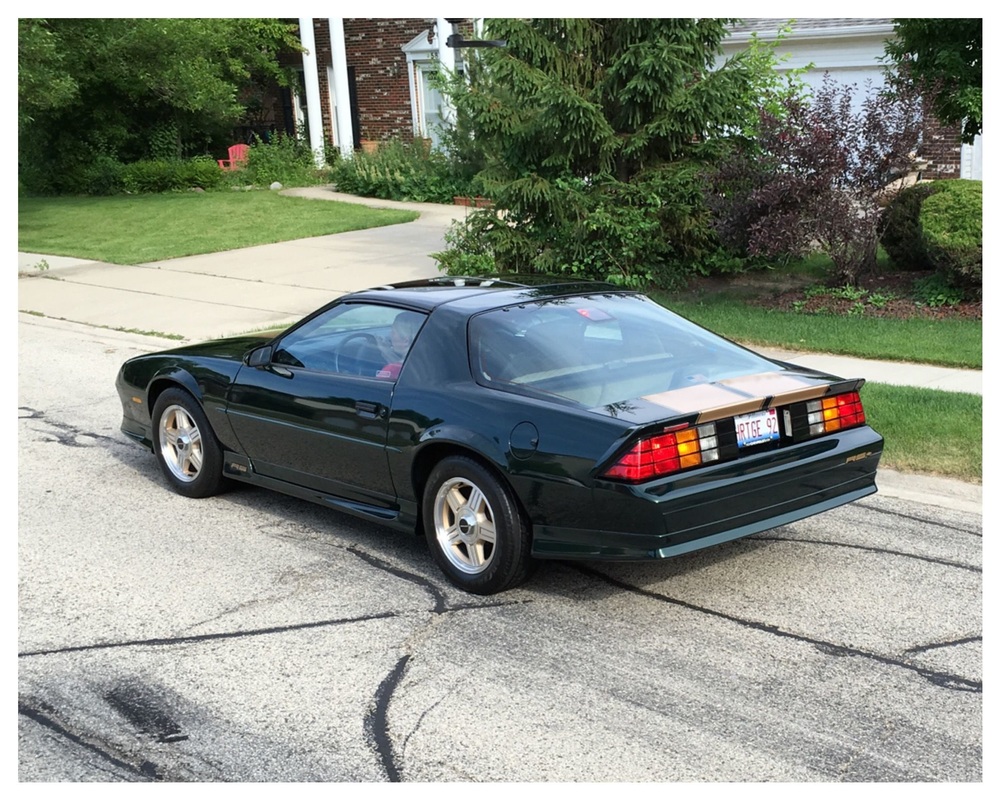
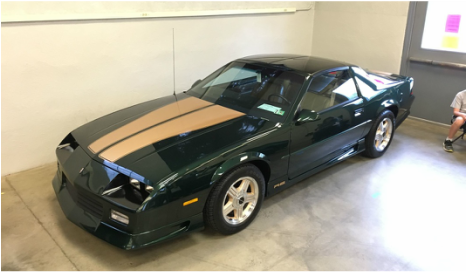
We love to collect anniversary year Camaros, they don't always have to be the actual anniversary edition GM produced but in this case we wanted a 1992 Heritage Edition. Not always the easiest car to find in the kind of condition we wanted. We had been searching for a while when we got a call from a friend saying he knew of one that needed a collector to grab it. So we drove to Iowa to check it out and brought him home. He has been fondly named Marco in reference to his Polo Green paint. We were fortunate to be invited to show him at Camaro Nationals in the Bowtie class this year and we have been working very hard to bring him up to snuff. He was in amazing condition when we got him but a few parts had been replaced over the years with NON-OEM equipment. So we have corrected those issues and done a ton of cleaning and maintenance work. This page is the detail of all of improvements we have made.
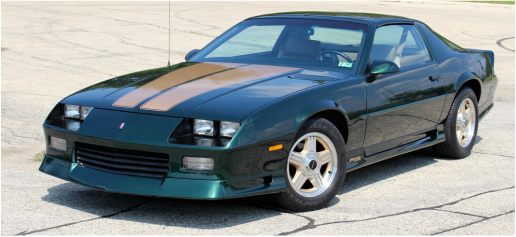
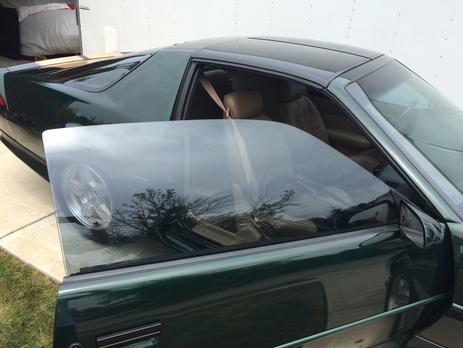
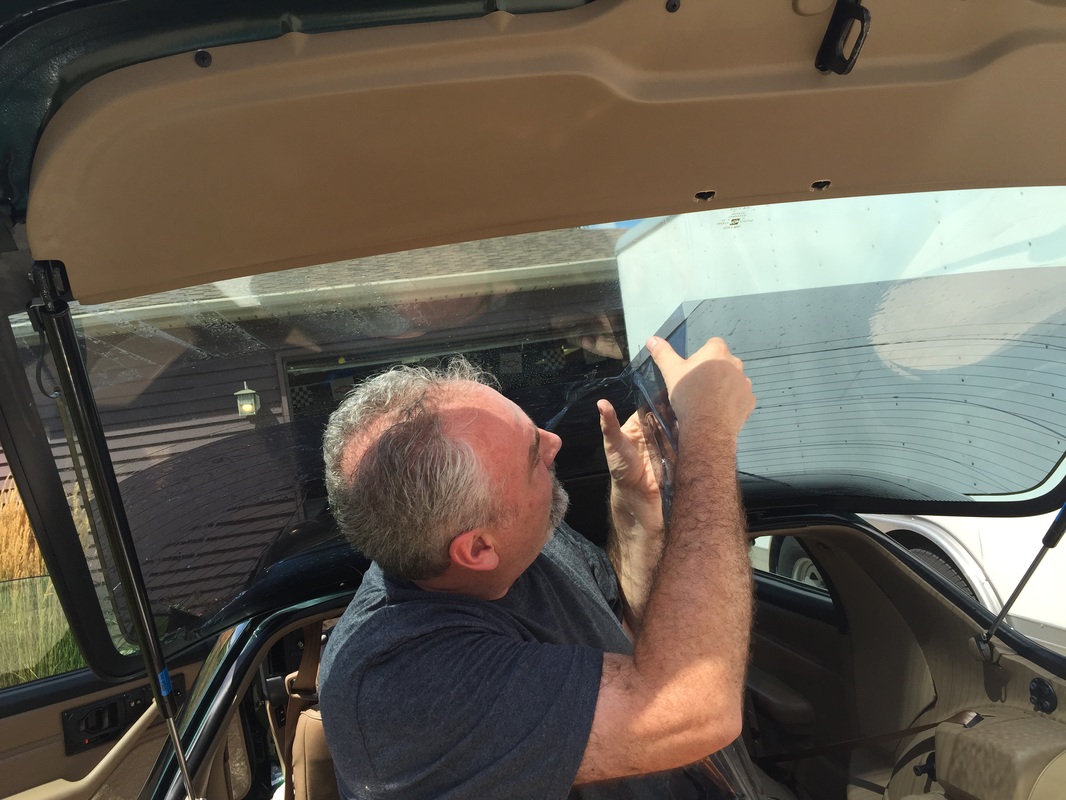
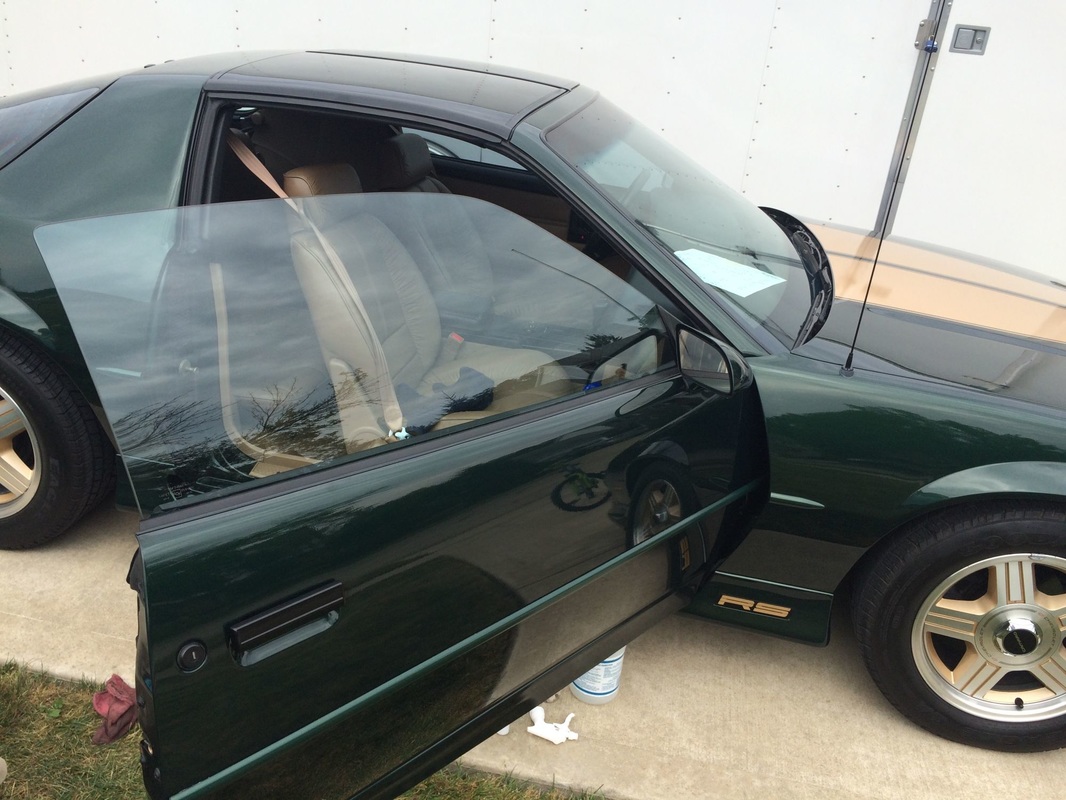
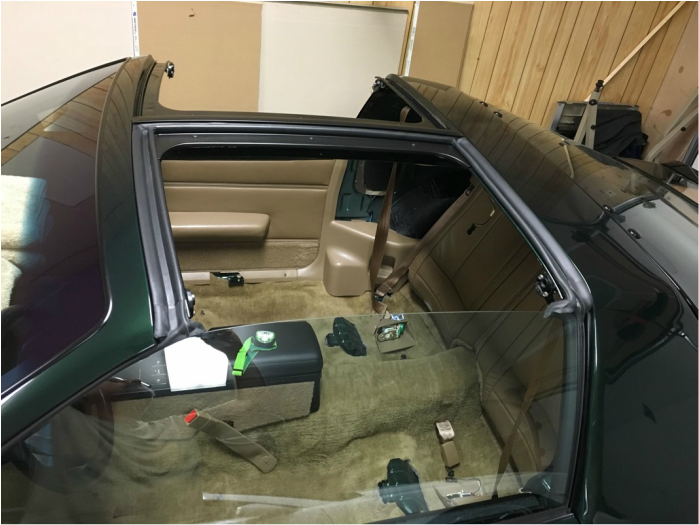
It was clear that the original owner absolutely loved his Camaro, and cared for it very much. Originally from South Carolina, it was necessary to tint the windows (the annual inspection sticker from 1993 is still on the windshield - the owner relocated to IA for business shortly there after) but now it was time to get rid of the nasty film. Over two weekends labored to carefully remove the tint from the side and rear windows.
|
|
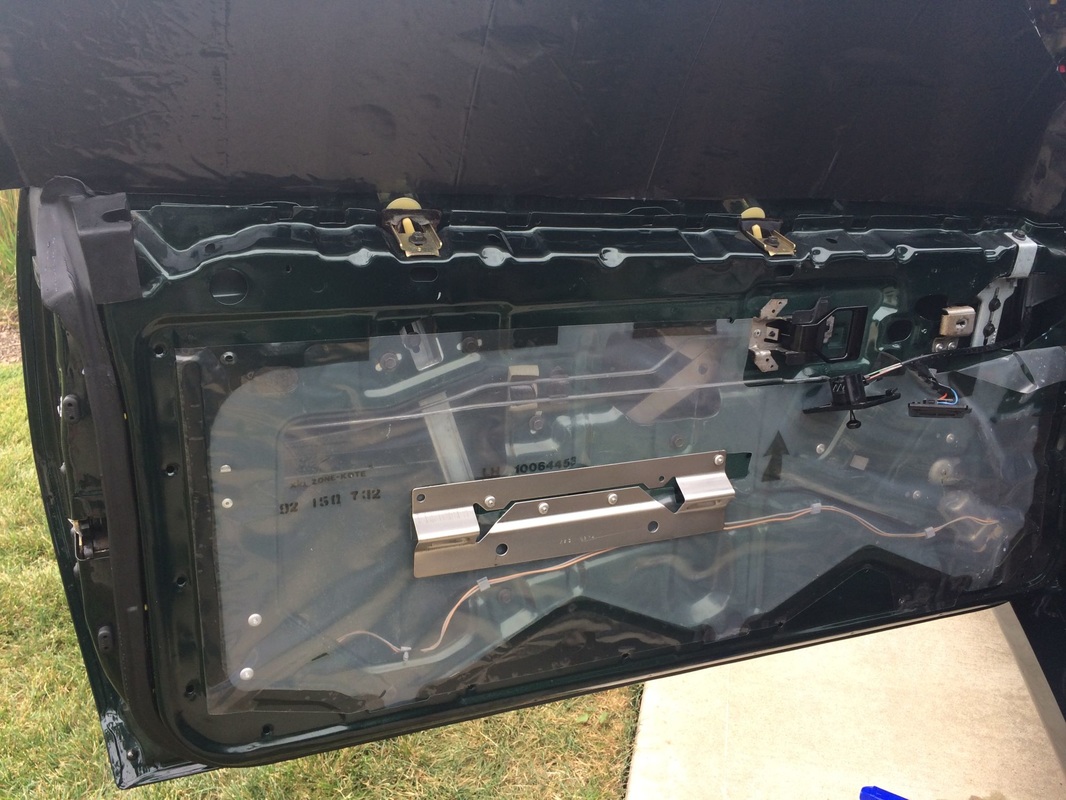
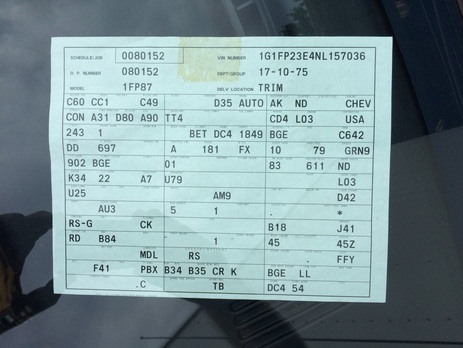
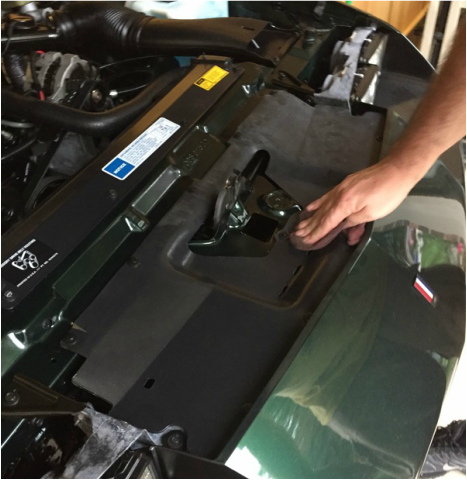
Using straight ammonia, black trash bag liners and Mother Nature's sunshine worked pretty well on loosening the film and getting rid of the adhesive, Goo Gone worked to get rid of the rest of the sticky stuff. Below you can see the black trash bag stuck to the backside of the glass soaking the film with ammonia. In the process we found a trim tag behind the passenger side door panel.
|
|
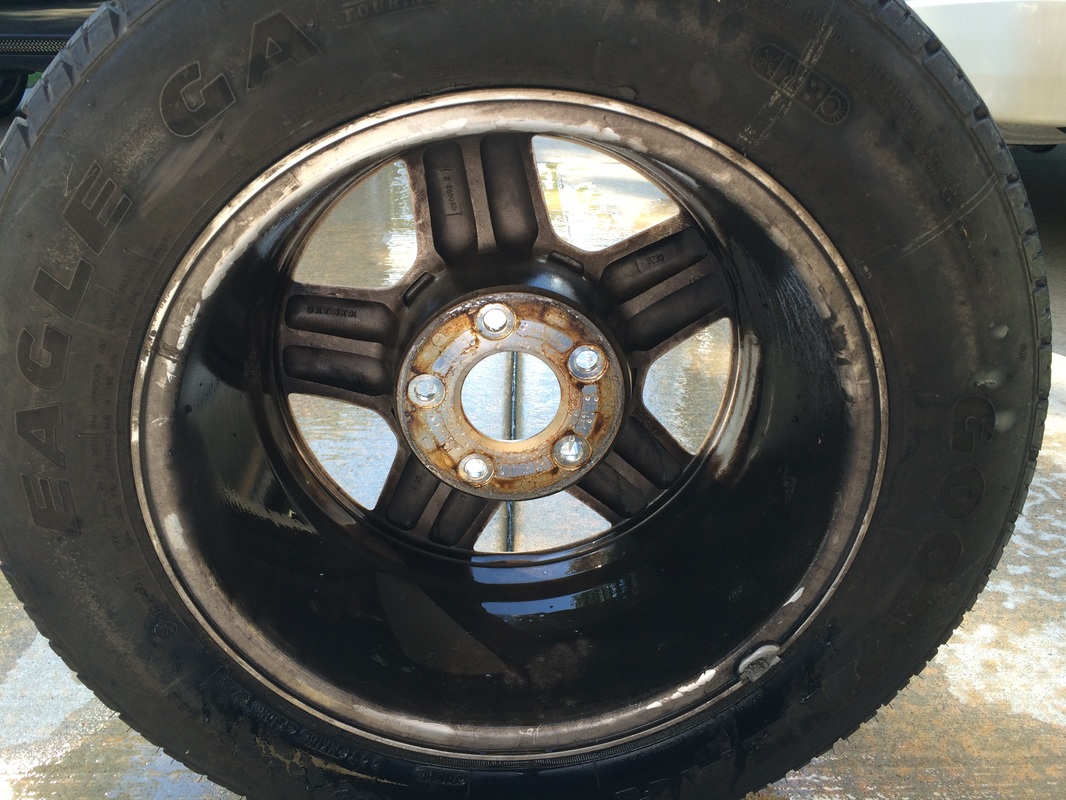
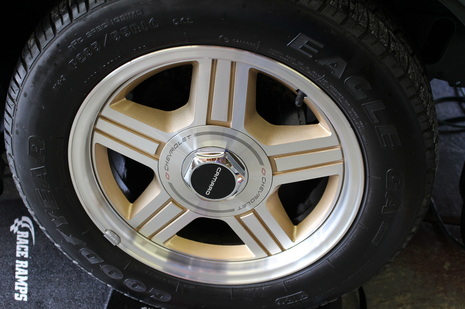
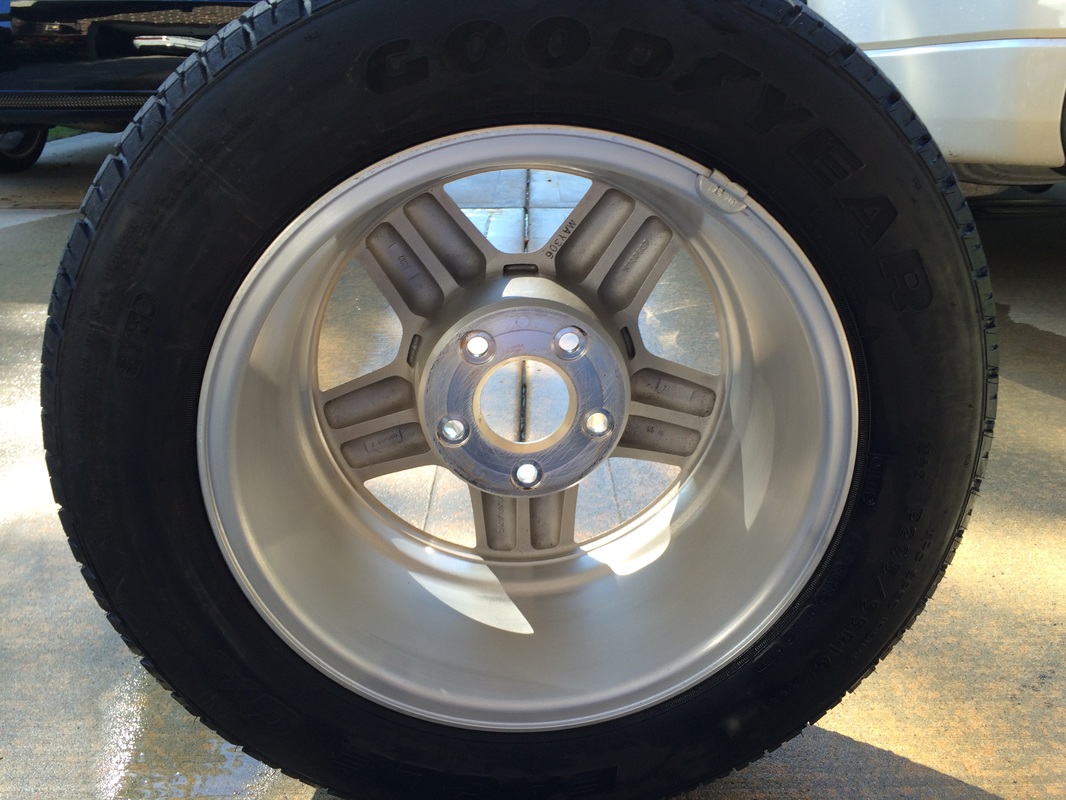
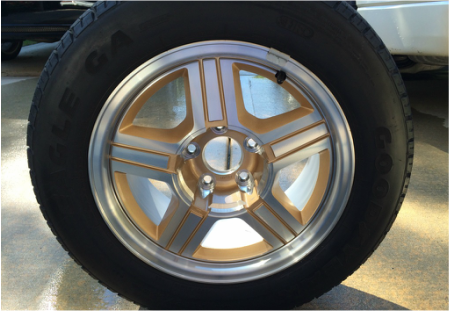
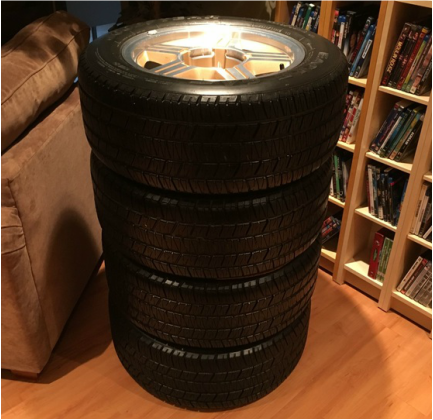
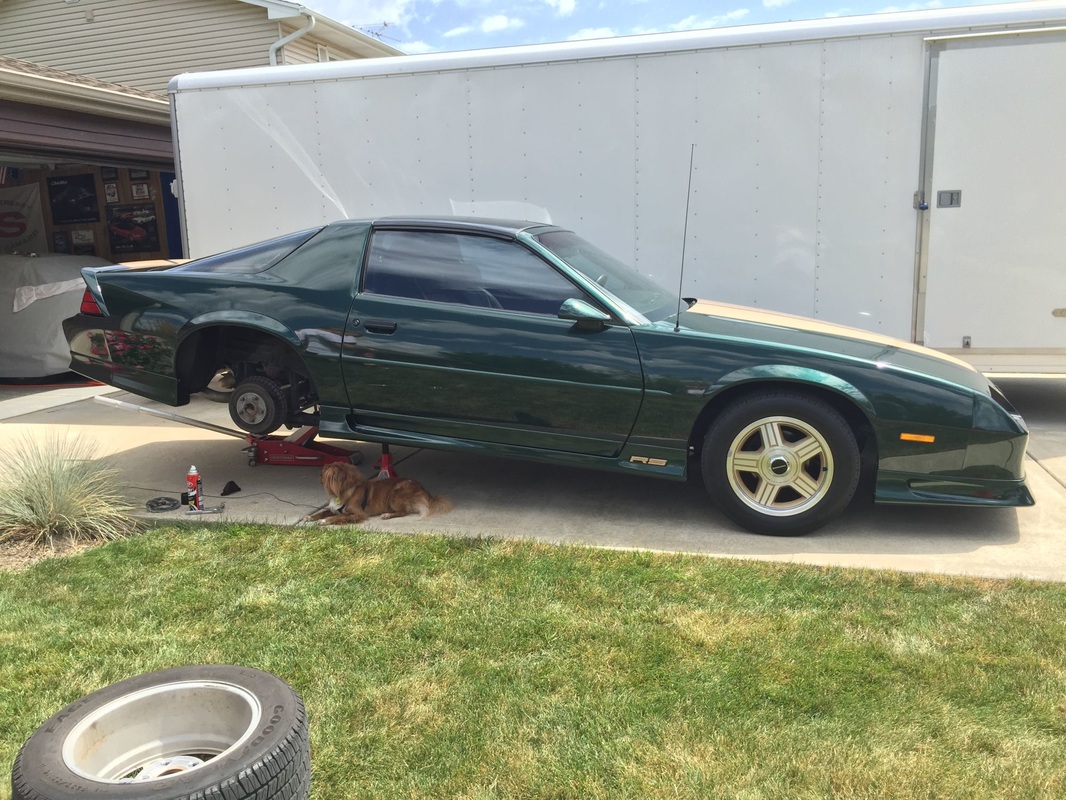
Wheels and Tires . . . amazingly the car is still rolling on it's original tires with just under 17,000 miles on the odometer. We do not believe that the inside of these wheels have ever been cleaned . . they were pretty gross!
|
|
We really do not want to disturb the originality of the wheels and tires, they are original only once! So we took a cue from the Chevrolet Heritage Edition Camaro Prototype, and put on 17" x 9" GTA Gold Lace Wheels with 275/40ZR17 BFG Comp TA's so that we can enjoy him safely on the road, and preserve the originals safely in the house.
|
|
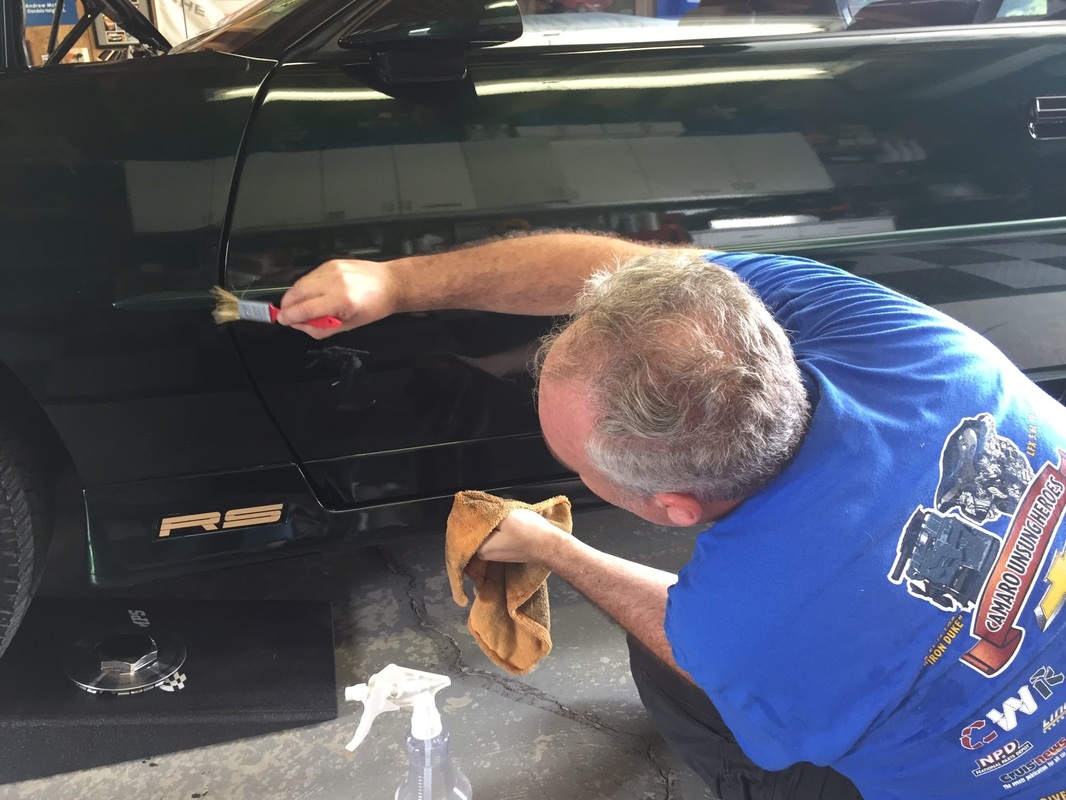
As I said before the previous owner deeply loved his Camaro and enjoyed slopping on copious amounts of wax, which did save the paint, but was a nightmare to get out of the nooks and crannies
|

|
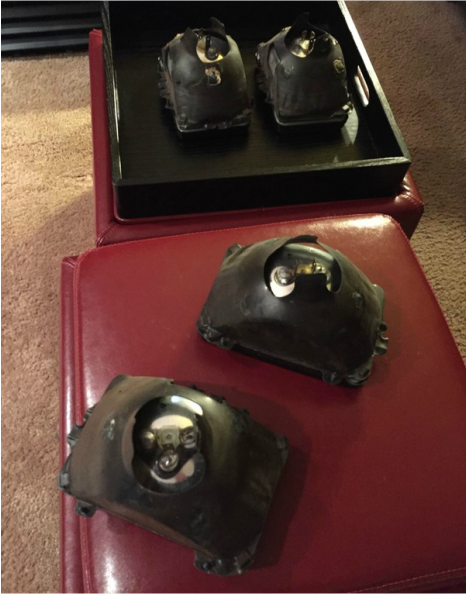
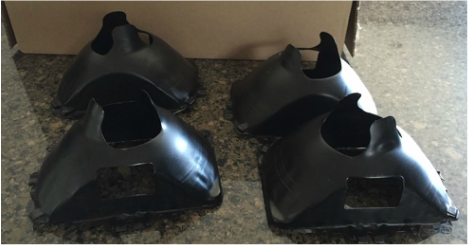
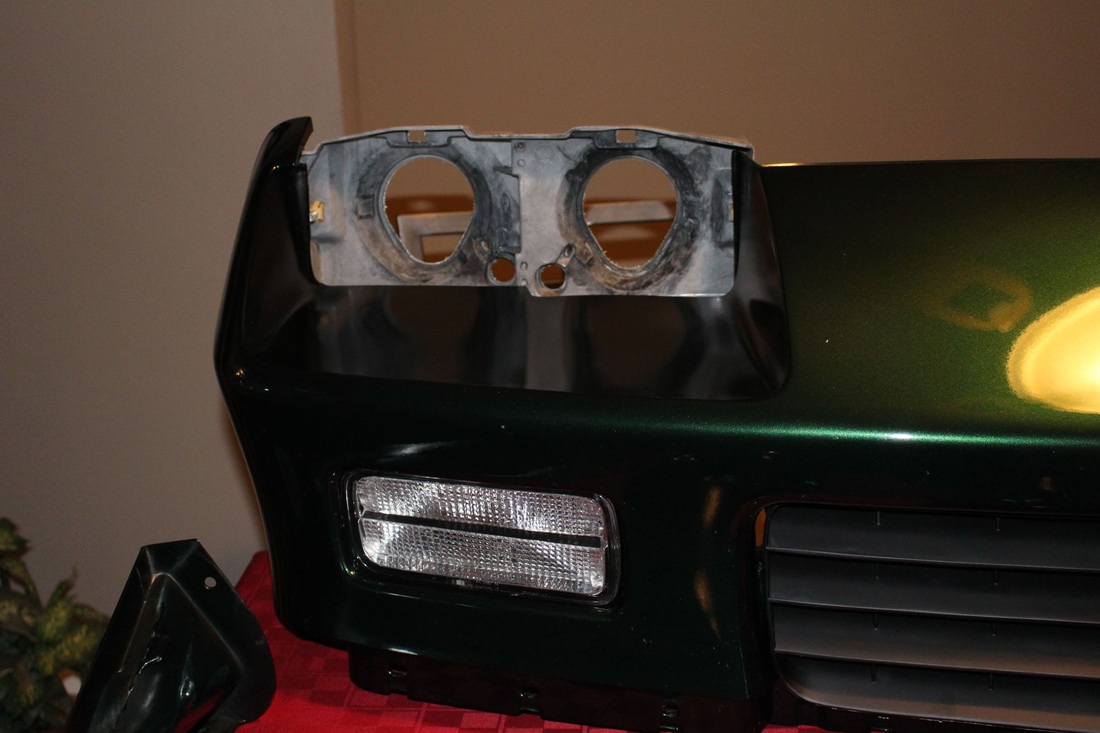
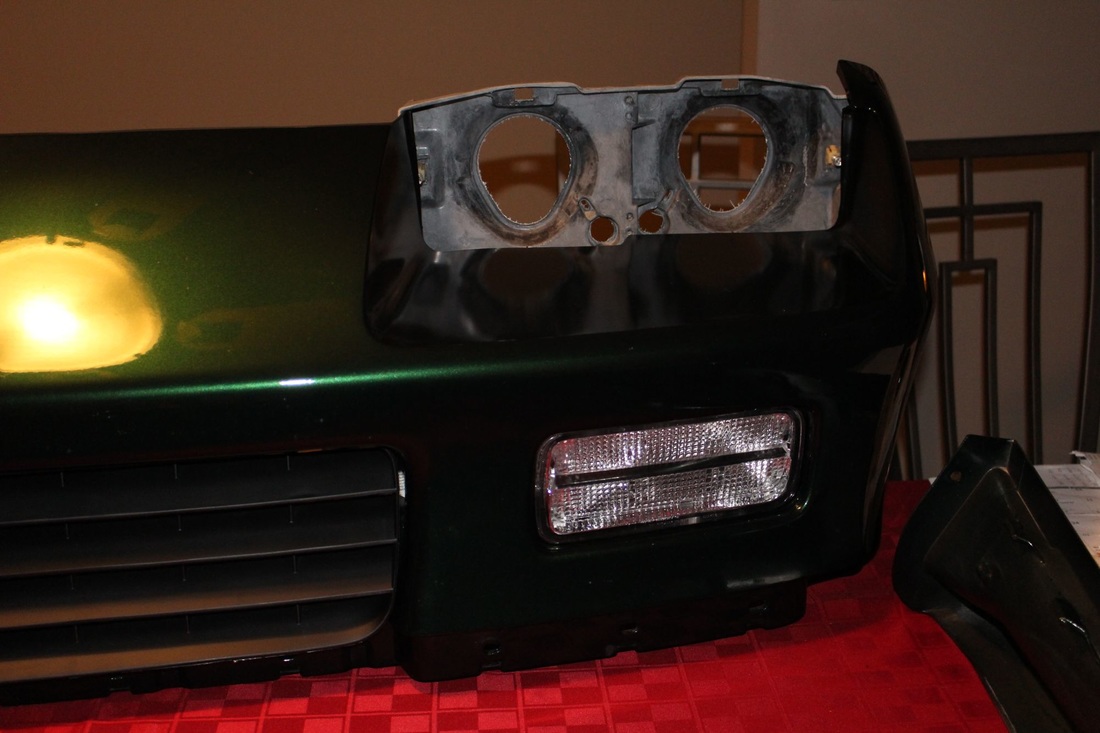
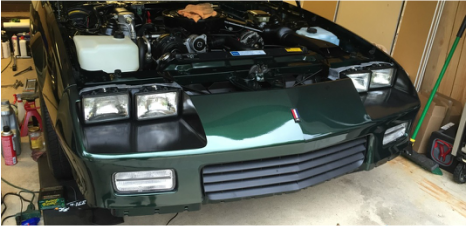
In the ever crazy efforts we take to restore / preserve these cars, here's one that always makes me laugh, the car had ONE incorrect headlight. So as the story goes, one thing leads to another, which in the end was great, because the headlight buckets were all gross and rusty, so was able to take those out and re-finish them, and address all the filth back there!

|
|
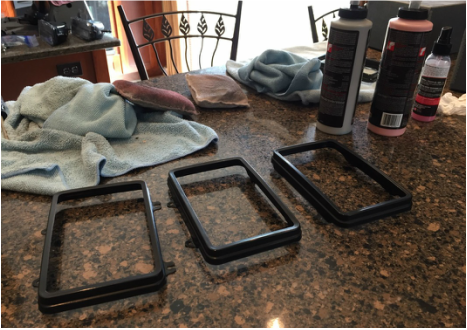
Head light bucket restoration. The heat from the halogen bulbs must adversely affect the black coating on the head light buckets, since on virtually every Camaro I see they have a dusting of rust on them. The grossness really did not photograph well, GM used a nasty grease to lubricate the buckets against the fiberglass header which turned to concrete. The headlamp trim rings were in really nice shape, just needed some bug guts polished off and a little touch up with a paint pen. Headlamp buckets scrubbed smooth and repainted high temp GM satin black.
|
|
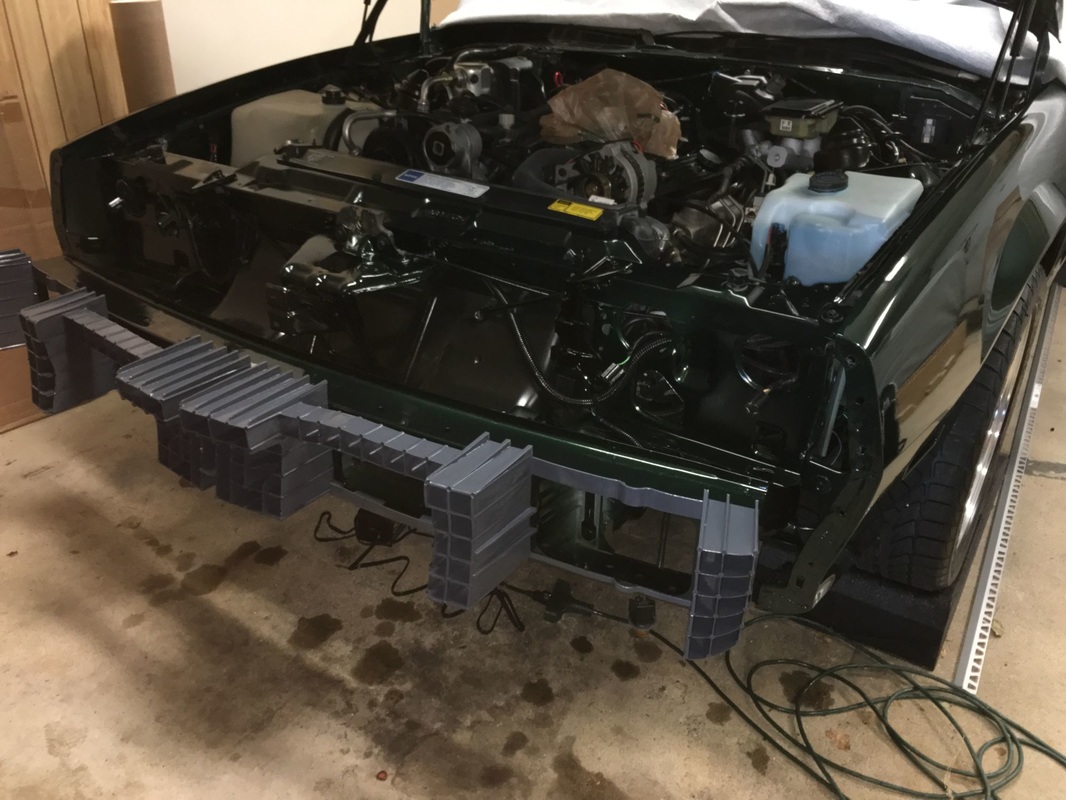
We re-assembled the bumper in the dining room . . .
|
|
The fully cleaned, polished and rebuilt front nose clip waiting to go back on.
|
|
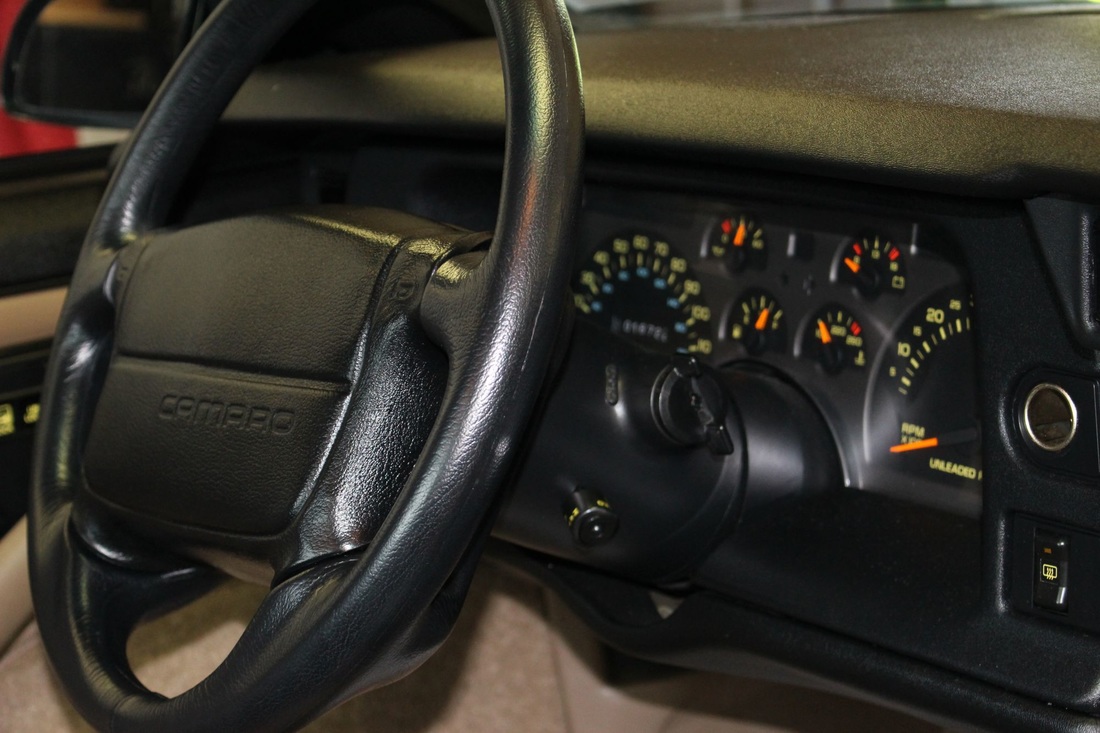
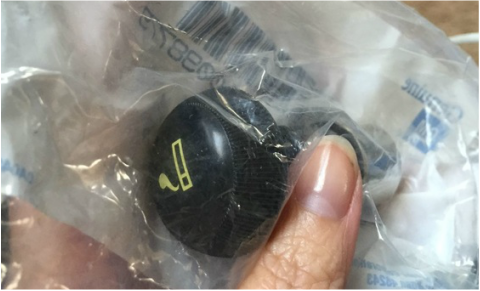
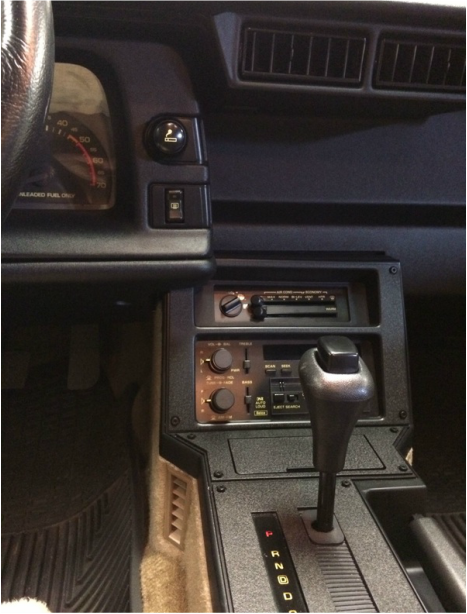
When we got Marco, the original cigarette lighter was MIA . We assume the original owner was a smoker, since every once and a while I sense a hint of lingering odor. Now it's like it was never missing.
|
|
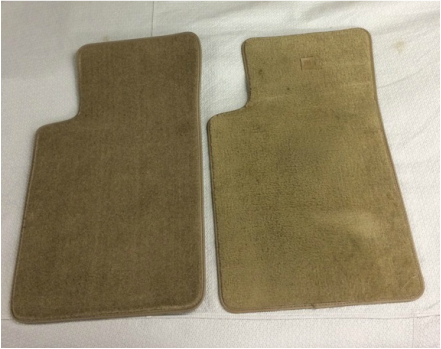
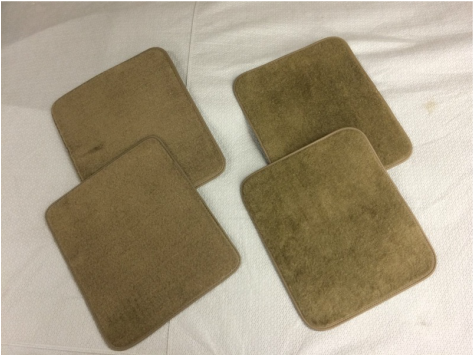
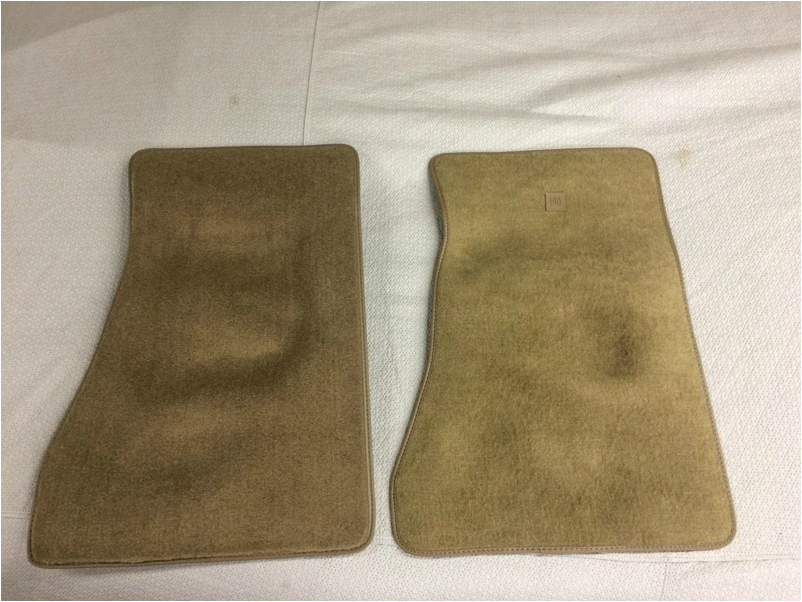
We were fortunate to get the original GM logo'ed floor mats with our car, so to preserve them got a set of ACC mats. Although not a 100% perfect match sure are really nice.
|
|
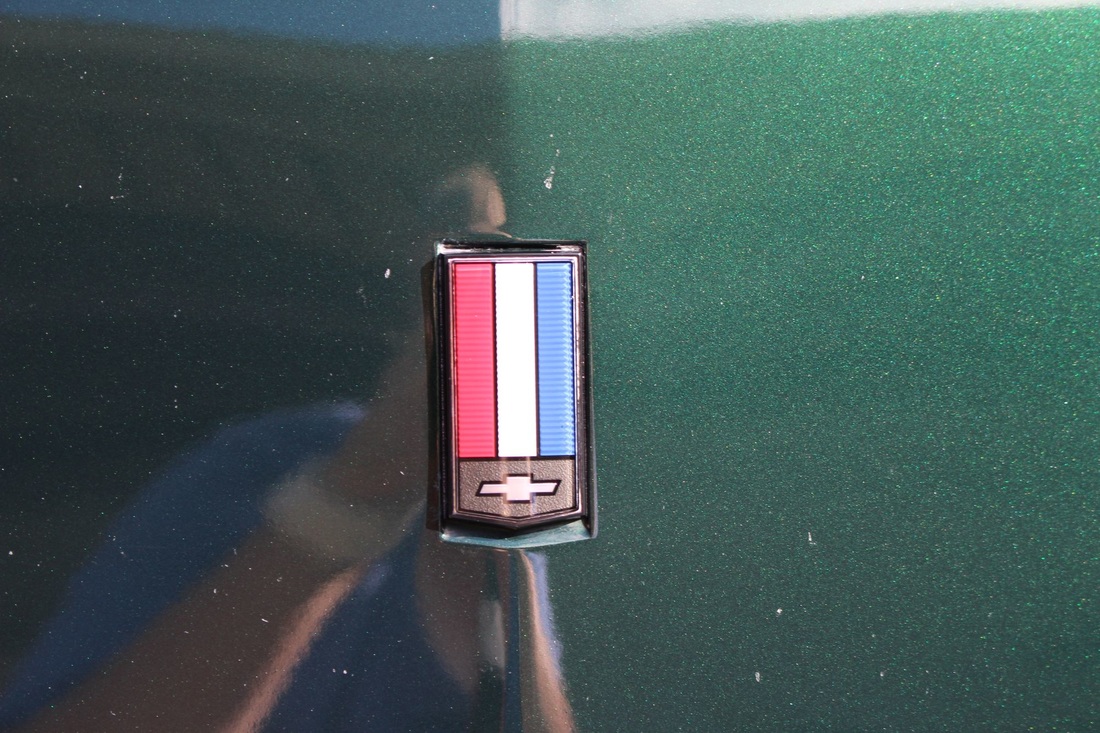
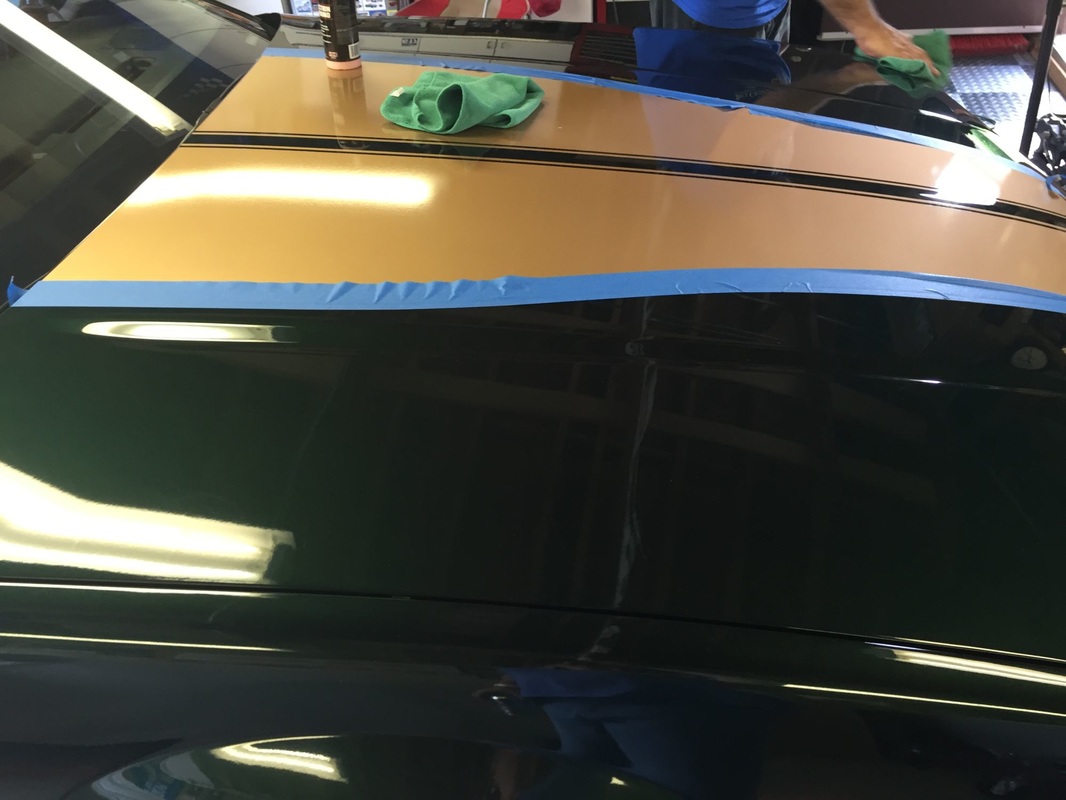
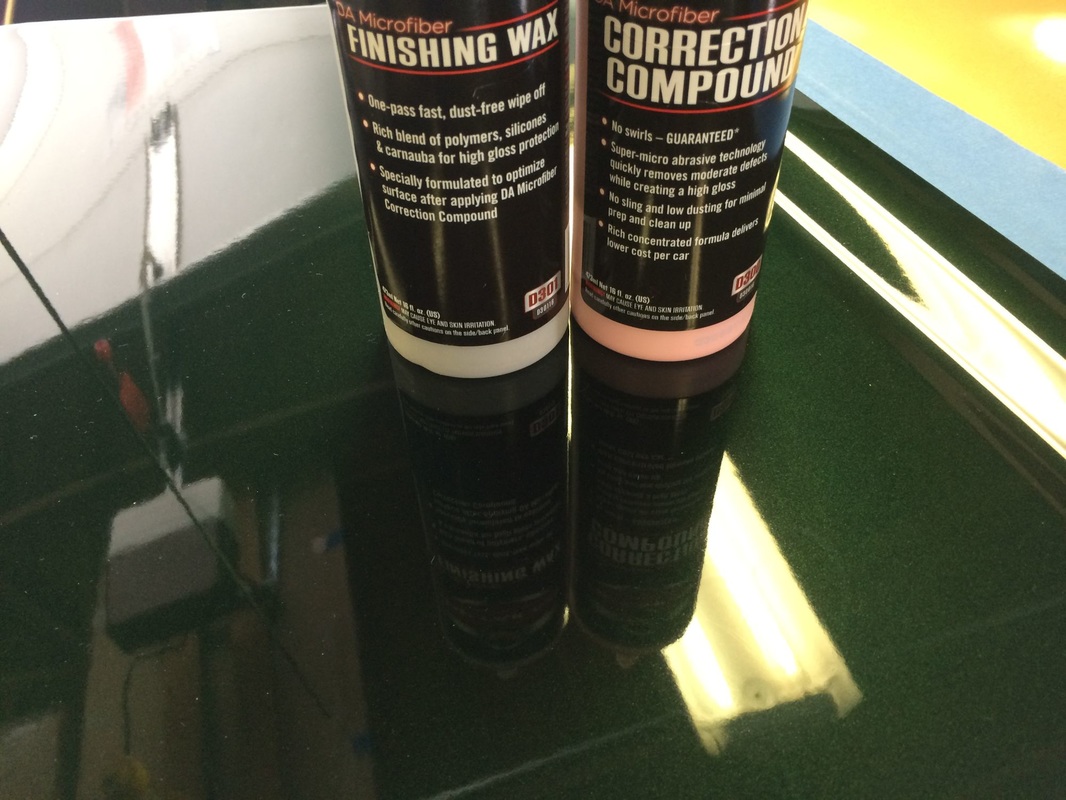
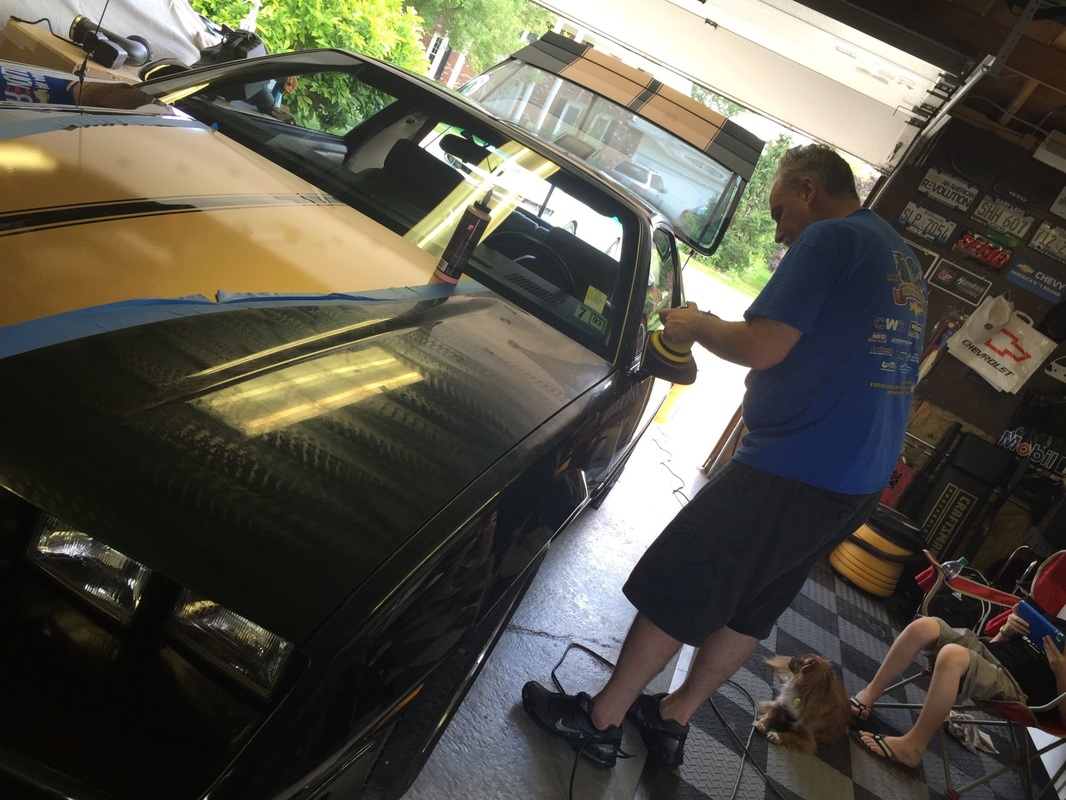
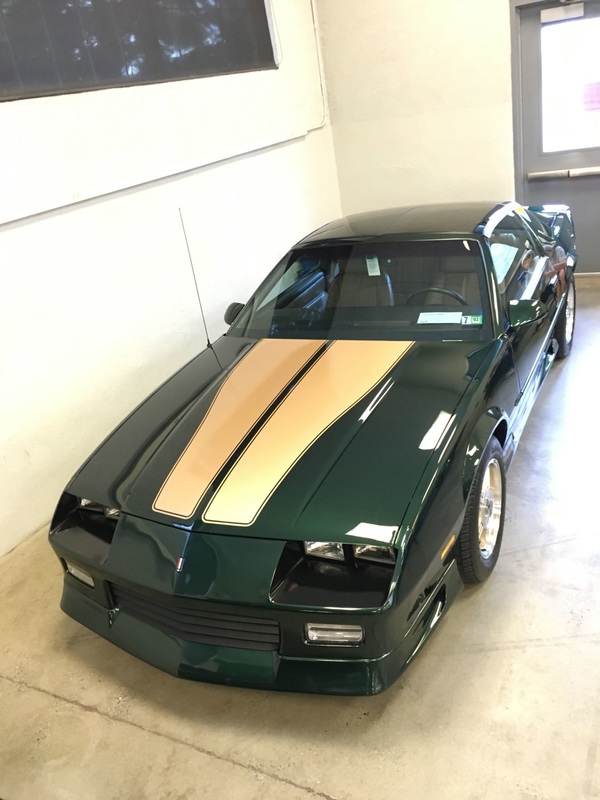
Paint correction. Marco's paint was in really good condition, honestly remarkable condition for a 24 year old car, granted he does have some rock chips, scratches and bug gut etching, but I knew could bring back even more of the glory. Countless hours have been spent cleaning cracks and crevasses. Using Meguires DA Microfiber Paint Correction Kit brought back the mirror gloss.
|
|
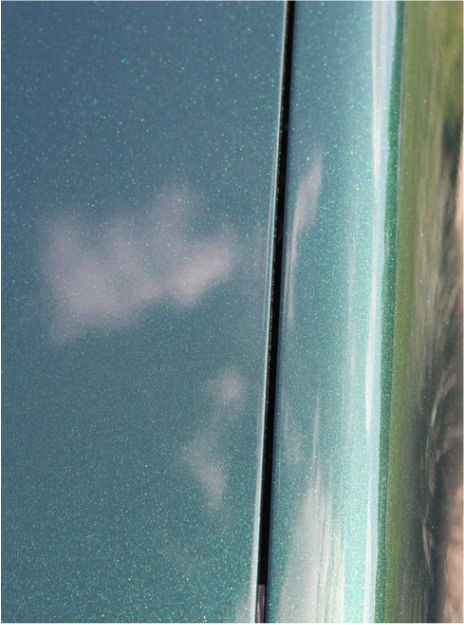
The color and metallic is just brilliant in the bright sunshine!

|
|
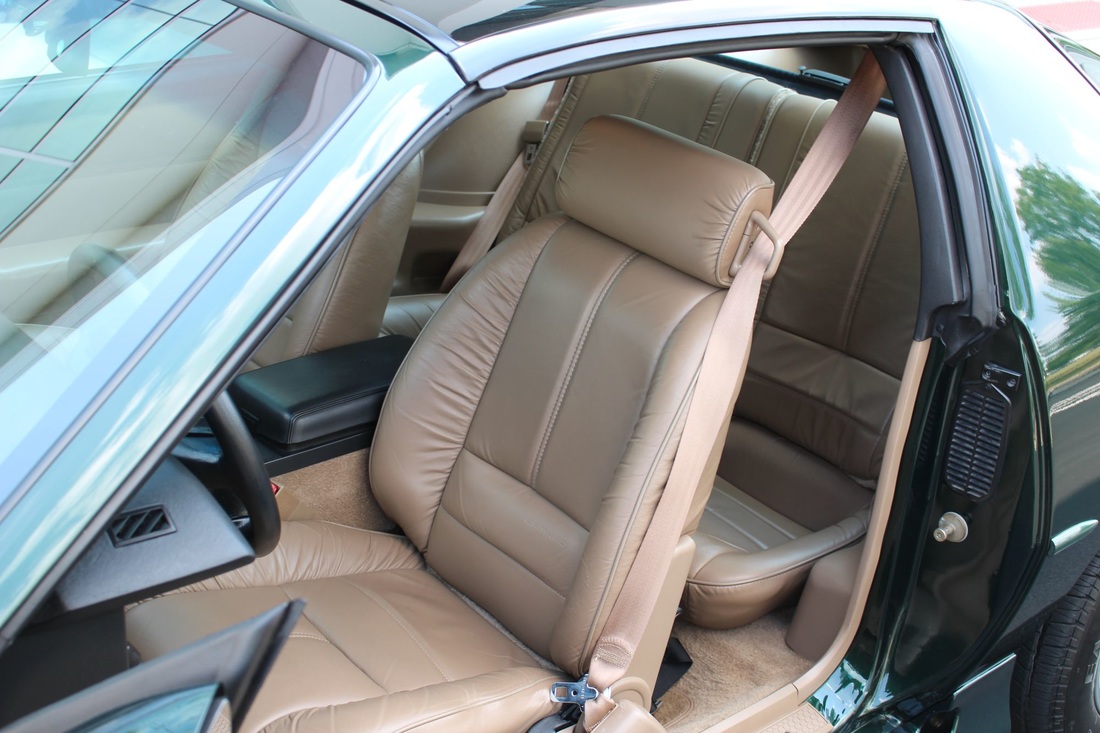
Both of the original seat belt loops had gone all brittle and broken off before we had purchased. We still have all the "parts" safely stored away.
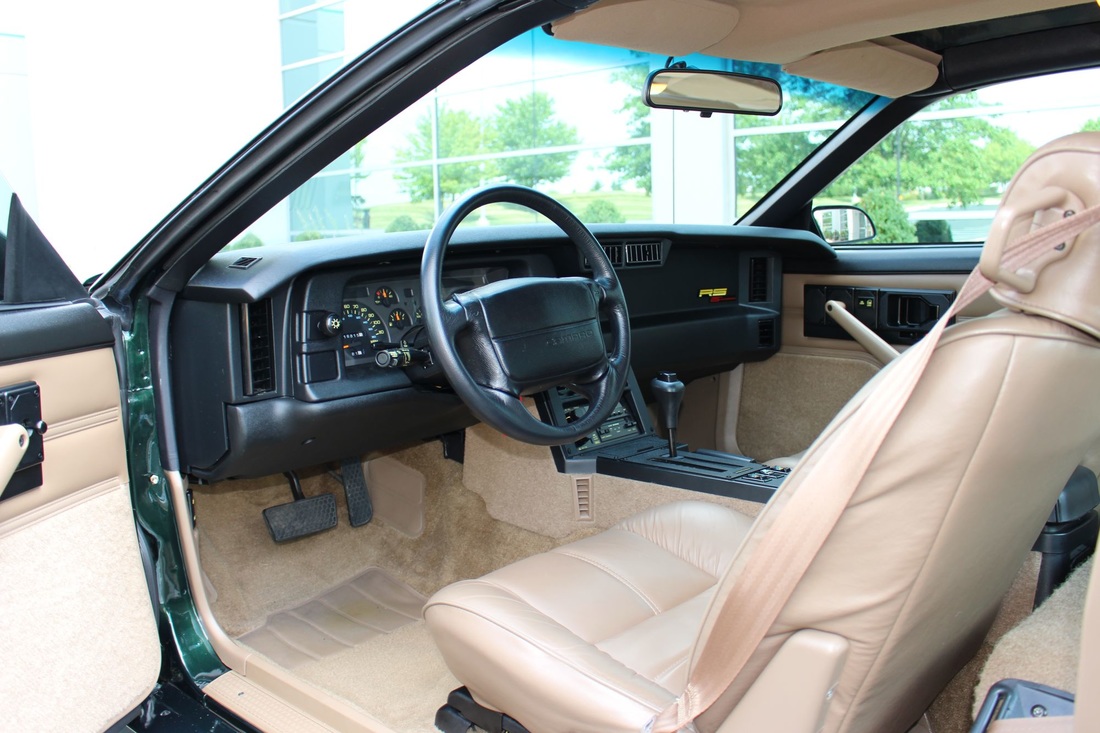
To get by, we found that the 2000's Neutral Interior matches the unique color of the 1992 Light Beige Interior color very well so bought a pair . . looks OEM, but of course not correct. I have since found brand new GM in the bag NOS correct and correct 64I colored replacement seat belt loops. They came from GM pre-cut to slide over the seat belt and a little retainer "square" that sandwiches between the head rest and the base of the loop, I thought I had pictures somewhere but for the life of me can't seem to find them. I really want to install them but am too afraid to, since now they are no longer available!
To get by, we found that the 2000's Neutral Interior matches the unique color of the 1992 Light Beige Interior color very well so bought a pair . . looks OEM, but of course not correct. I have since found brand new GM in the bag NOS correct and correct 64I colored replacement seat belt loops. They came from GM pre-cut to slide over the seat belt and a little retainer "square" that sandwiches between the head rest and the base of the loop, I thought I had pictures somewhere but for the life of me can't seem to find them. I really want to install them but am too afraid to, since now they are no longer available!
|
|
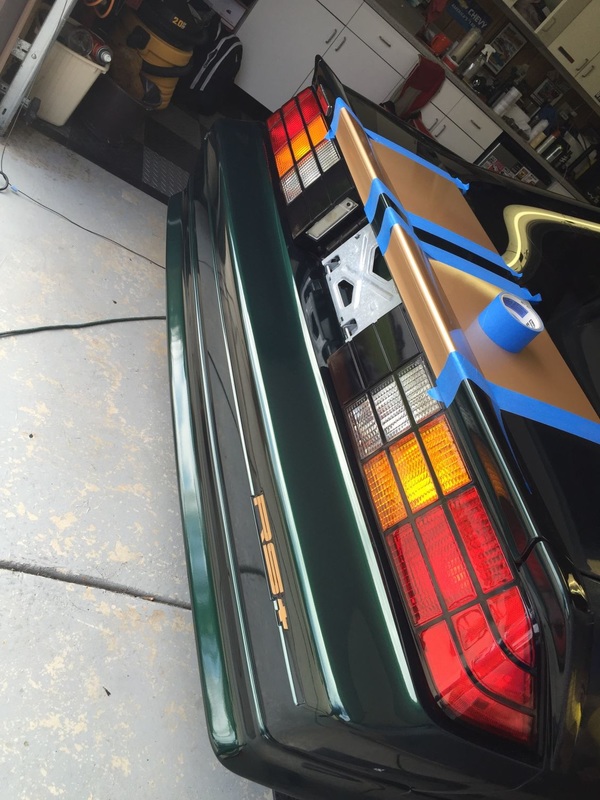
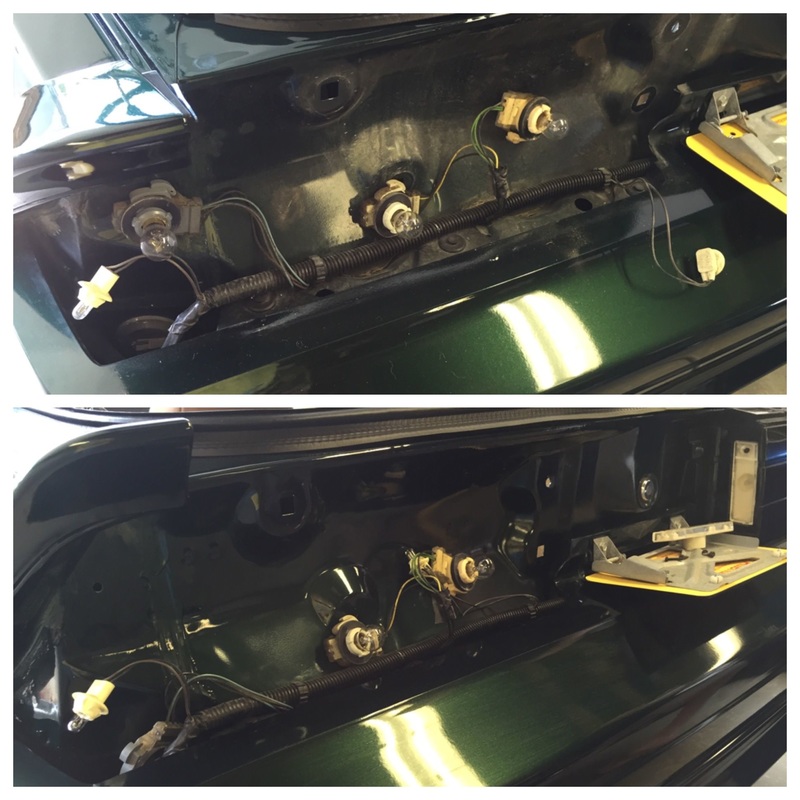
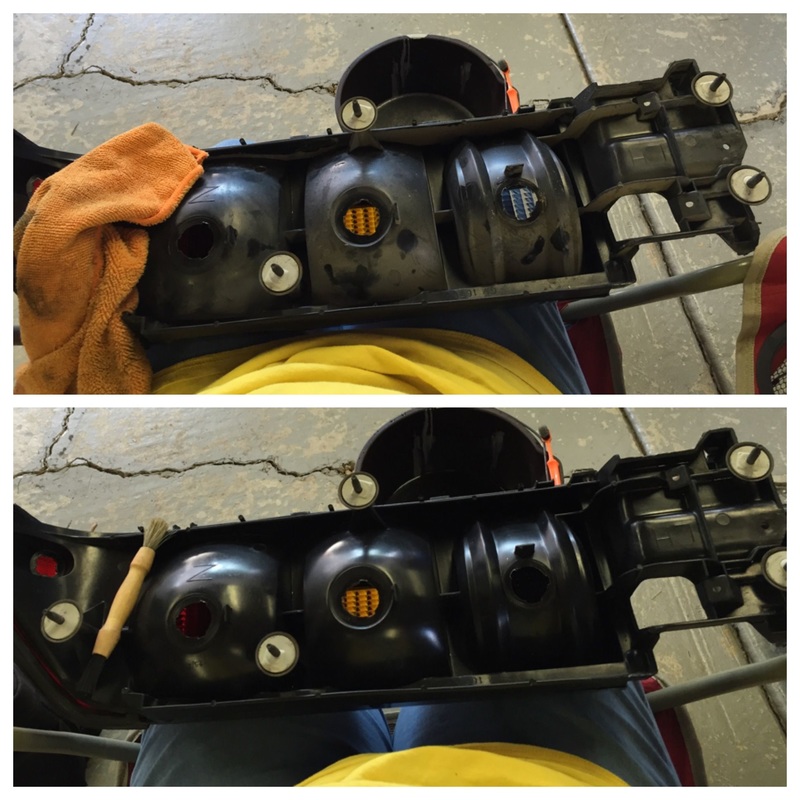
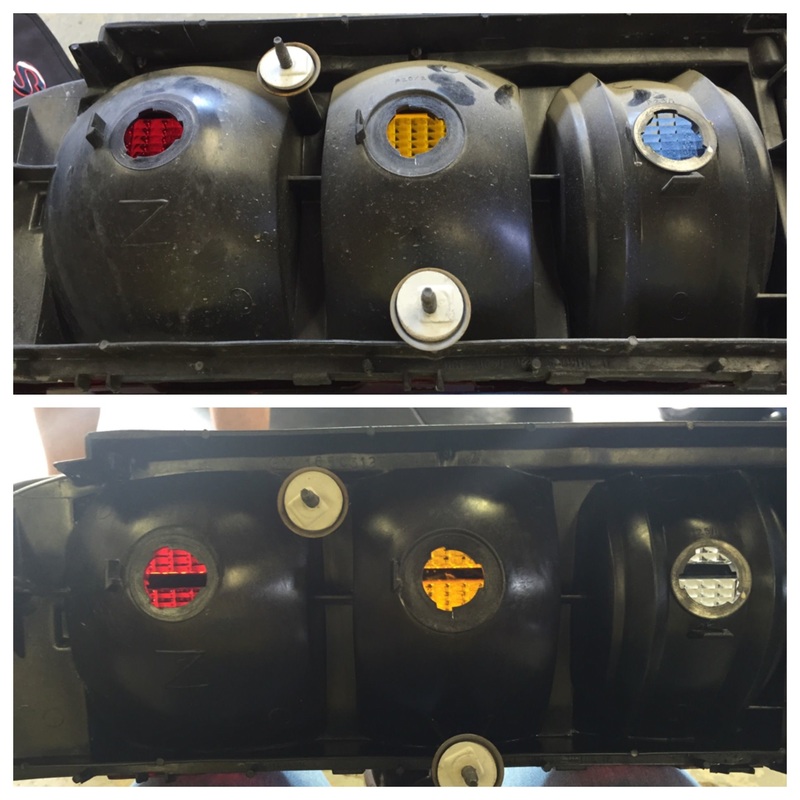
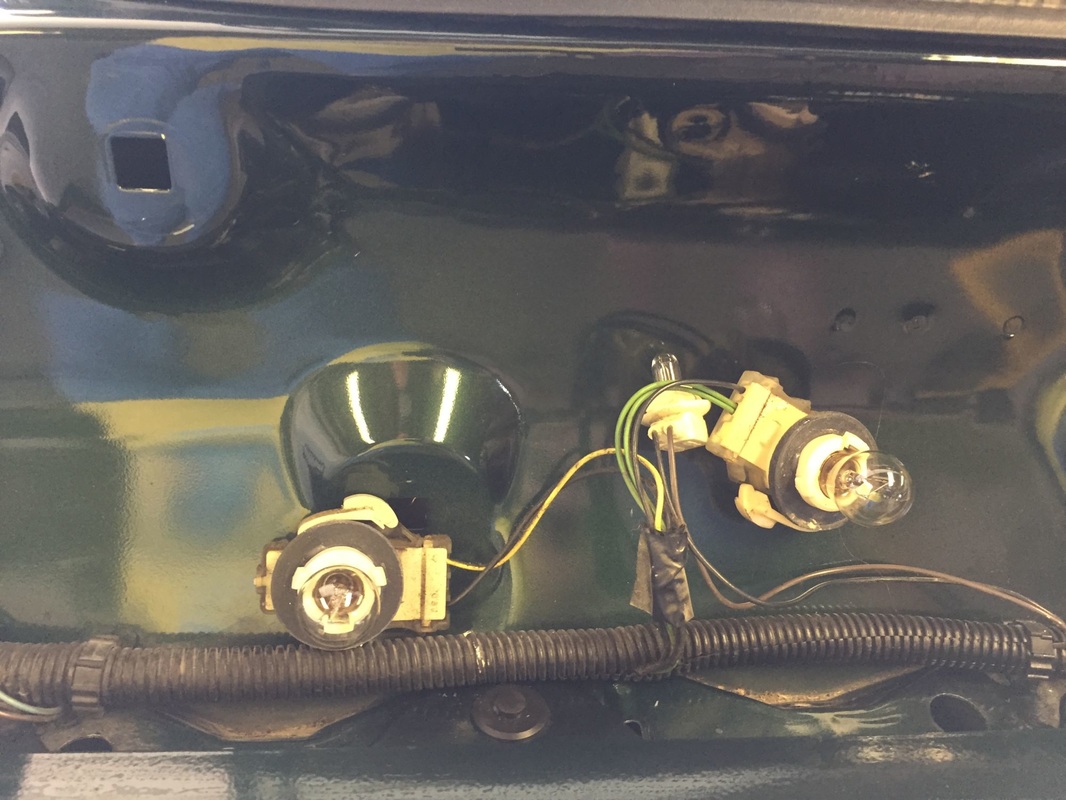
In the never ending quest to clean everywhere the tail lamps came out. I am pretty sure that although the previous owner loved his Camaro, he lived on a dirt/gravel road, the amount of filth is a little mind boggling.
|
|
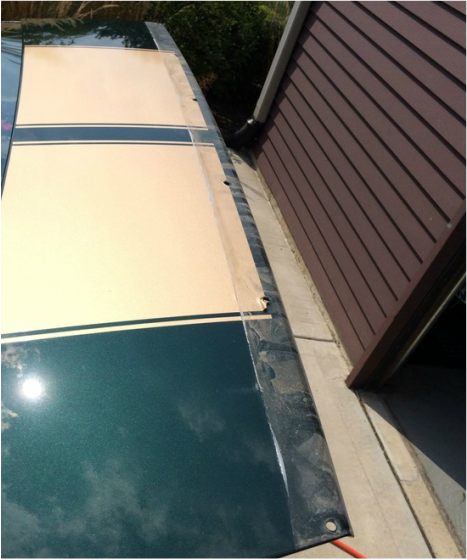
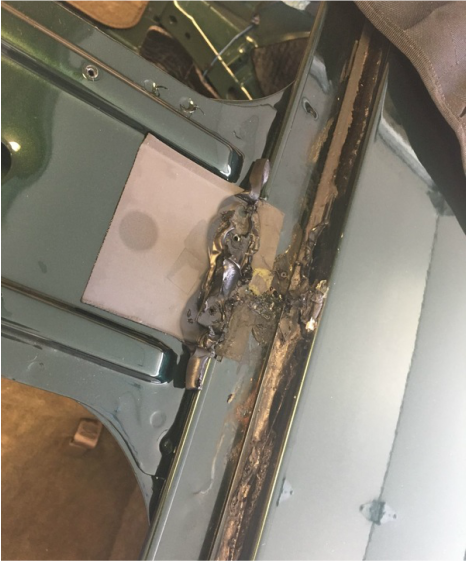
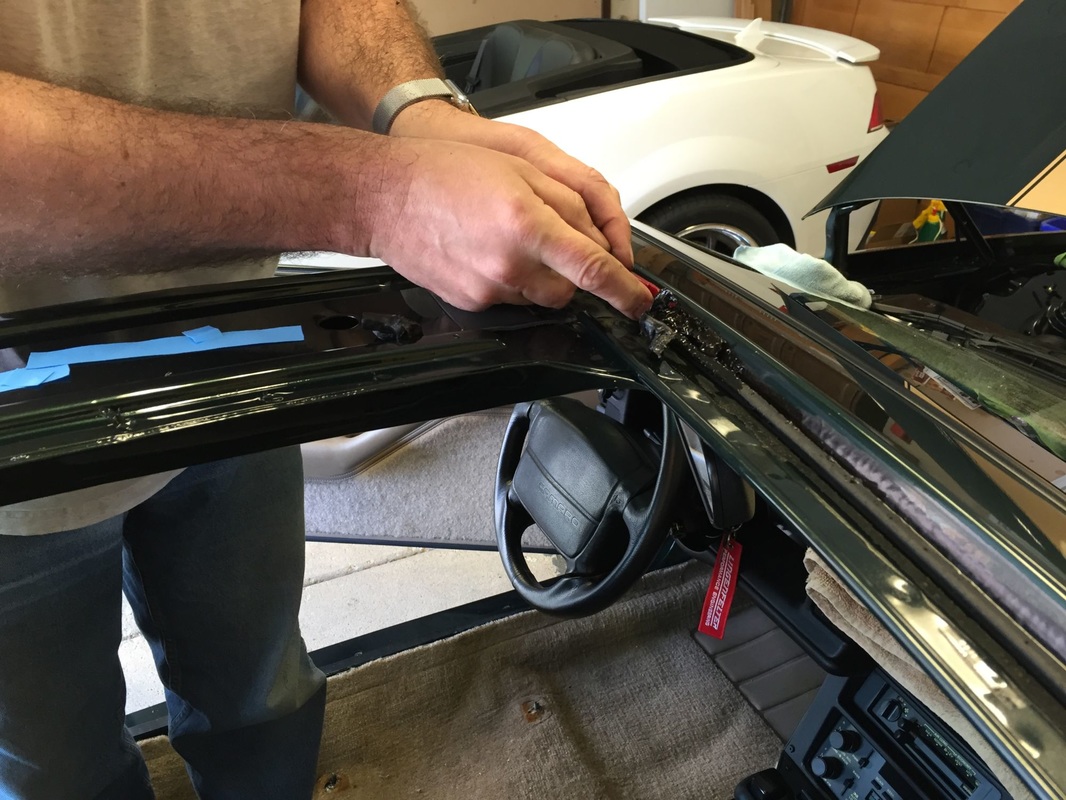
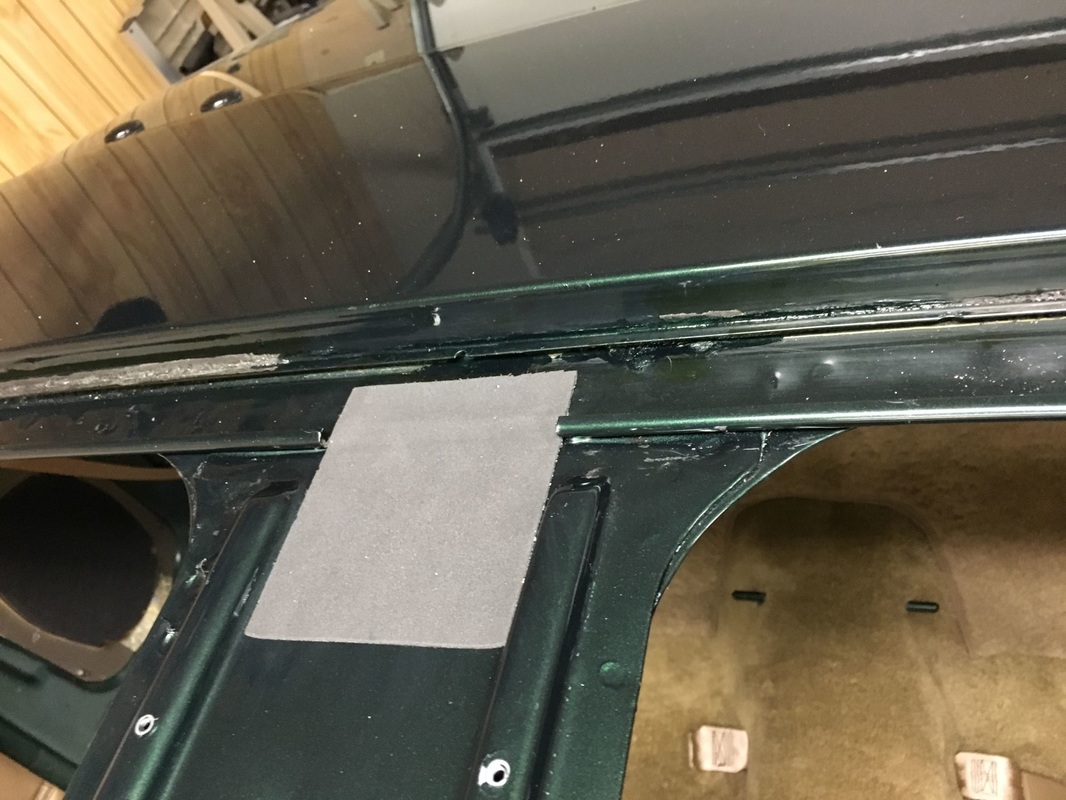
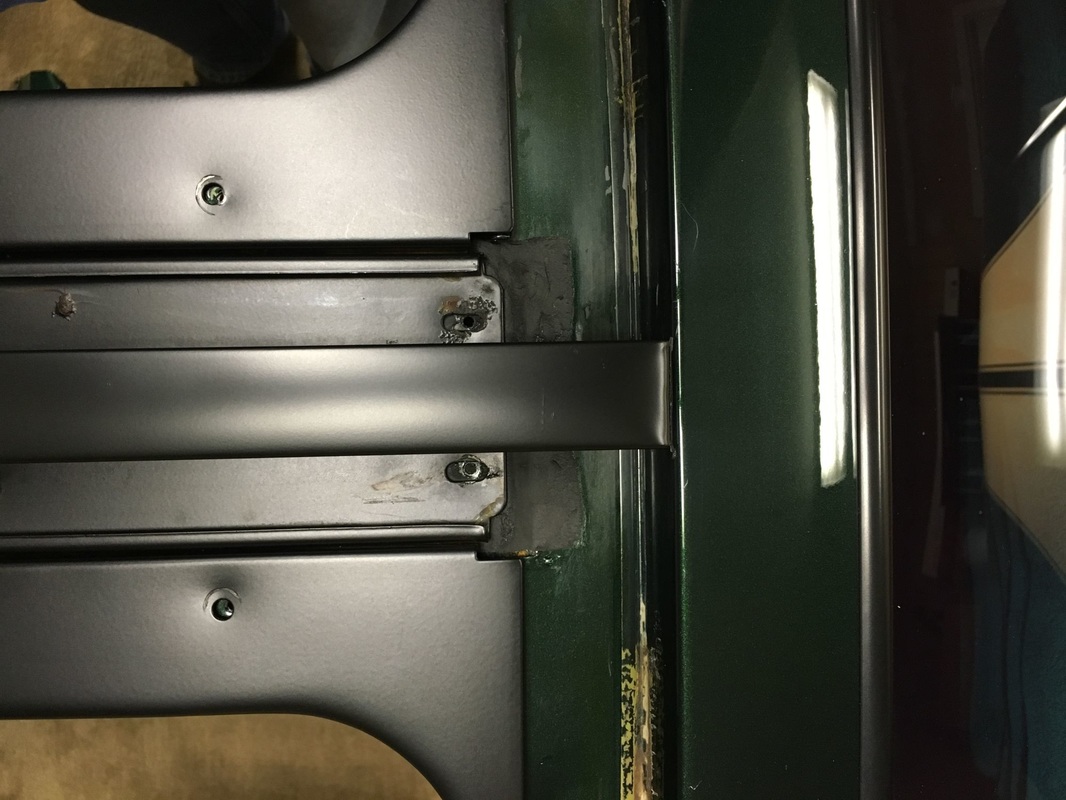
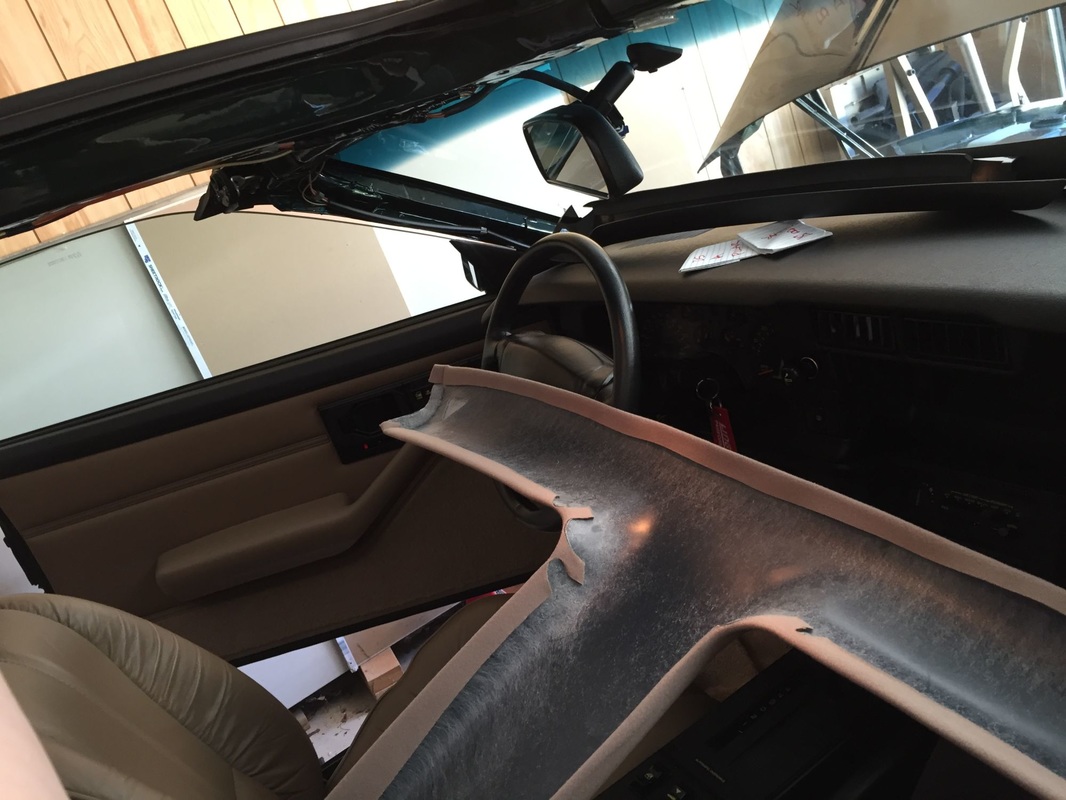
One of the worst projects to date was replacing the t-top weather stripping . . as somewhat typical, the tops leaked, and the previous repairs amounted to adding more adhesive, more sealant and just more mess . . and still leaked . . plus, the existing stripping was damaged. So a replacement was necessary.
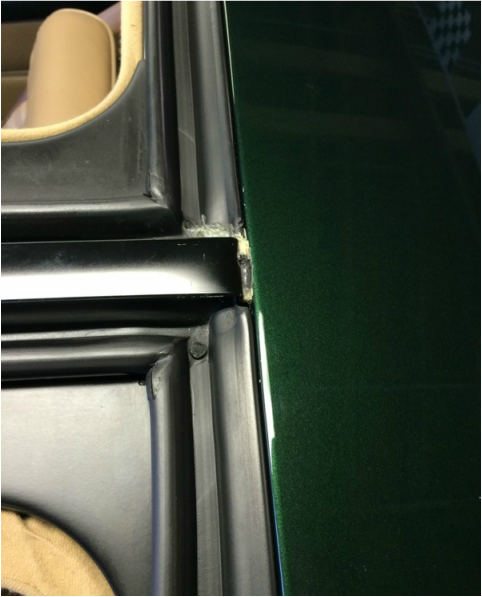
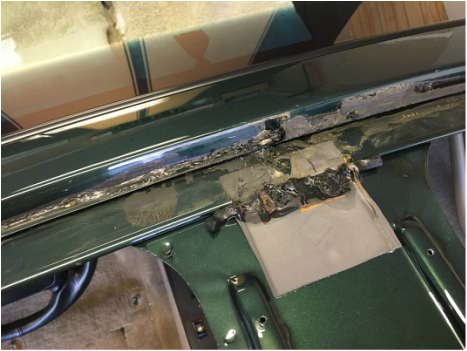
But before undertaking this task, took due diligence to determine who's product was best, and in the end it came down to using genuine GM parts. I don't have many before pics, but here's one where I actually have cleaned up some of the mess, and you can also see the passenger side weather strip has been glued back together with clear silicone.
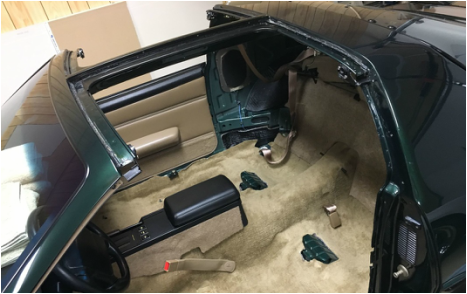
In the process of removing the weather stripping I removed most of the interior, for many reasons, deep cleaning, protection and to have the headliner re-done.
But before undertaking this task, took due diligence to determine who's product was best, and in the end it came down to using genuine GM parts. I don't have many before pics, but here's one where I actually have cleaned up some of the mess, and you can also see the passenger side weather strip has been glued back together with clear silicone.
In the process of removing the weather stripping I removed most of the interior, for many reasons, deep cleaning, protection and to have the headliner re-done.
|
|
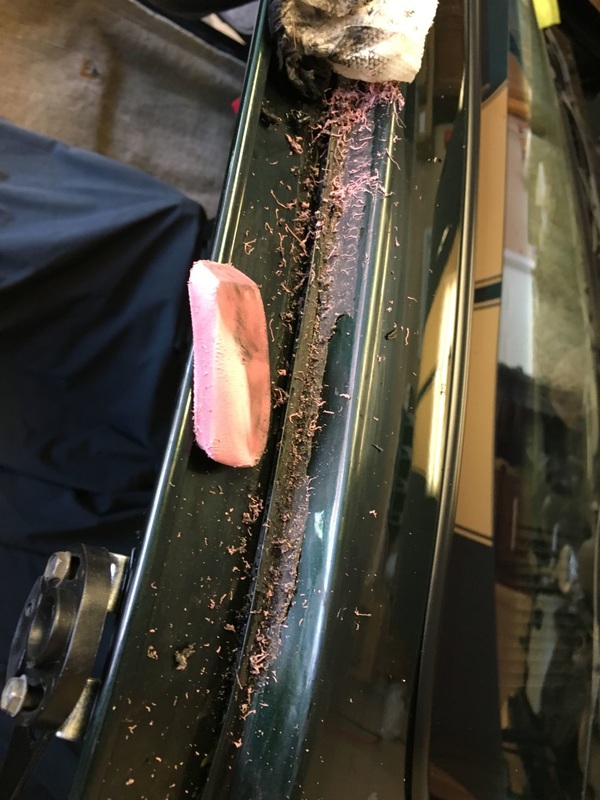
Never in a million years did I think I would have been able to get the center bar to release, but thankfully it came out unharmed and has been restored to near original beauty.
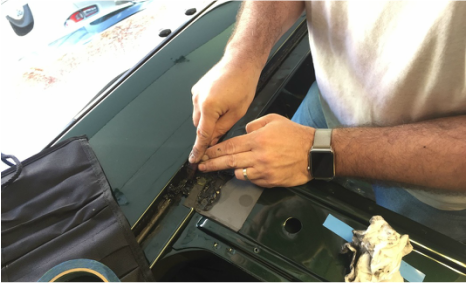
Using, Goo Gone, lighter fluid, plastic tools and cussing got most of the crap off . . . oddly enough a pink eraser worked wonders.
Using, Goo Gone, lighter fluid, plastic tools and cussing got most of the crap off . . . oddly enough a pink eraser worked wonders.
|
|
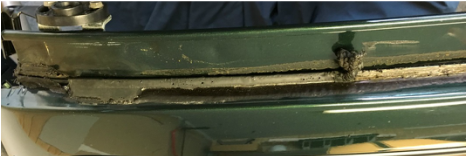
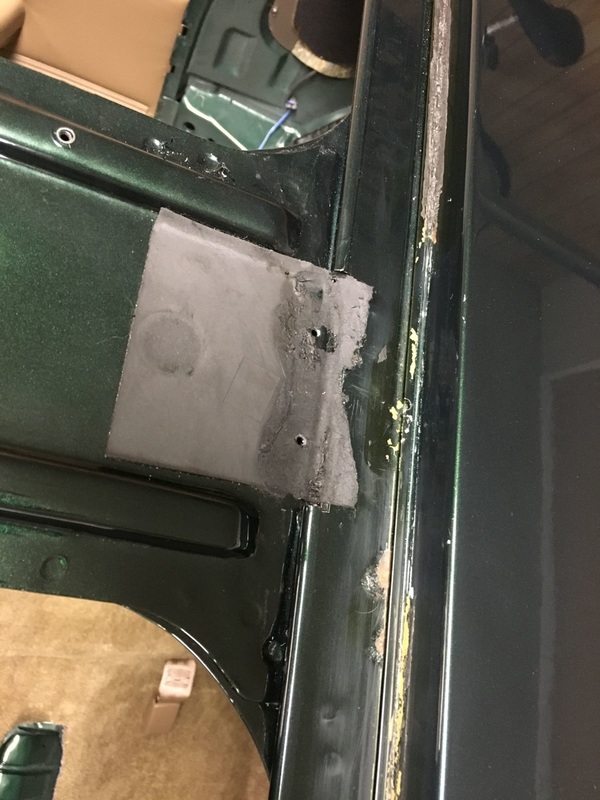
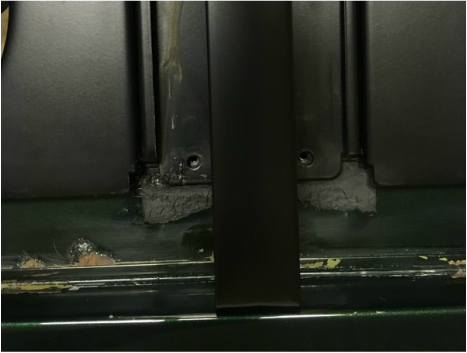
Thankfully this was the worst spot of rust I found, all of the missing paint was caused by previous repairs. I was able to find very similar foam from all places a washing machine parts depo to replace the ruined squares at the front and back of the center t-bar.
|

|
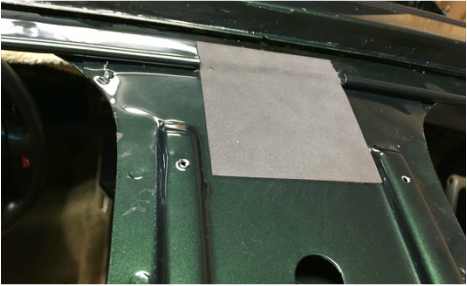
Here you can sort of see though the screw holes how misaligned the center t-bar was, I slotted the holes so that I could justify the center bar.
|
|
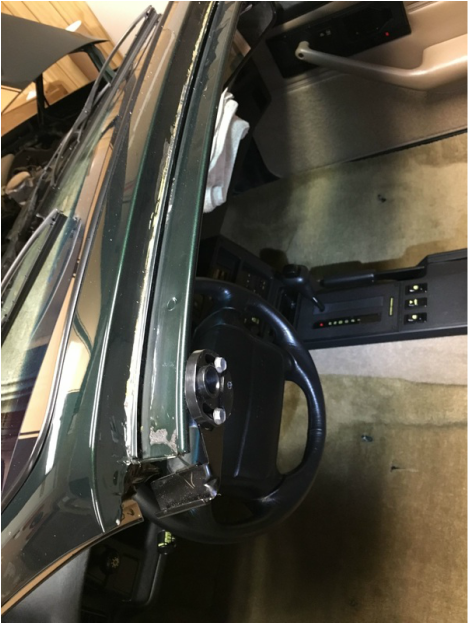
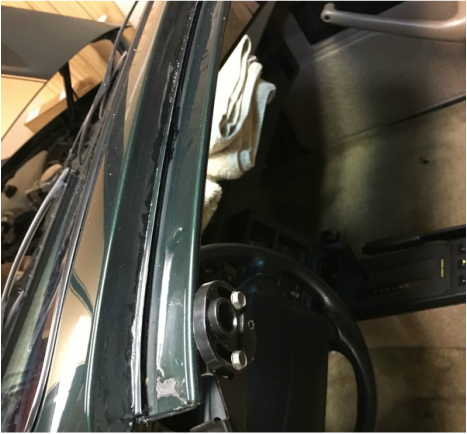
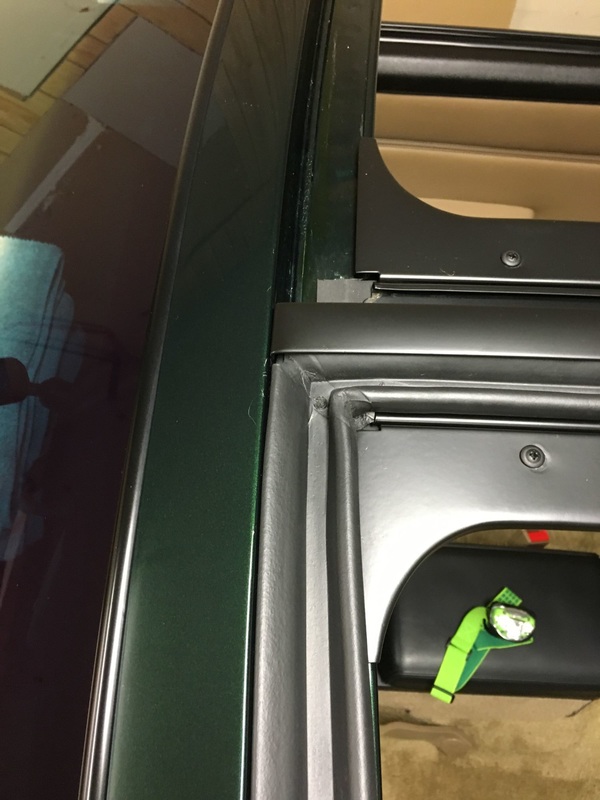
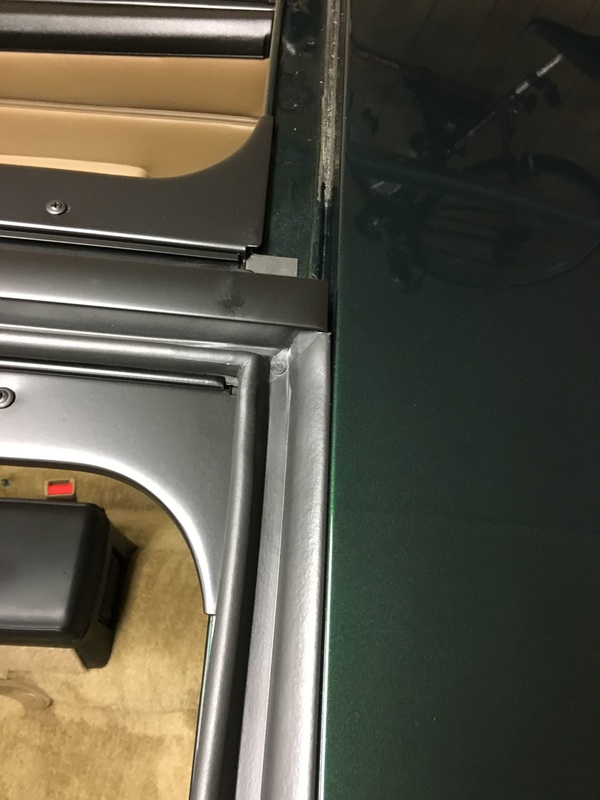
Although not pictured, all of the missing paint was touched up with color and clear coat, the rust re-mediated and touched up as well. Then came installing the weather strip, for the time being it is installed dry (w/o adhesive) but was it ever simple to set the two plastic clips in their respective receivers and then press into the slots, the hardest part is the a-pillar, especially at the bottom behind the side mirror.
|
|
I do have a couple of scratches to address on the windshield frame cause by a sloppy t-top replacement but I am loving the new weather strip, almost too nice to cover up!
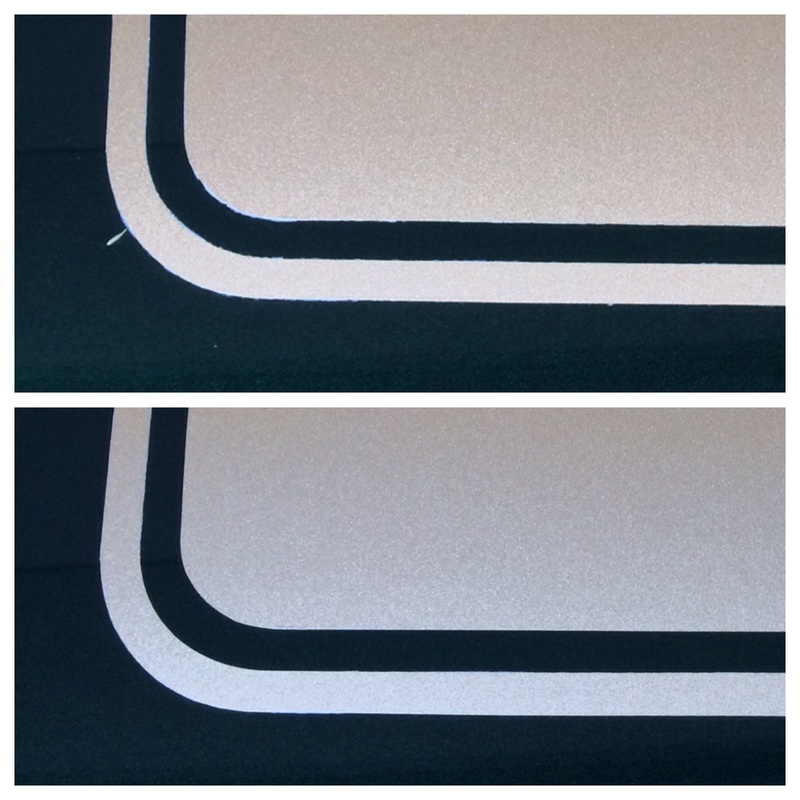
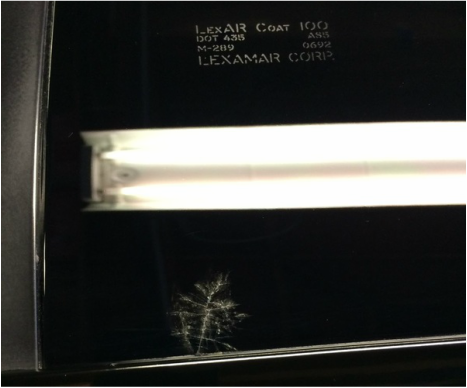
The pleasure of Lexan T-Tops! The original Lexan T-Tops are in nearly perfect condition, note nearly, the passenger side top has a very odd focused shatter mark. What caused that? No clue, it must have happened very early in the life of the car, since the owner included with the car (and the dealer did not re-purpose) a brand new in the box GM replacement T-Top. Great news, but , will a new in the box T-Top even remotely coordinate with a 24 year old top let alone the date codes? So this has stayed wrapped up for prosperity sake. We were able to source new old stock T-Tops so we built up a pair to use on the car and carefully stored away the original ones. So we now have a finished roof! Finally got the NOS Lexan T-Tops detailed and assembled. I did paint the edge trim over the side windows to match the center bar with SEM Trim Black . . all of the new seals have been given a gentle coat of NAPA Sil-Glyde. The tops fit great with the new weather stripping, albeit a bear to get seated due to how fluffy the new seals are. Some adjustments to make here and there, but really happy with the end result.
|

|
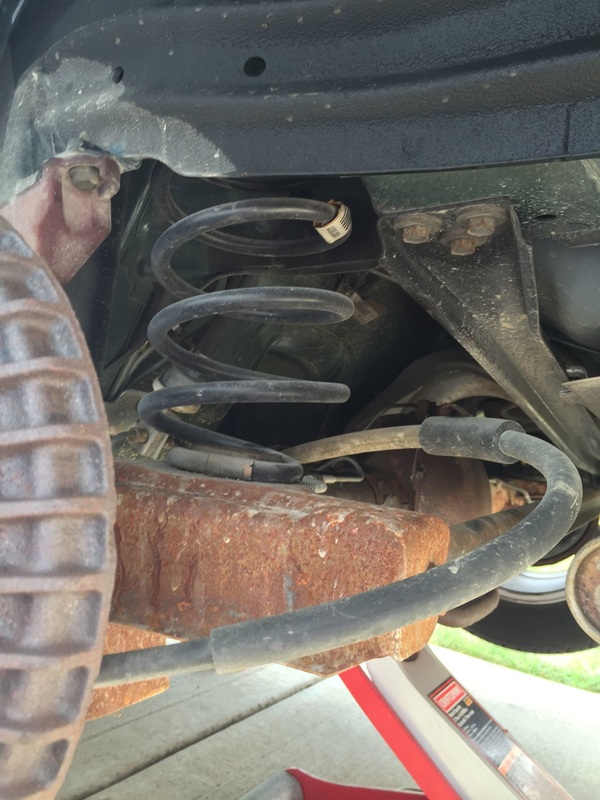
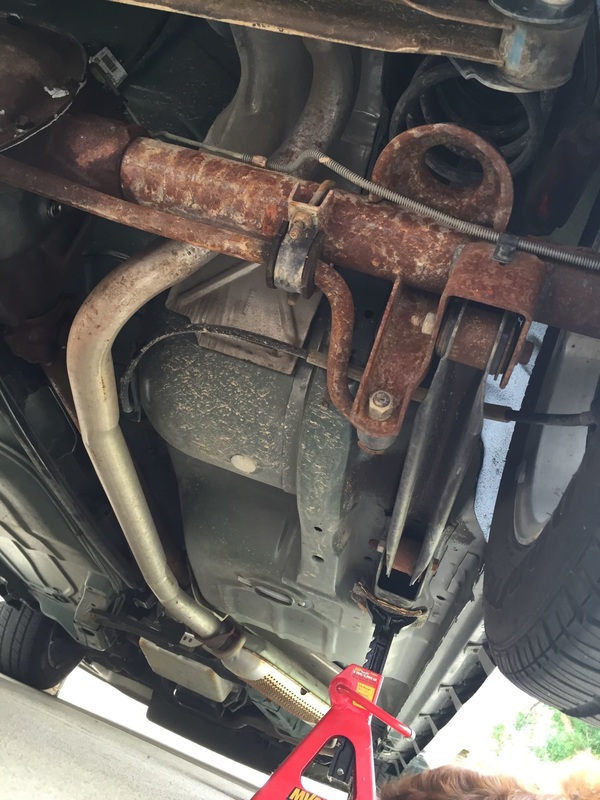
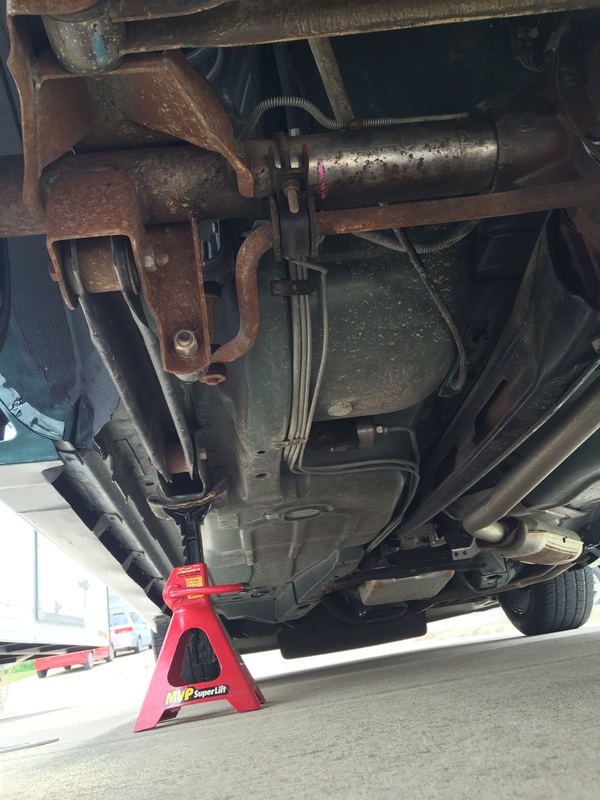
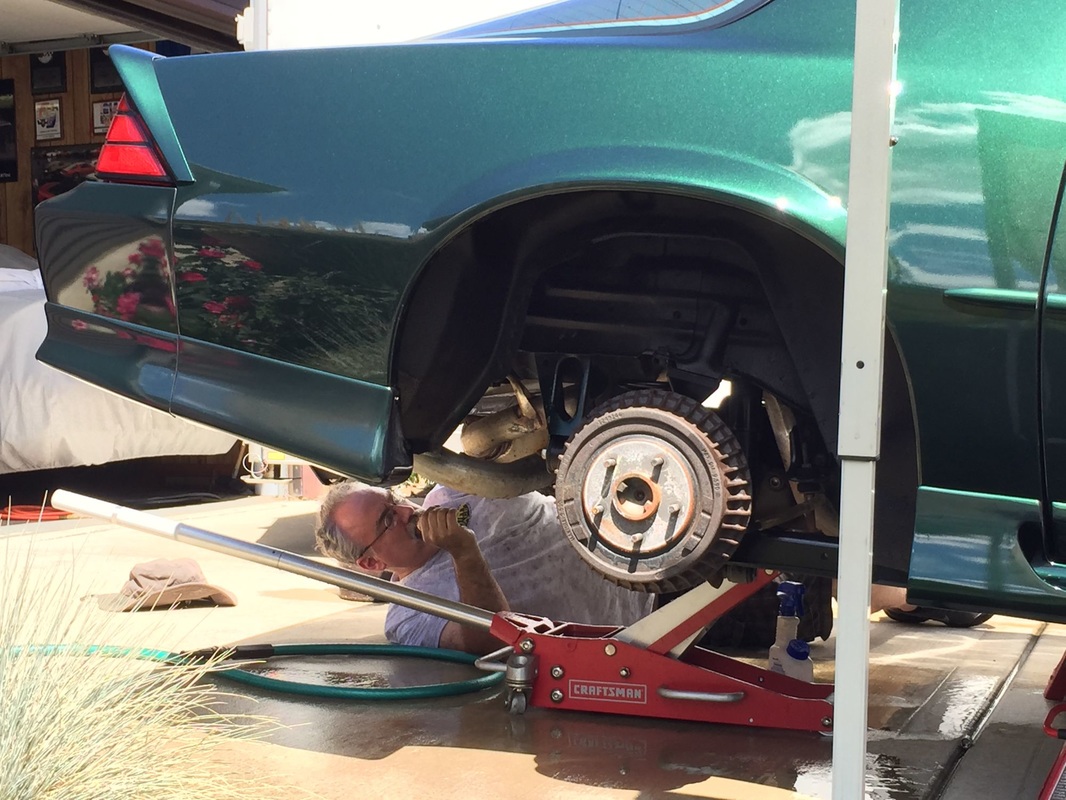
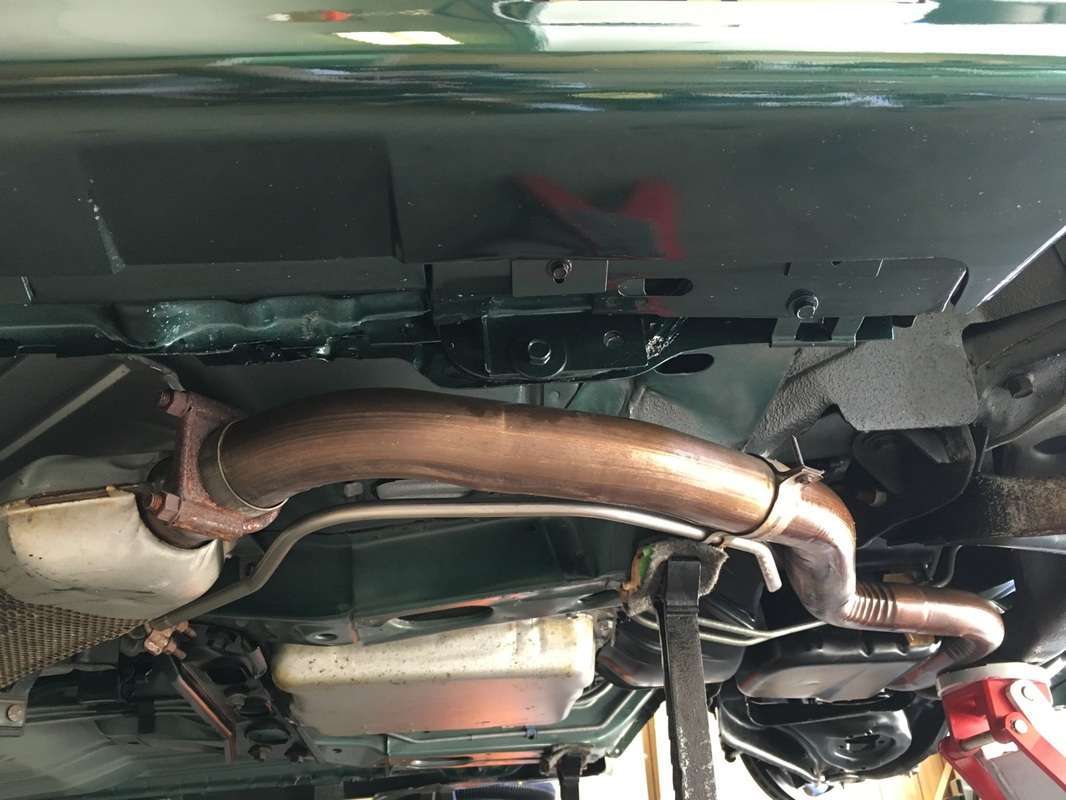
Under carriage clean up. As I said before I do believe that the previous owner lived on a gravel road, since the underside is rather dirty. Would LOVE to find a NOS set of GM bumpstops with the funny orange/red color like you see here . . sadly these are all dried out and crumbling. I've found the cream white ones and black take offs, but not these. Also its pretty neat to still find the original tags and markings on the springs and axle assembly.
|
|
|
|
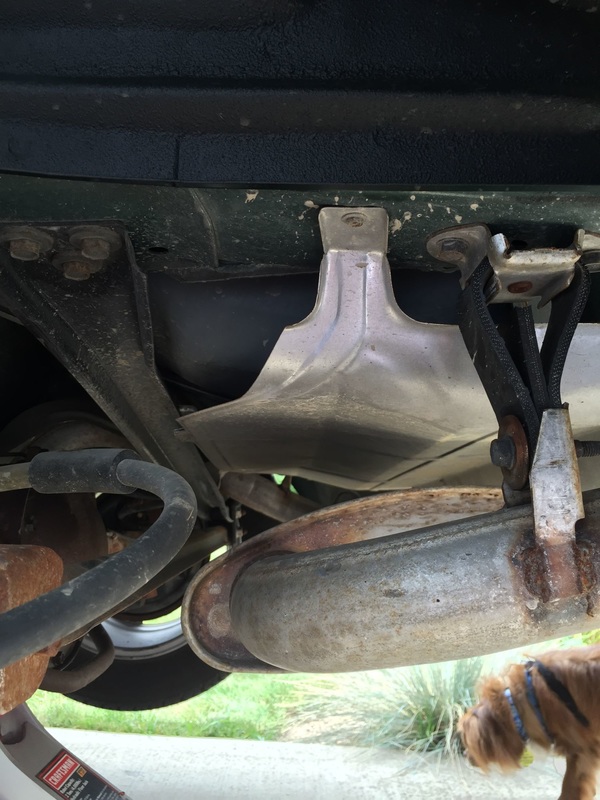
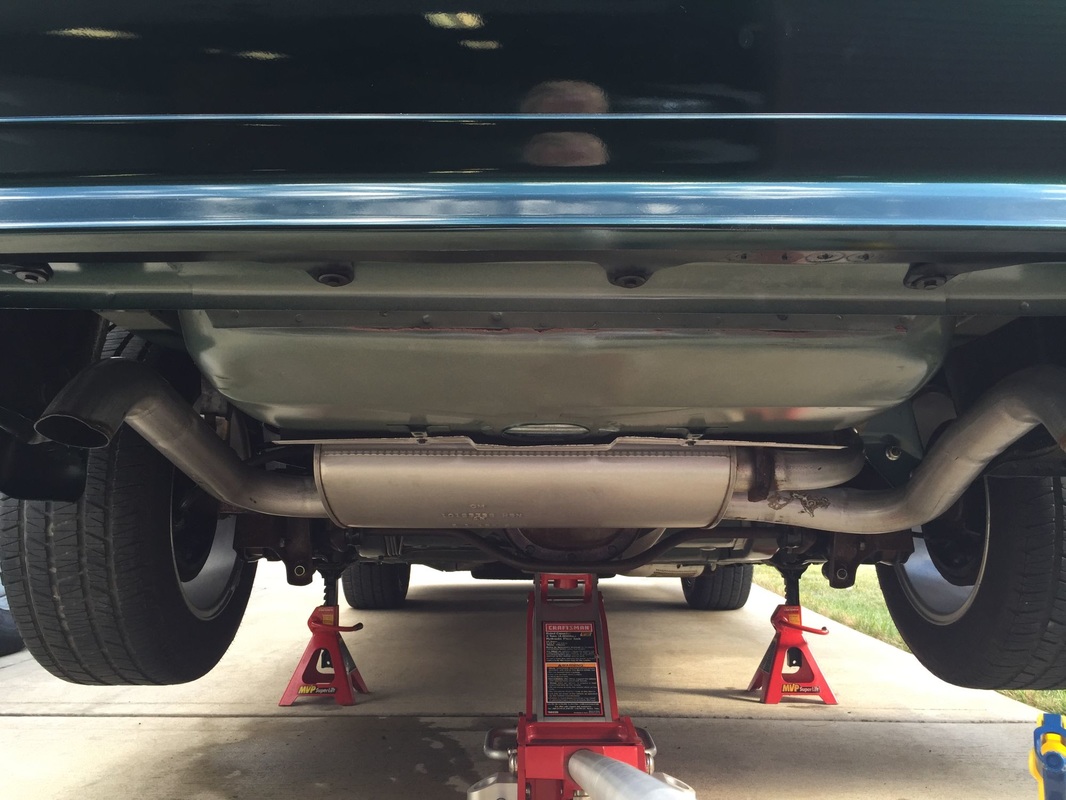
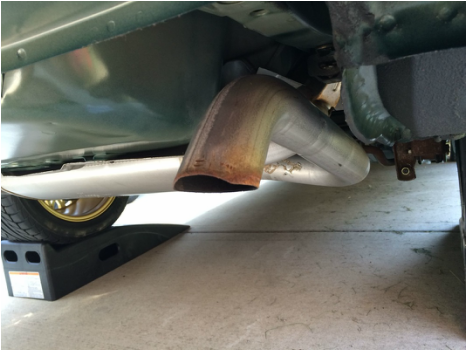
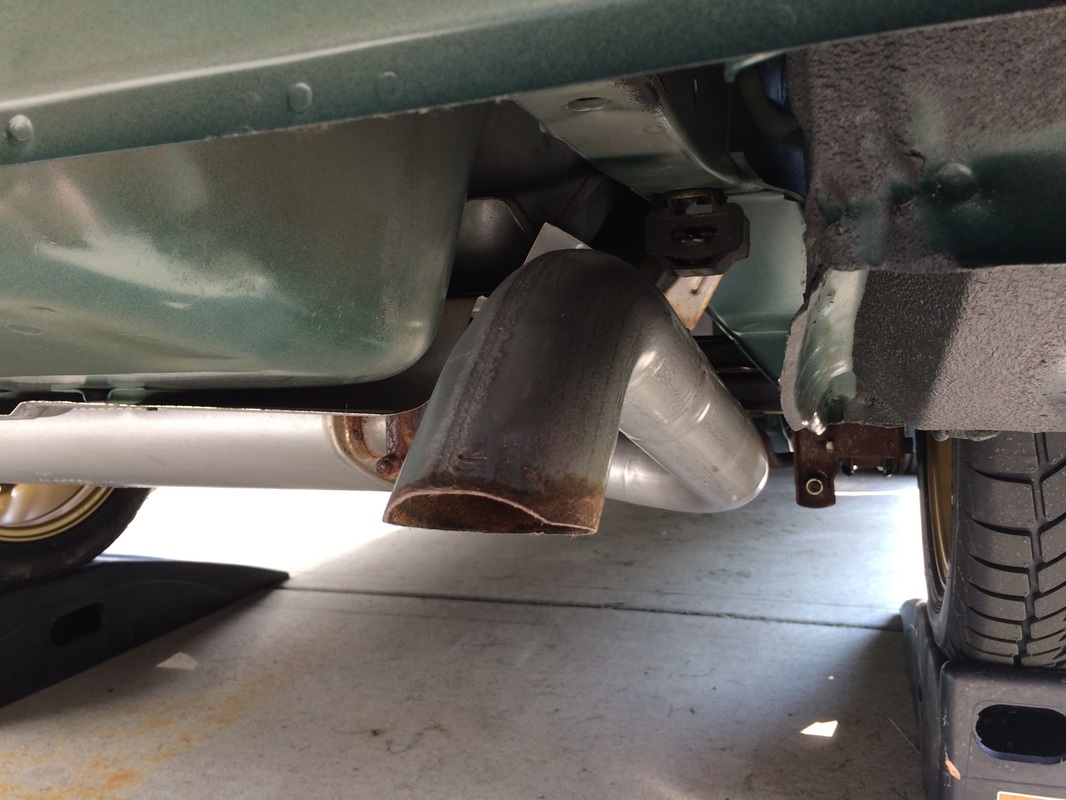
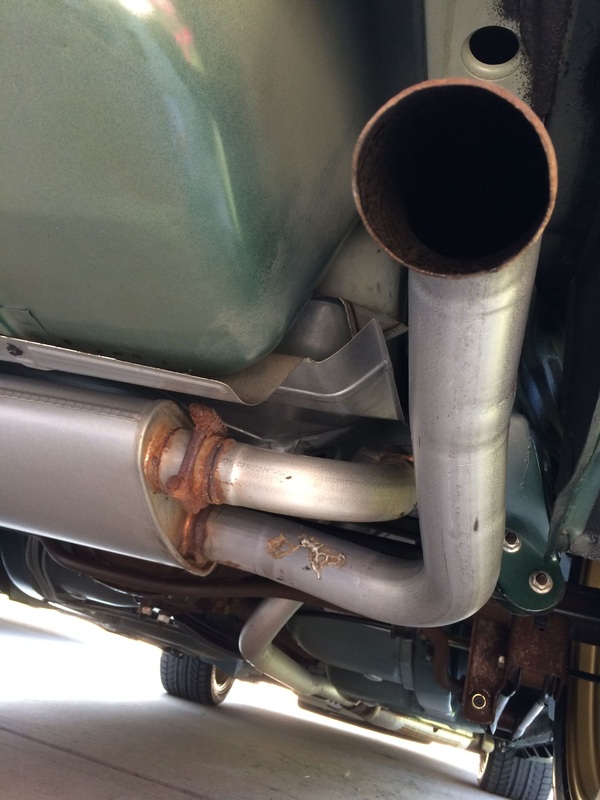
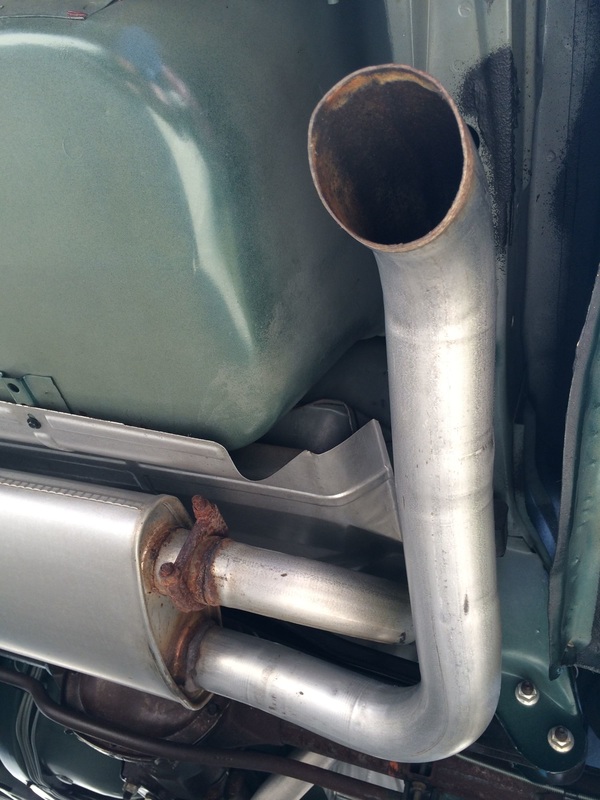
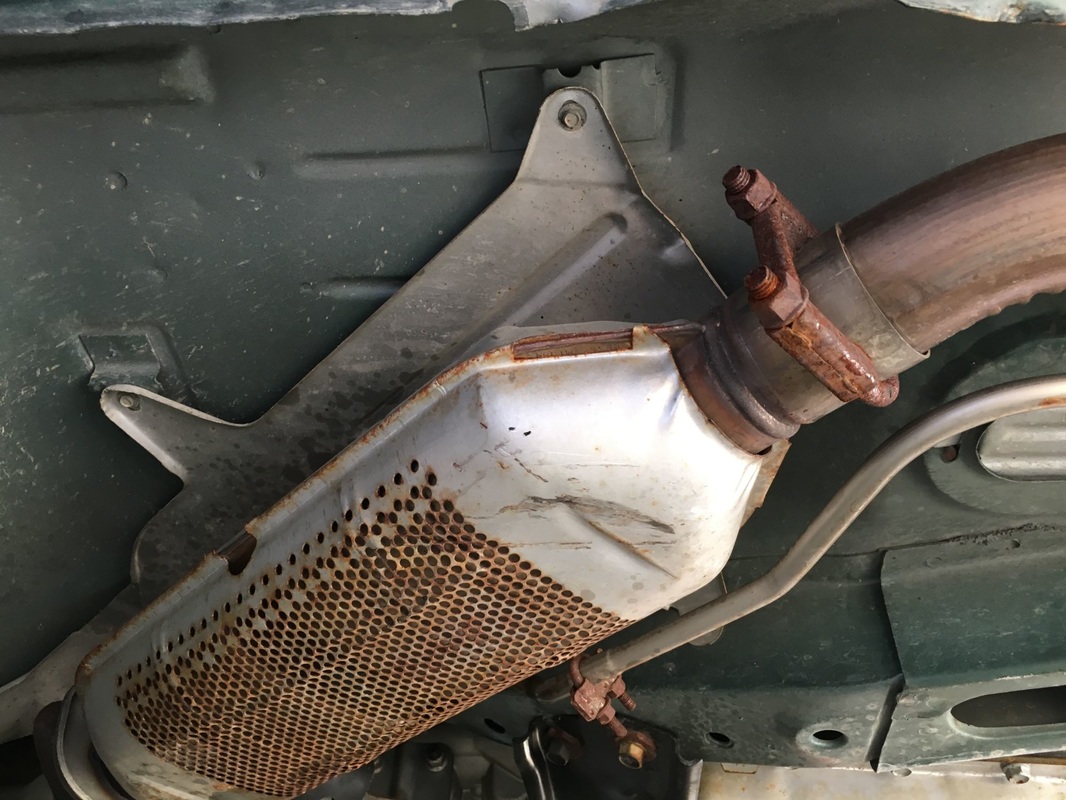
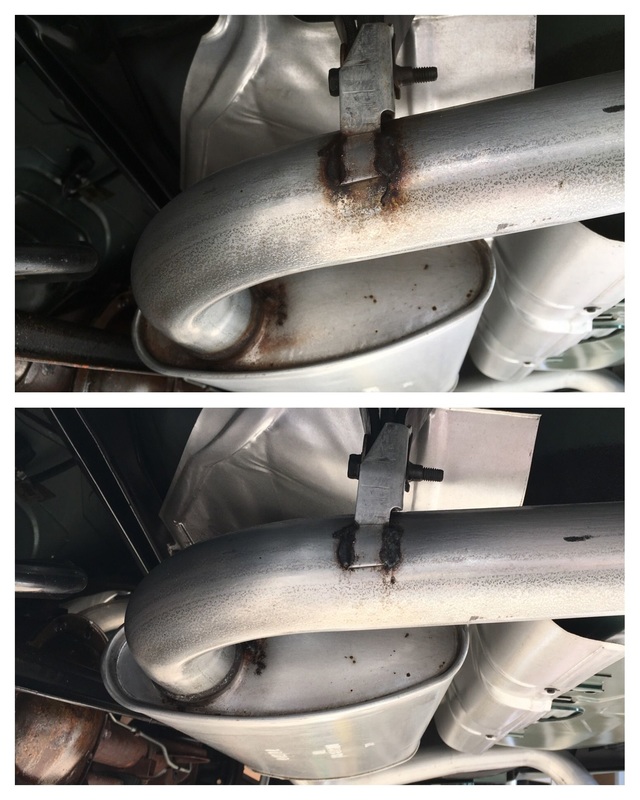
First layers of filth washed off . . coming out pretty good! Original muffler cleaned up really nice.
|
|
|
|
A weird "glob" was melted on the PS tail pipe. Thankfully it eventually came off with a bunch of persuasion.
|
|
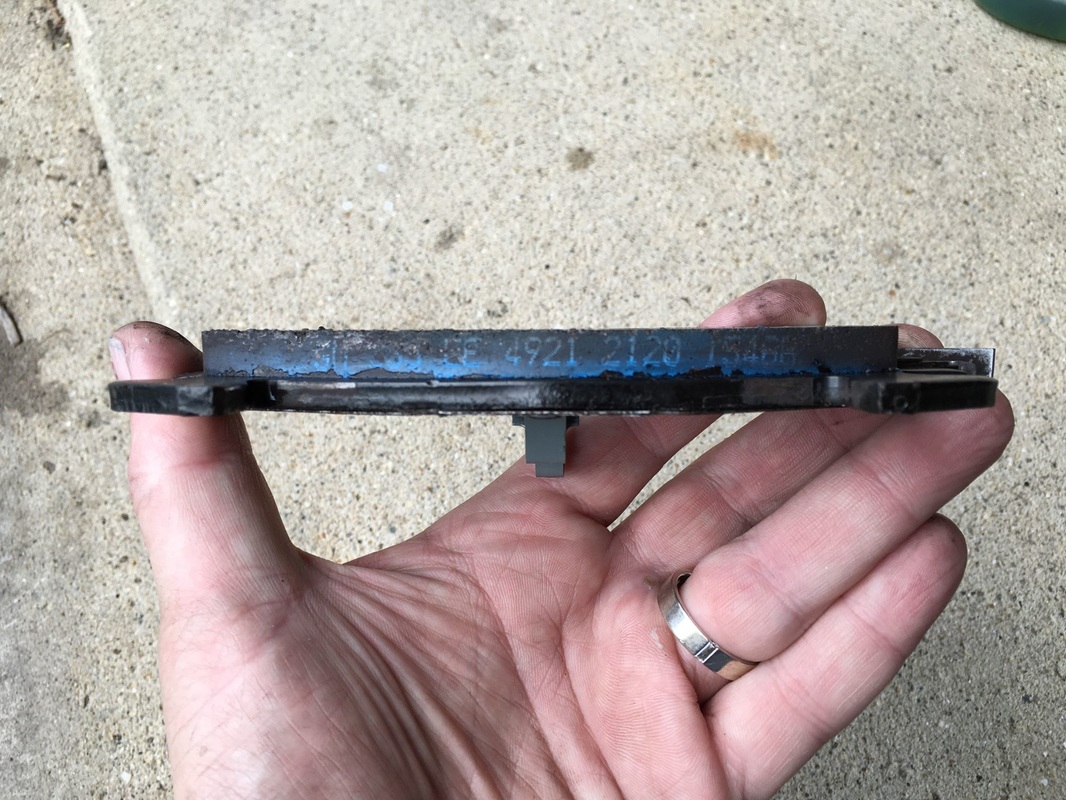
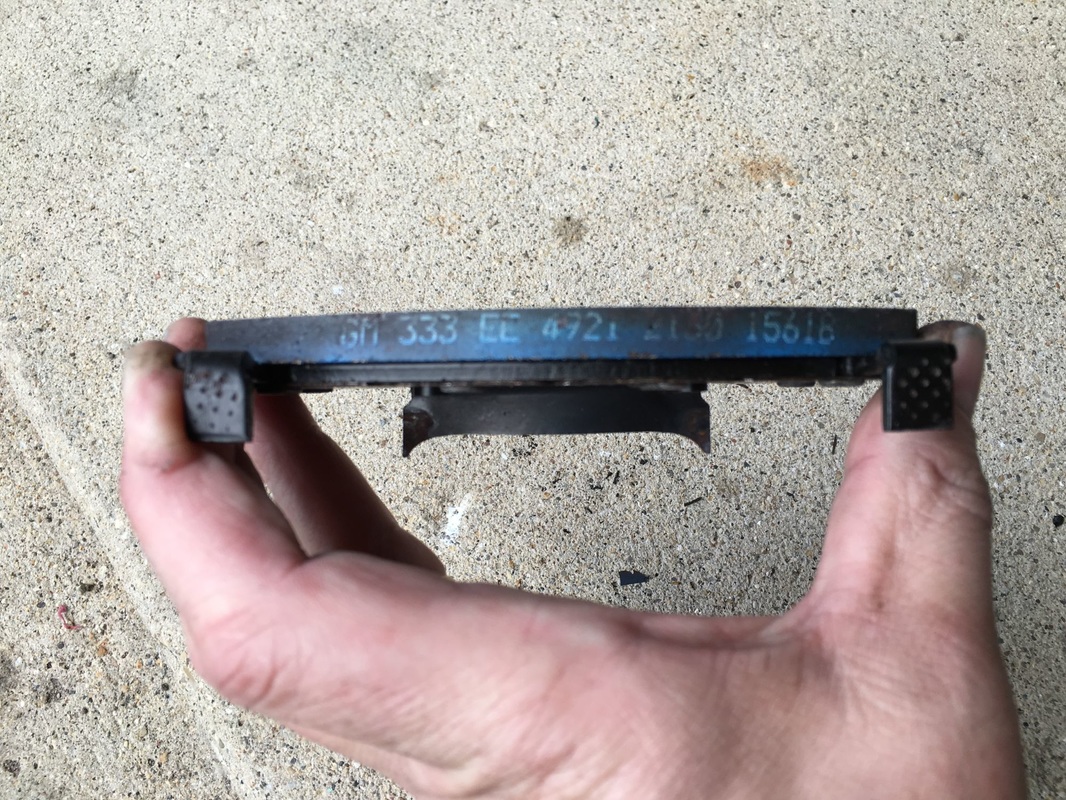
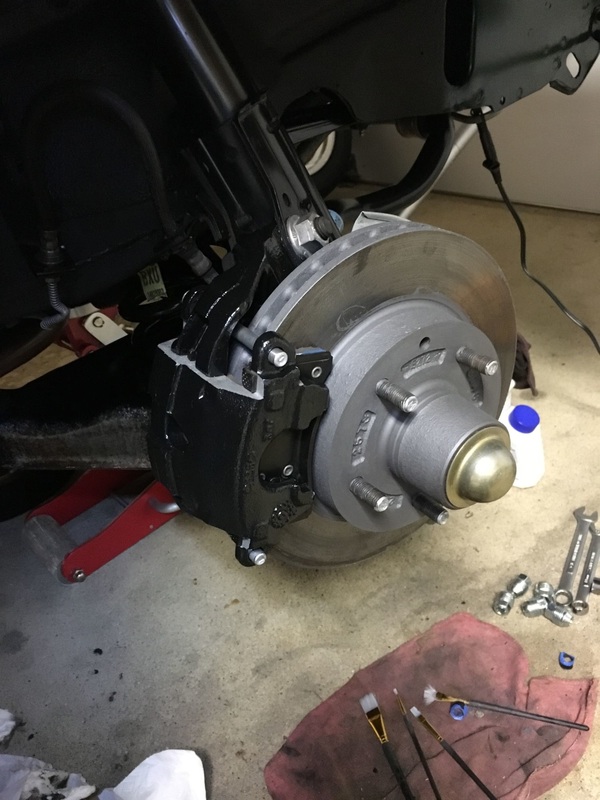
Was neat to pull the brakes apart this weekend and find what I assume are OEM pads . . . funky with the dusting of blue paint across the back of the pad before the metal backing plate was installed, and all the GM lettering is legible after I cleaned off the brake dust build up.
|
|
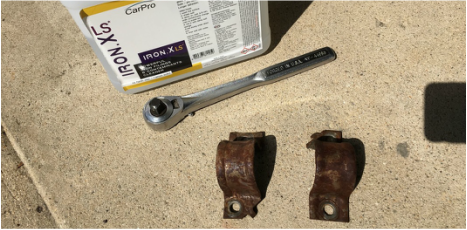
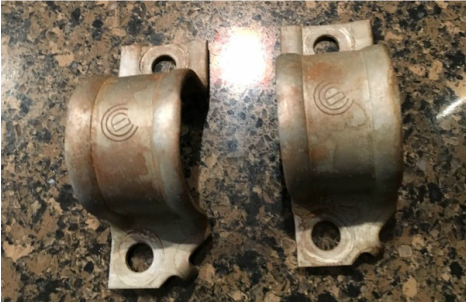
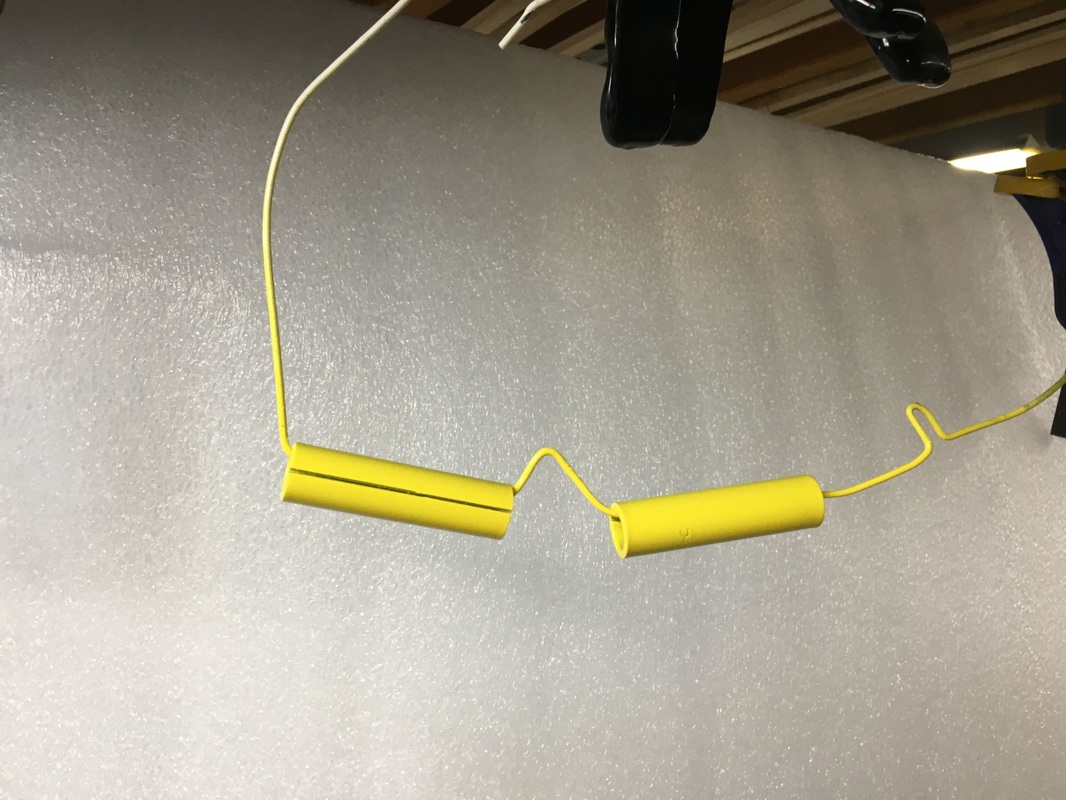
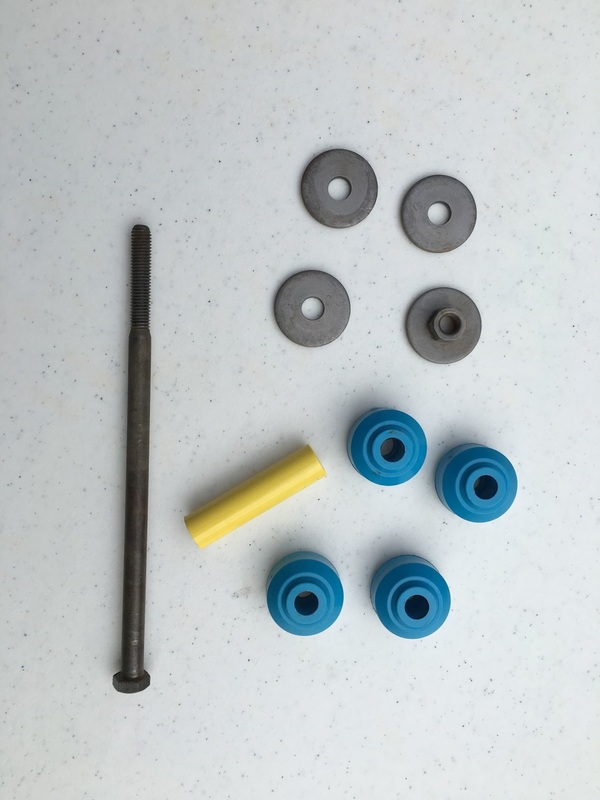
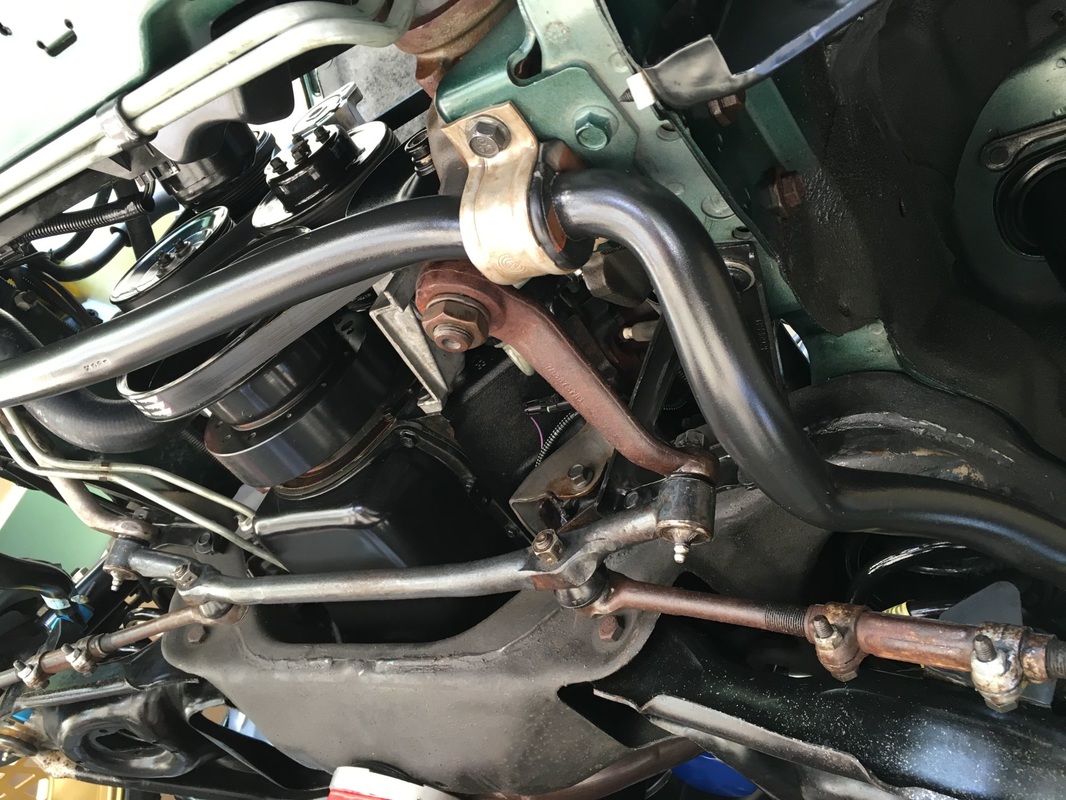
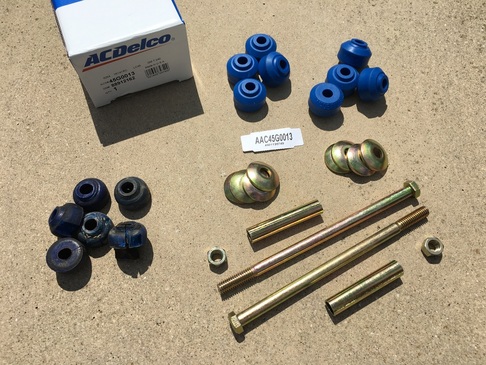
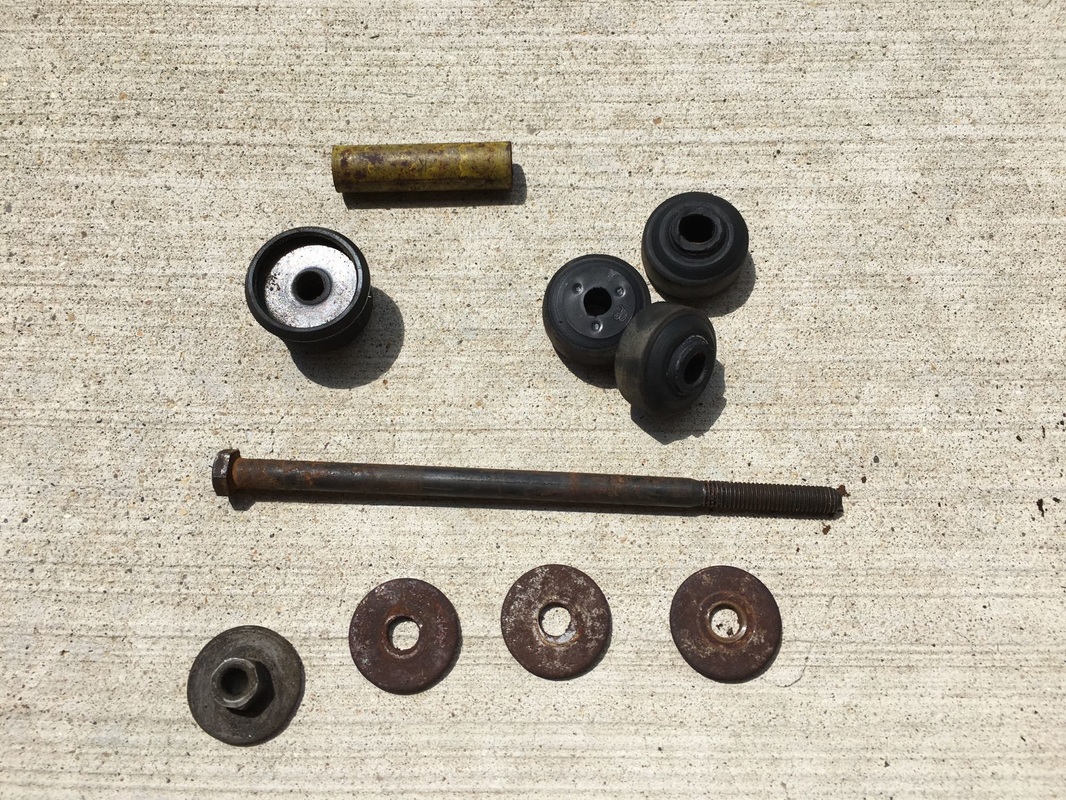
Wound up taking the front sway bar off, since the end link bushings were badly cracked, and a couple were missing. Oddly in my impatience did not take any photos, interesting that the front bushes are blue poly, the metal washers were plain steel but the tube was yellow. The sway bar bushings were also badly distorted but was lucky to secure a replacement pair on eBay. The body mounts were bare steel, so gave them a soak in Iron-X. Completed the sway bar bushing clean up and replacement. The Iron X did a fantastic job soaking over night and removed every spec of rust from the brackets, they looked AMAZING coming out of the fluid but, as soon as air and or water (required to rinse) touched them they flash rusted.
|
|
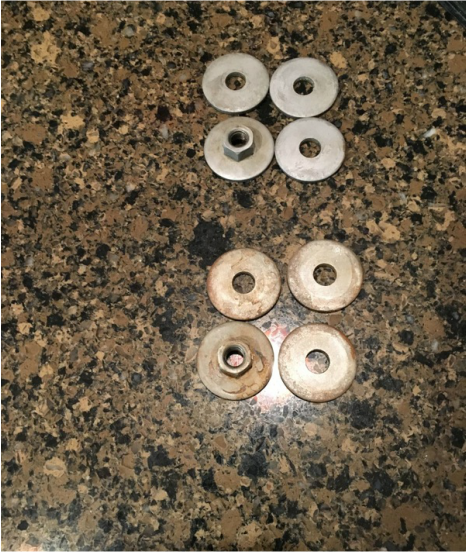
I cleaned the end link washers, bolts and sleeve at the same time. In the above picture the four cleaner washers have been rubbed down with a Mr. Clean Magic Eraser. I then gave everything a quick coat of clear. The sleeves were yellow from the factory, so those got a fresh coat of paint.
|
|
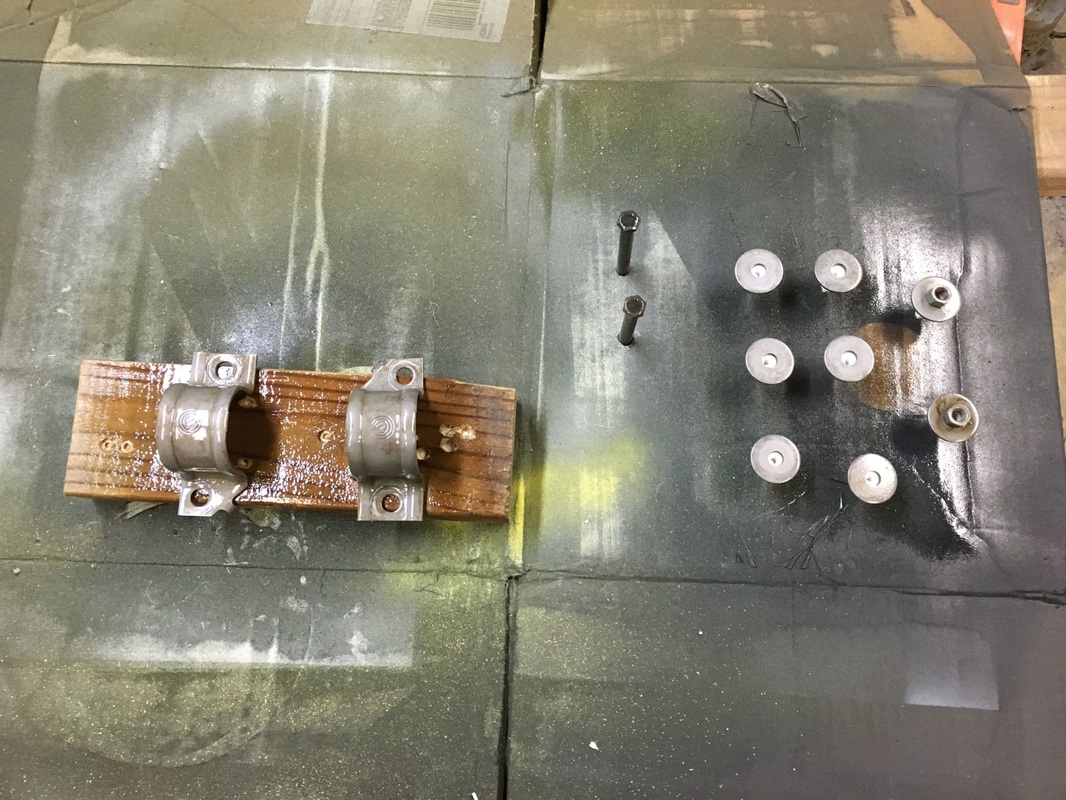
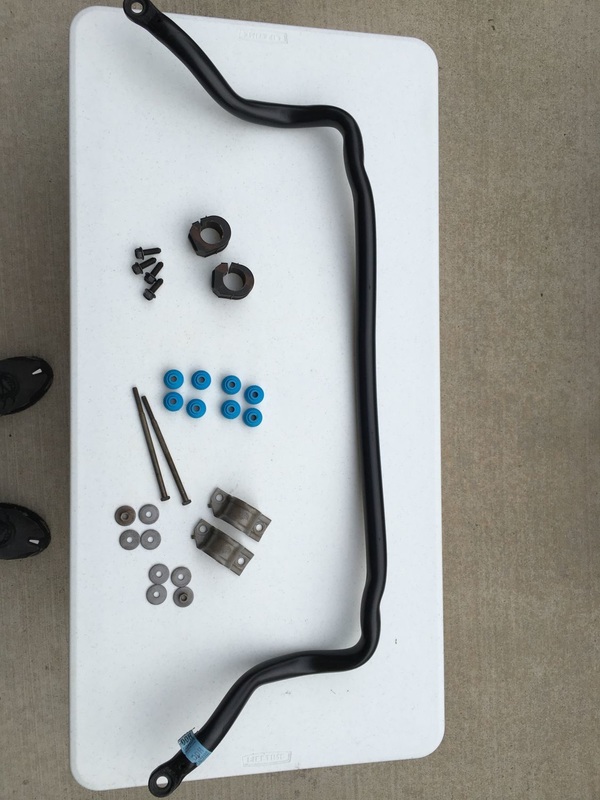
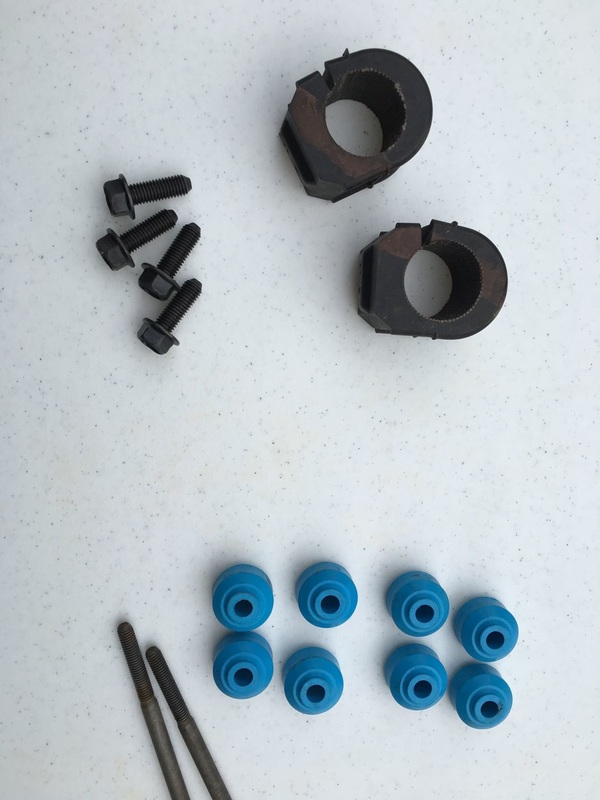
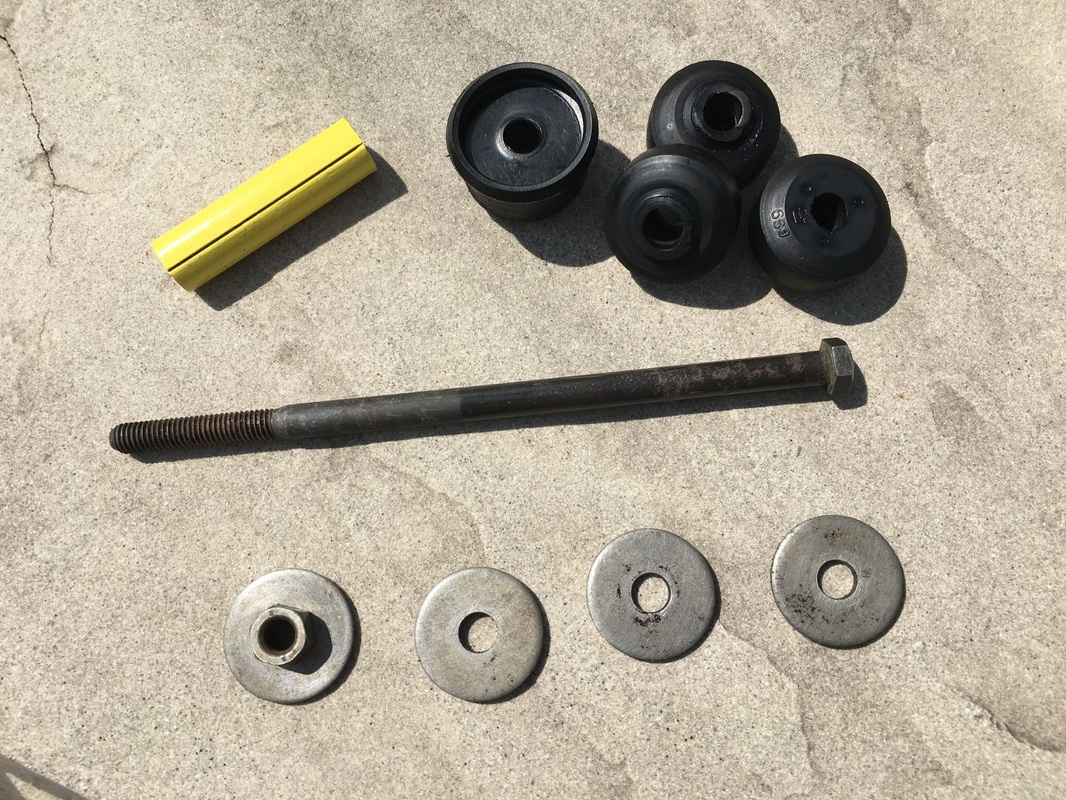
The factory F41 bushings were blue poly, the best match I've acquired so far are from Mevotech. Here are all of the finished parts before install
|
|
|
|
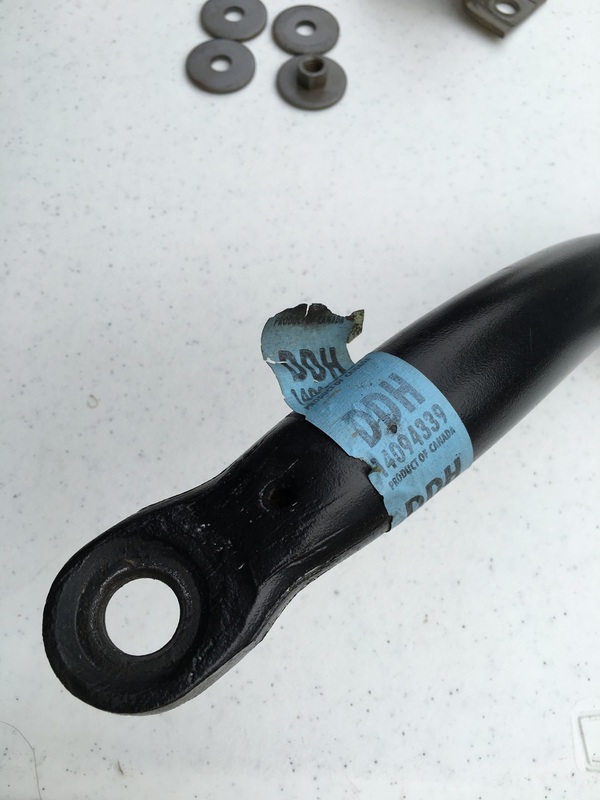
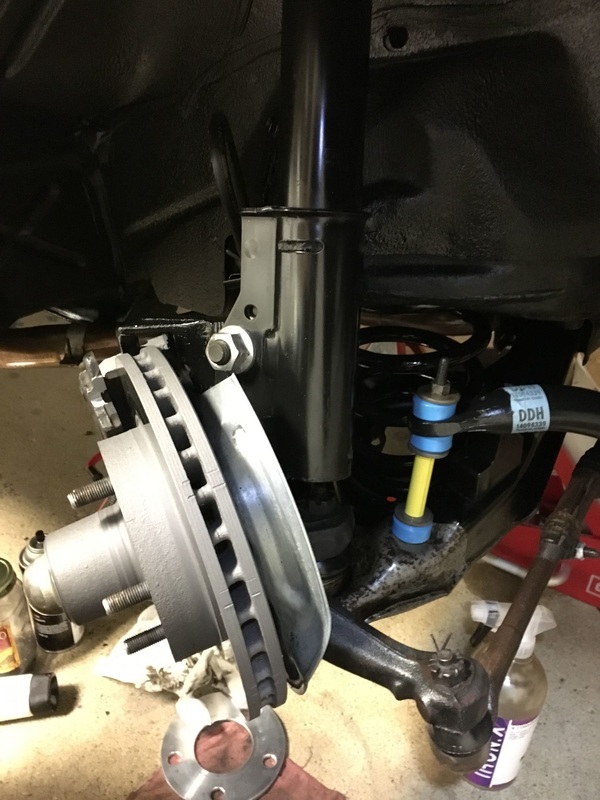
Factory decal remains on the sway bar. And the end result, pretty happy with the finished look but am still on the hunt for better colored end link bushings.
|
|
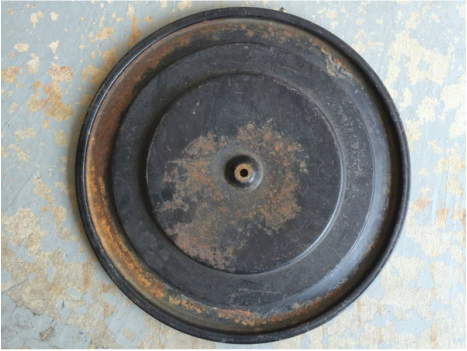
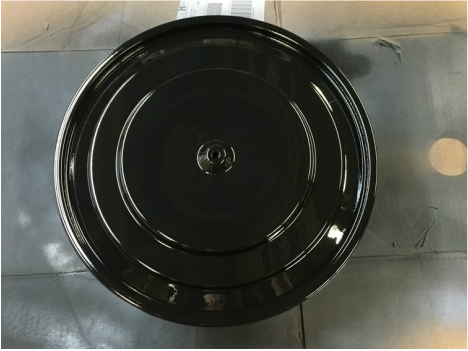
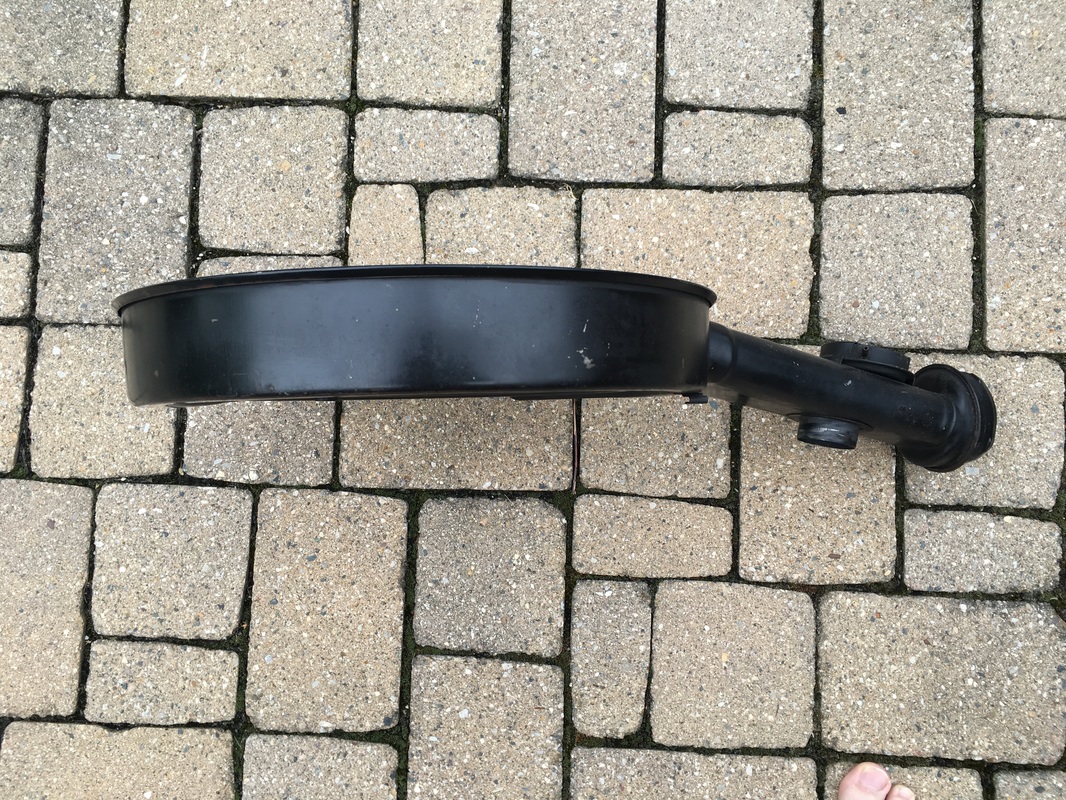
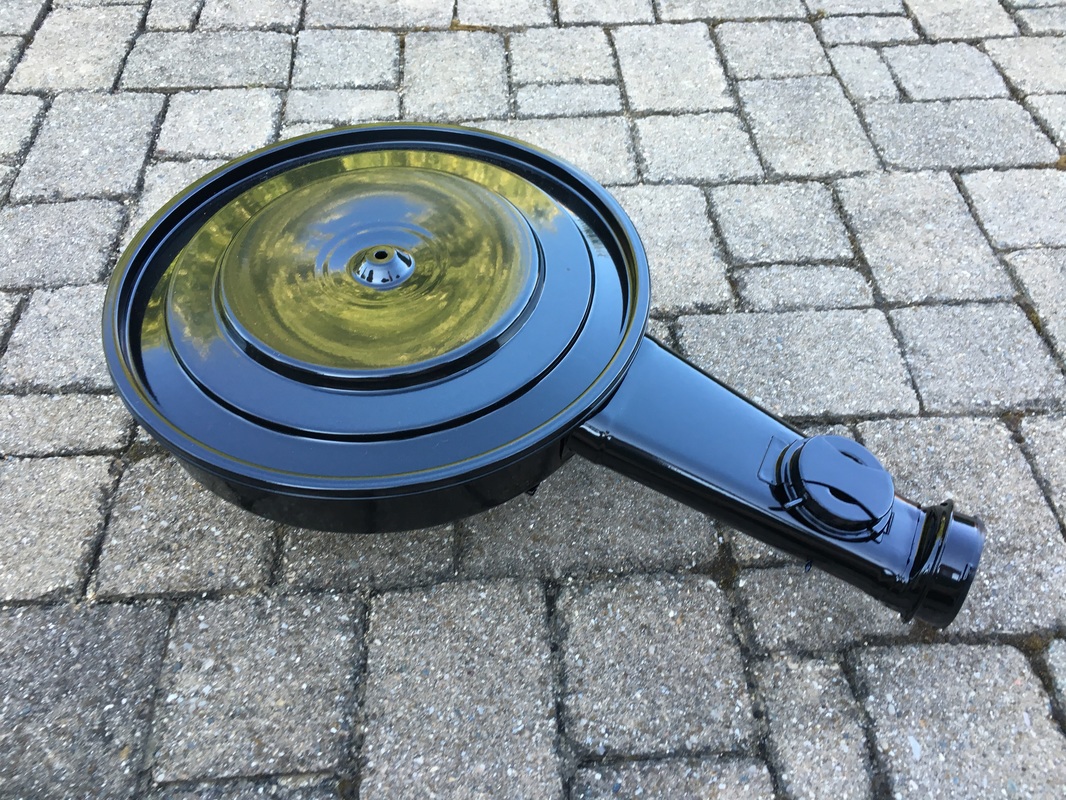
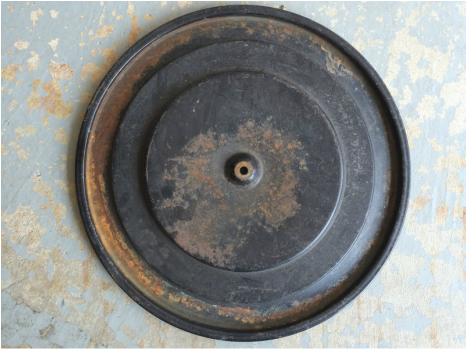
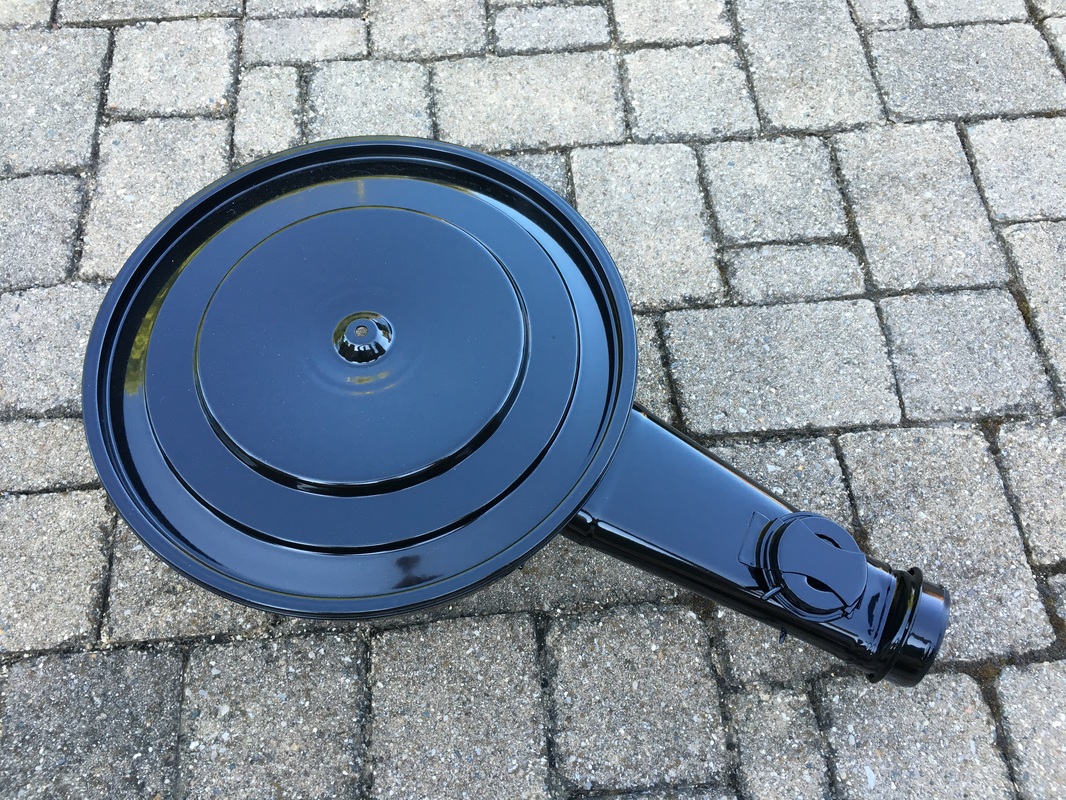
Our factory air cleaner is in super nice shape, not a spec of rust on it but there are a couple of careless mechanic nics and scratches on it, not enough damage to attempt fixing but did send me on a journey to see if I could restore an old air box. This is what I started with and the end result! Time to move onto the body section of it.
|
|
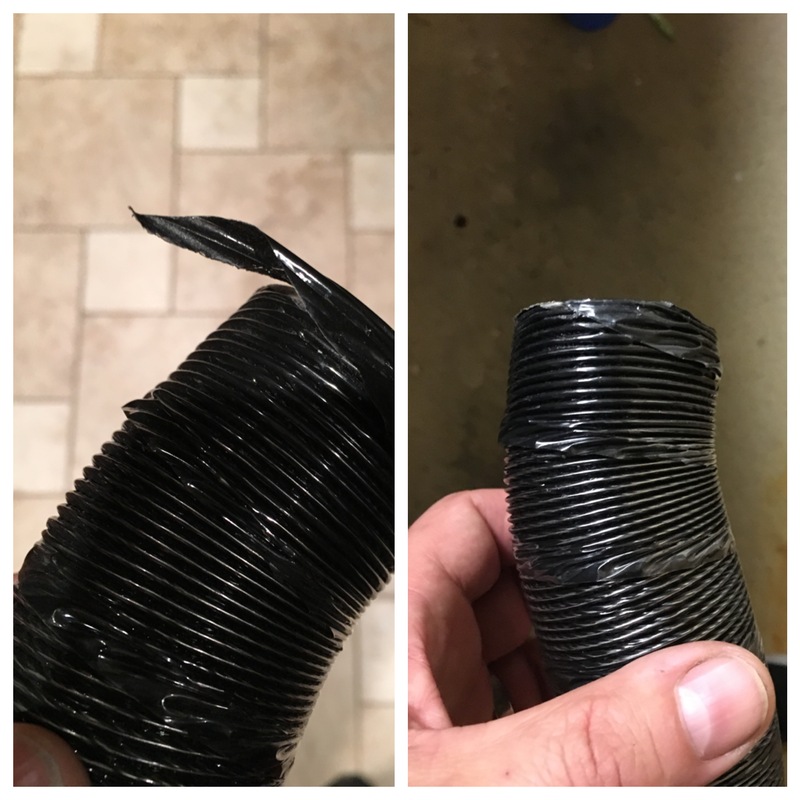
A baby repair done, the plastic film on the heat riser tube was de-laminating. A little RTV and good as new!
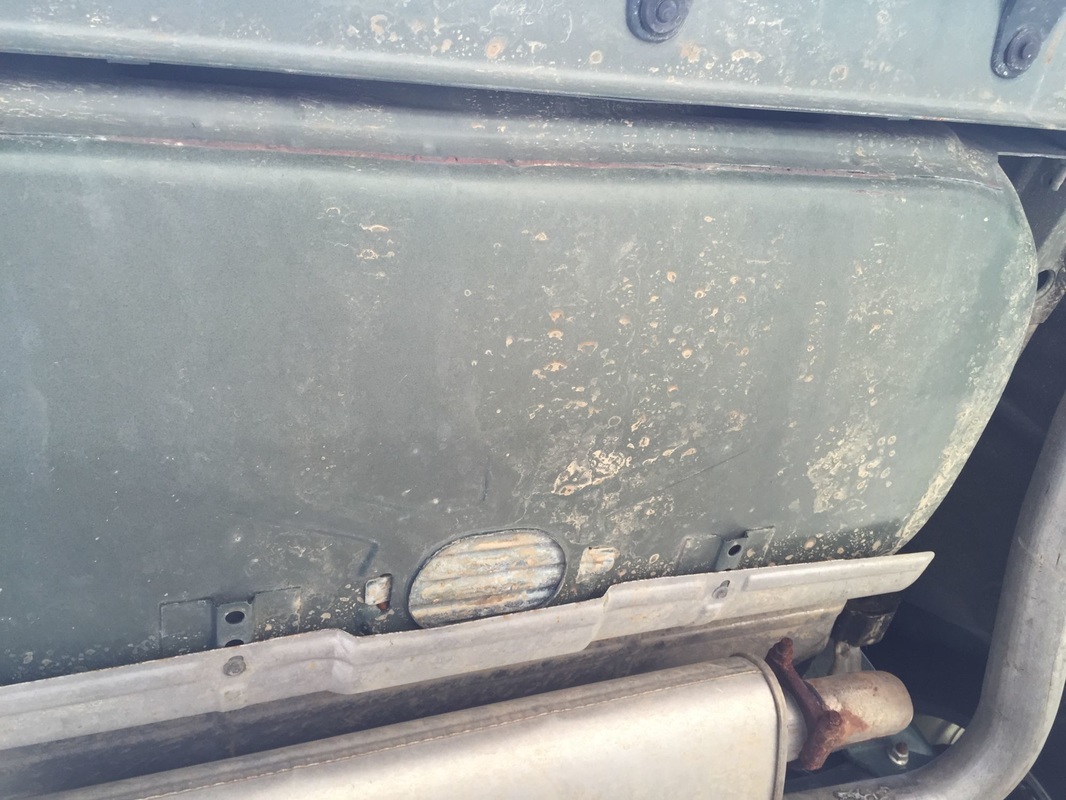
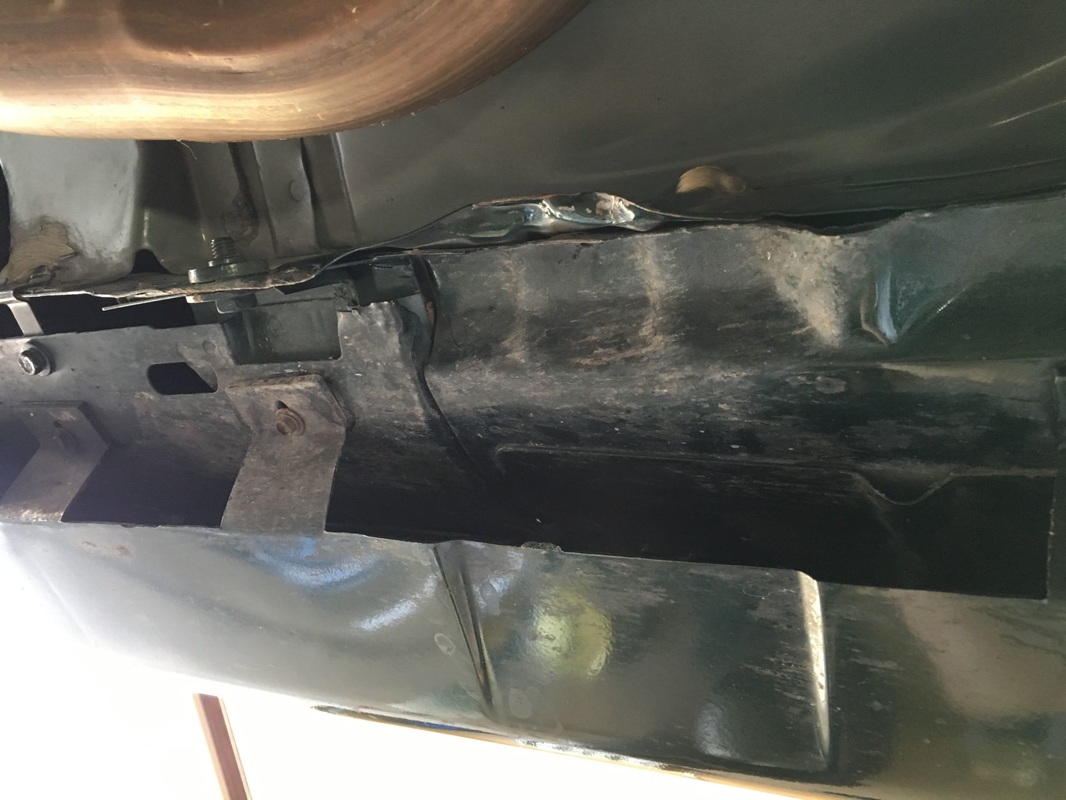
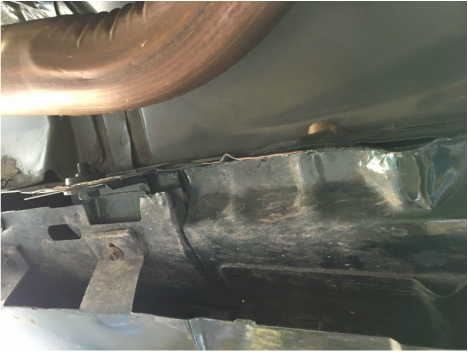
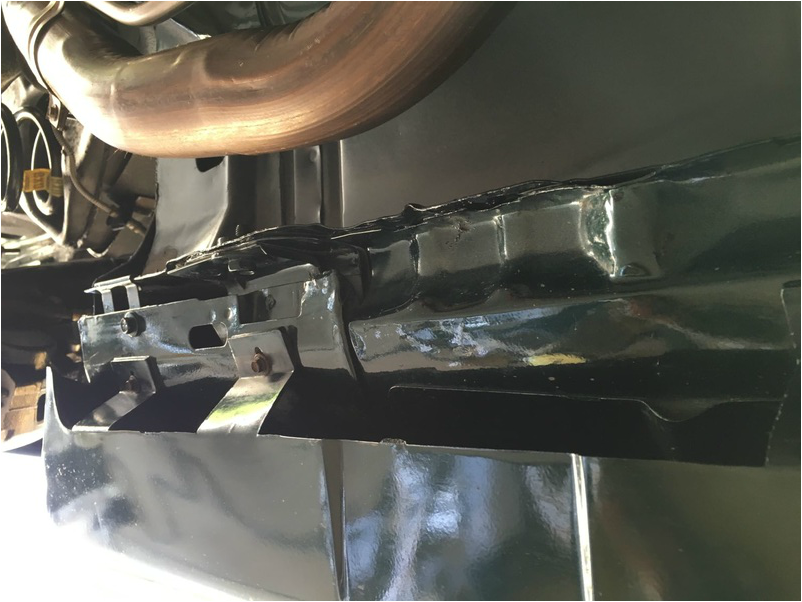
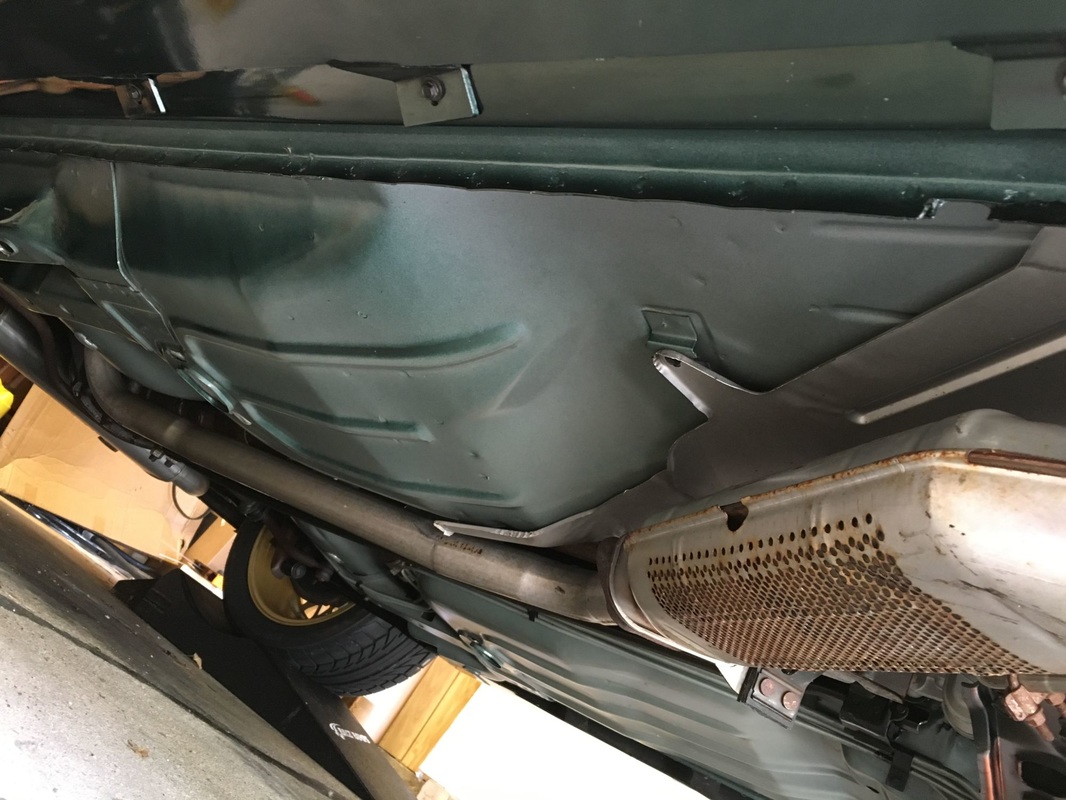
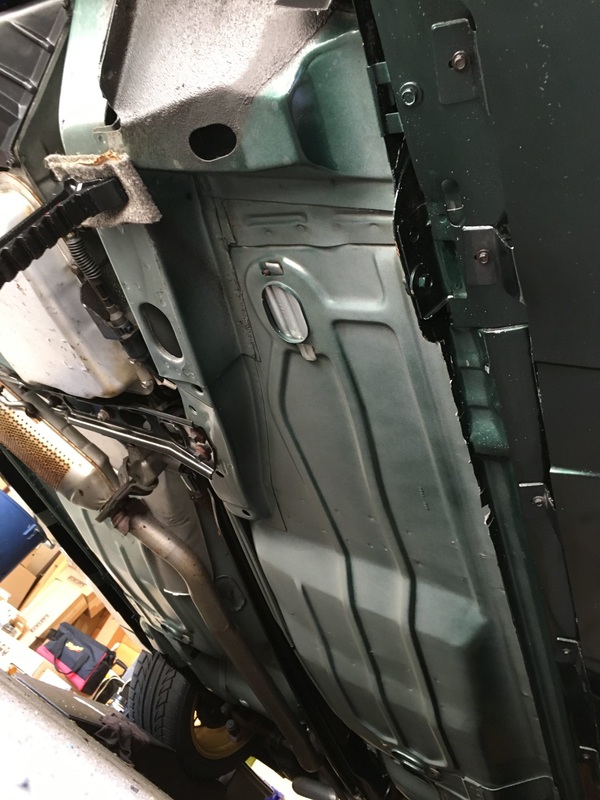
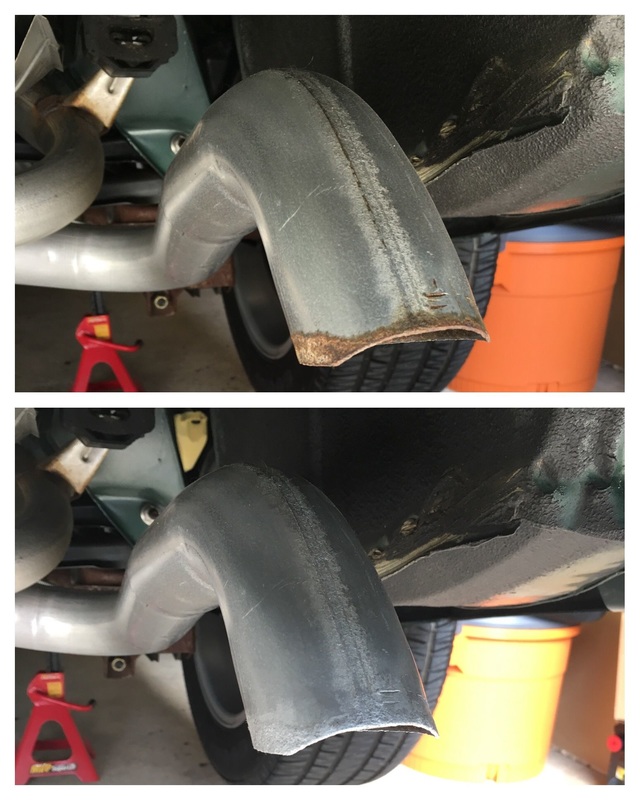
Finished up the under carriage clean up. Here's the PS front rocker, along with the bent metal work from a careless mechanic lifting the car. I have most of the metal bent back into shape, only thing I am not 100% sure on is the sharp hump that I have left . . . metal might have stretched.
|
|
The finished results. The ONLY paint work done was some brush touch up on any raw metal, this is not re-sprayed, it turned out that clean!
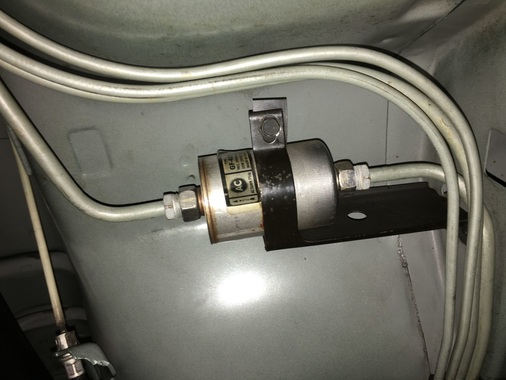
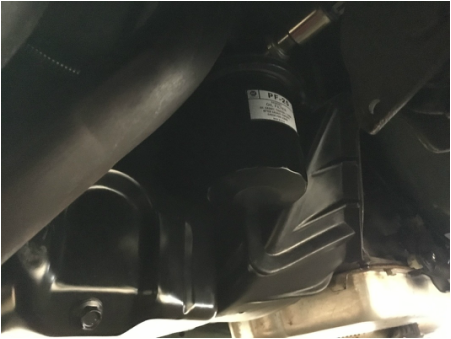
Really neat to find the OEM fuel filter, do need to re secure the decal though!
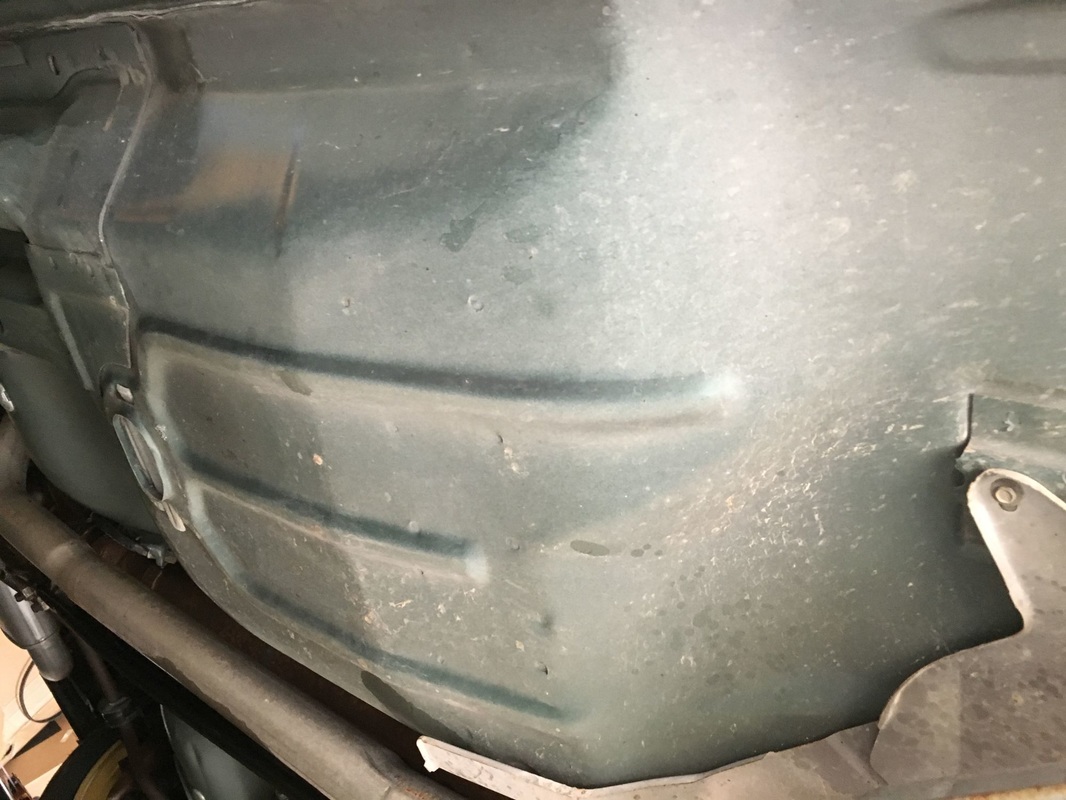
Some before pics of the underside:
|
|
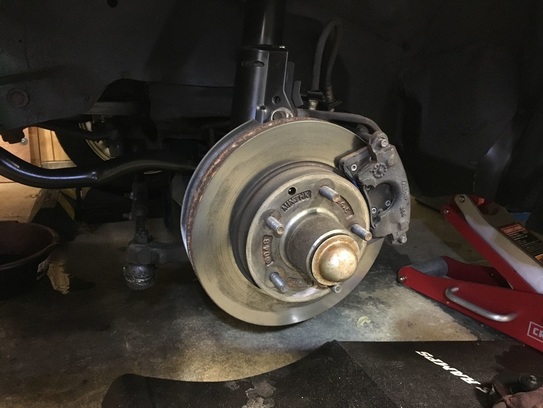
And the end results of the work, still have some details I want to address but much improved...again, nothing got spray painted, only painting I did was some brush touch ups on some scarred edges. There are still some under carriage issues I want to address but time is escaping me for this years show season, so tackle them as time allows. The waxy under coat on the K-Member needs some detailing. Full detail on the brake calipers and rotors. The dust cap rust cleaned off with Iron-X, and clear coated, the rotor was touched up with POR15 manifold grey, calipers done up with Dupli-color matte black & silver.
|
|
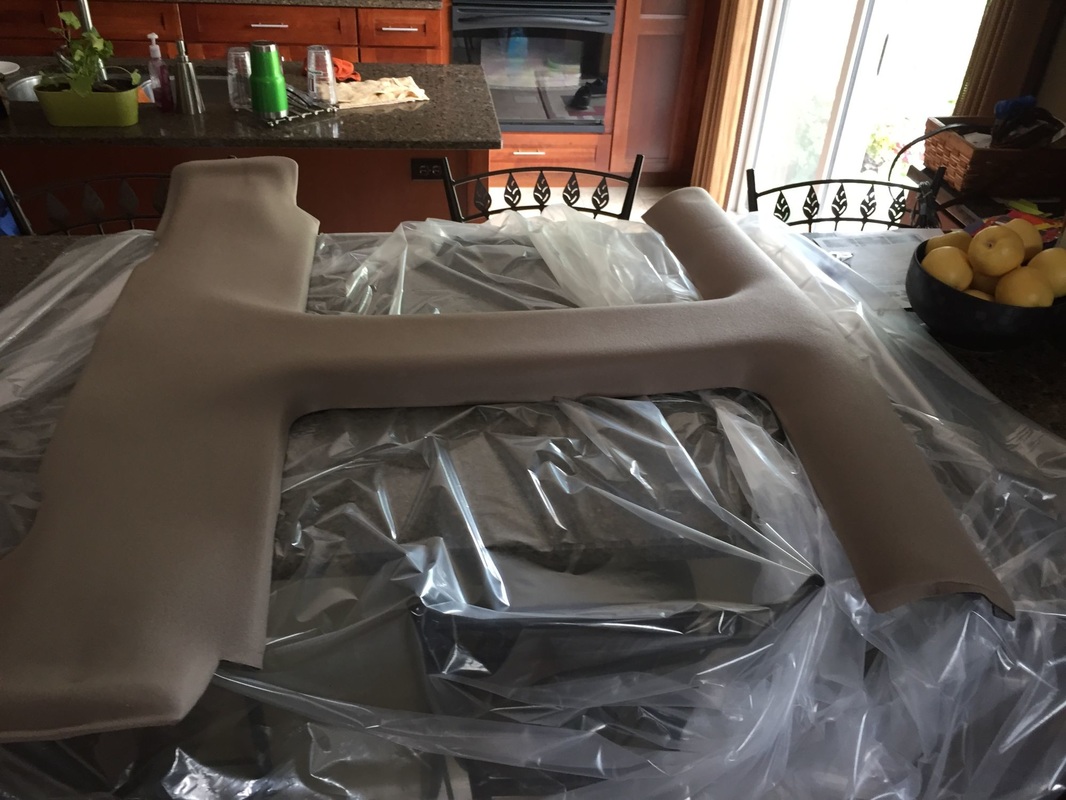
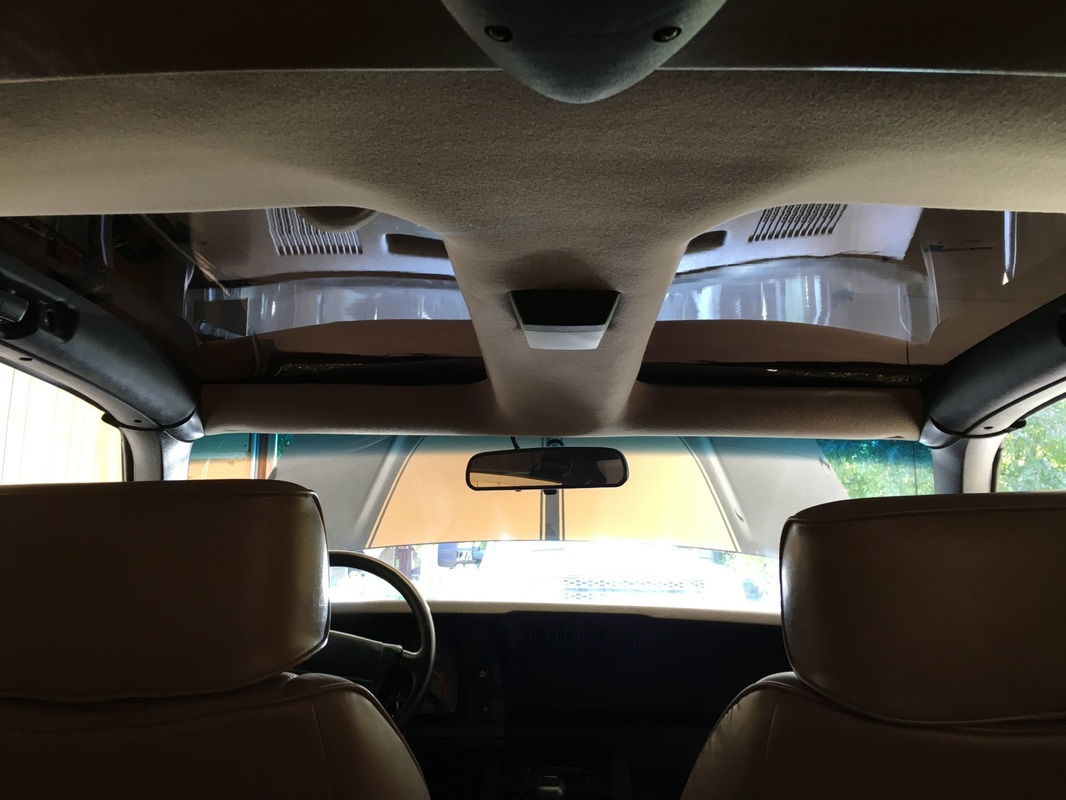
Sadly the original headliner was badly deteriorated from age, smoking and leaky t-tops. I have not given up hope trying to save the original, but for now it will do. This is the only progress pic that we got, but as you can see the fabric is cut WAY to close to the edge and the rough edges will be visible with the t-tops off. The ABS base does not have the same thickness as the stock headliner, so the wrapped edges turn out a bit "crisp" in lieu of soft folds. Scariest part is cutting all the holes in it.
|
|
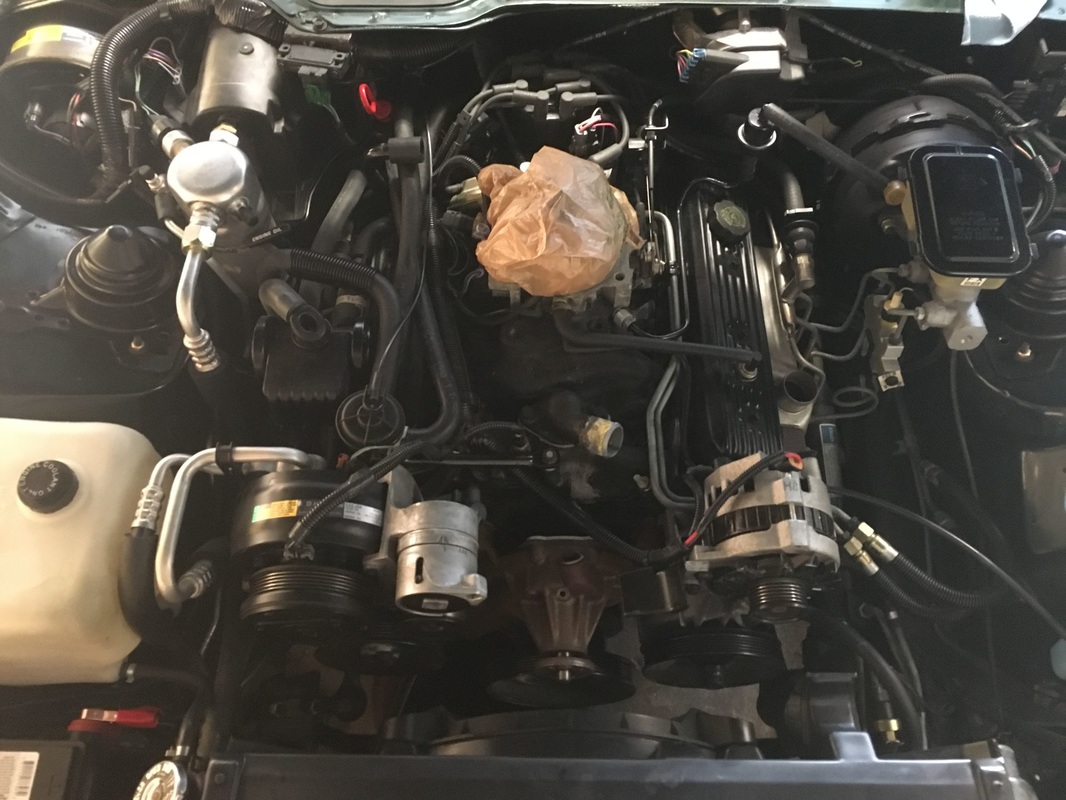
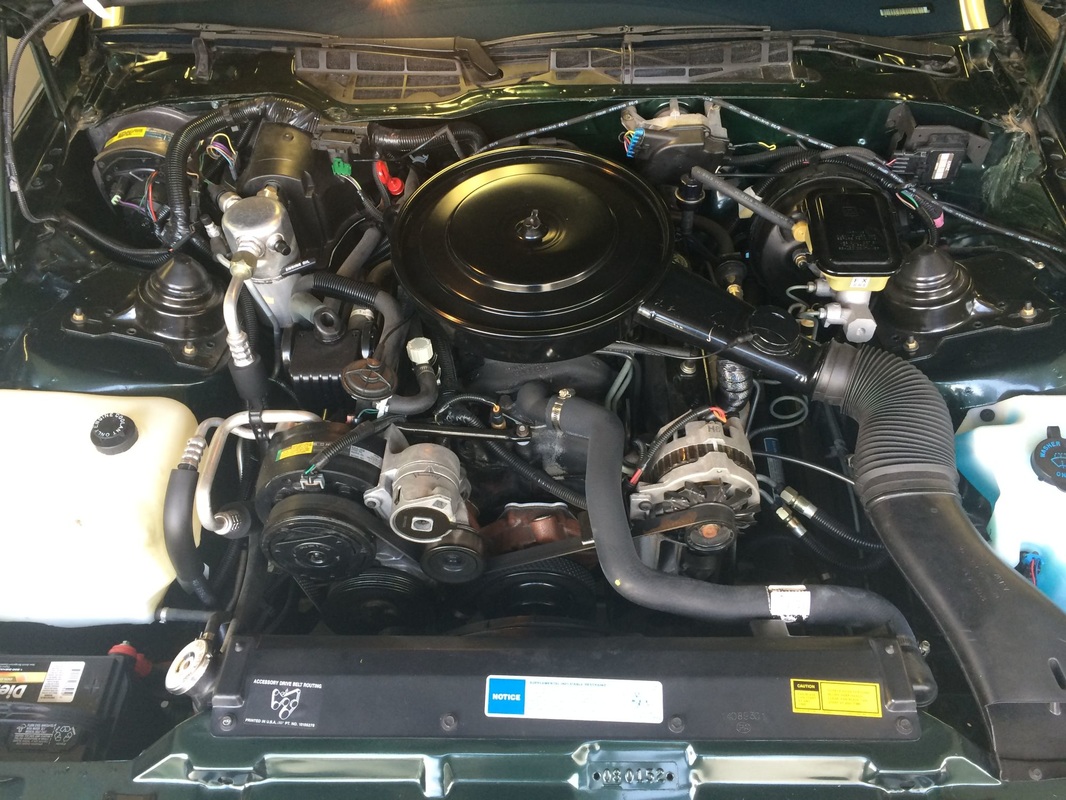
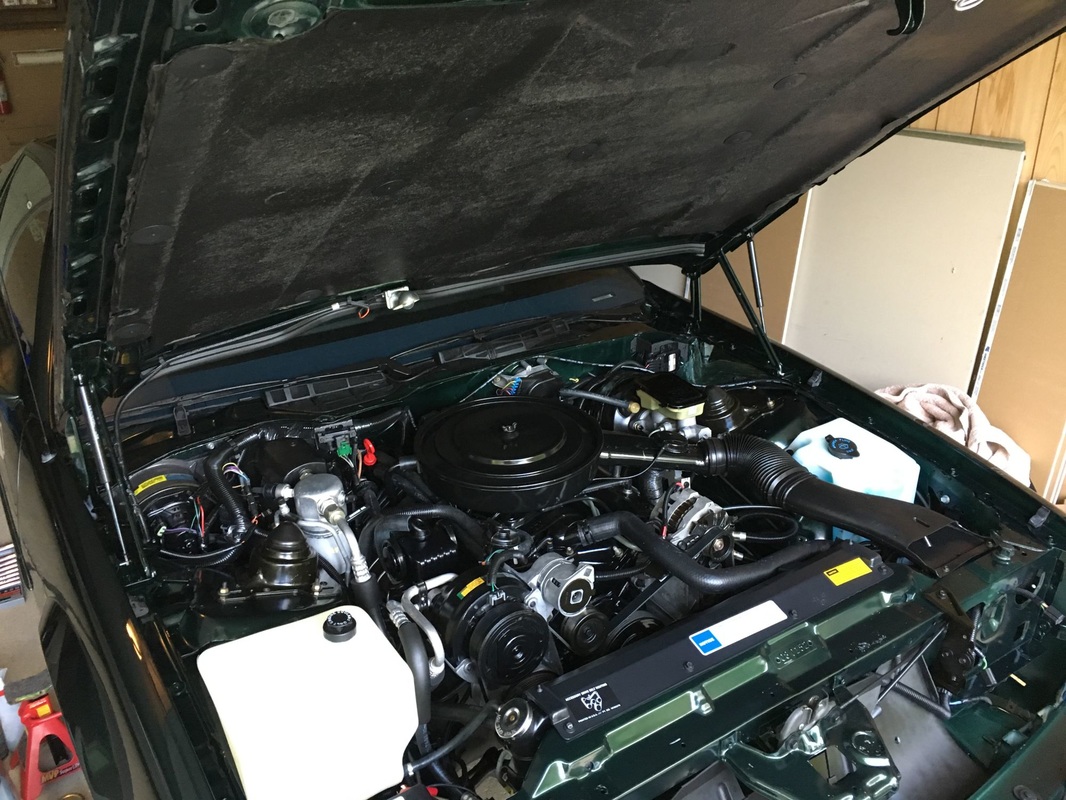
More engine touch up work, intake manifold painting, replacement of rusty universal water pump with OEM restored water pump. Also got my hands on the OEM spring clamps for the upper and lower radiator hoses. Replaced a few hoses with new AC-Delco pre bent units. Still need to re-install some of the wire harness and vacuum lines . . some final details to address, but coming along.
|
|
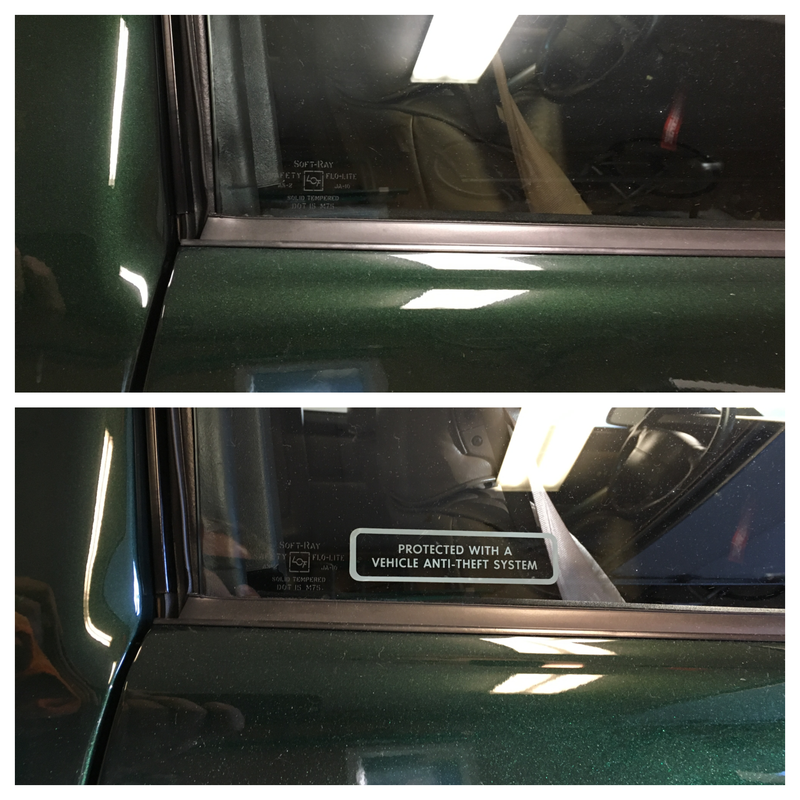
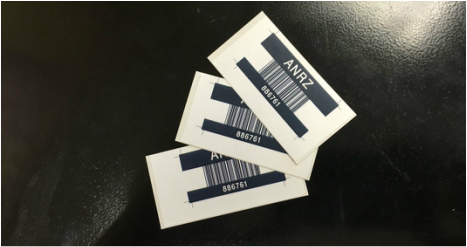
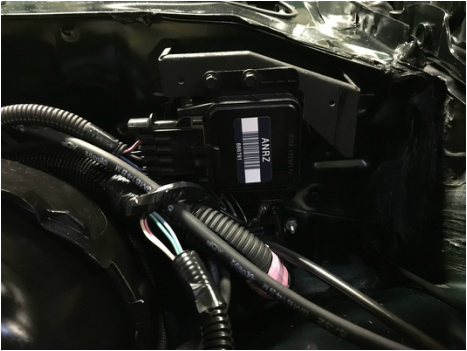
Original anti-theft system decals had been removed when windows were tinted, we found some original decals so those have now been replaced. Located some NOS GM seat belt repair kits, that come pre-cut to slip over the belt, and a little reinforcing receiver that goes between the head rest and the cut loop. So the seats are as close to factory correct as I can get them.
|

|
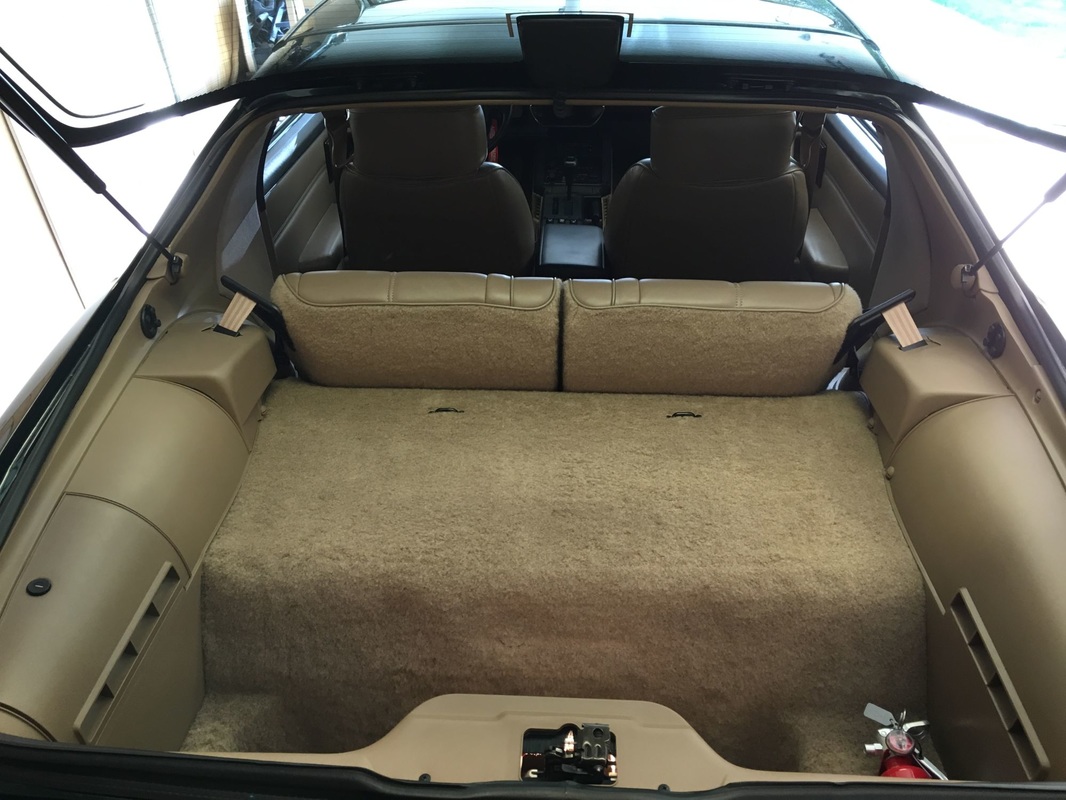
Rear hatch area and headliner all back together. The replacement headliner will need more work but that will go on the list for a future project.
|
|
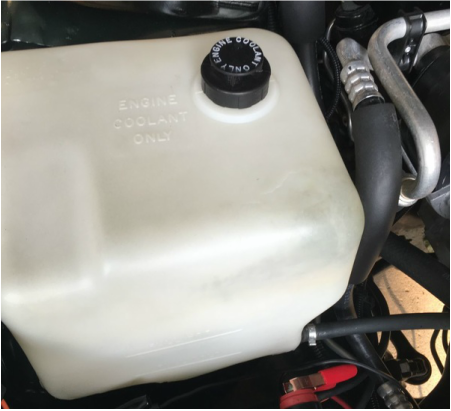
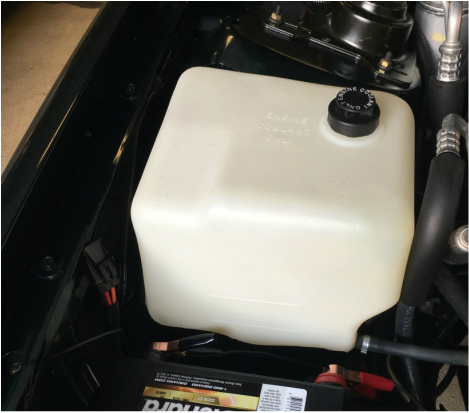
Inside of overflow tank all cleaned.
|
|
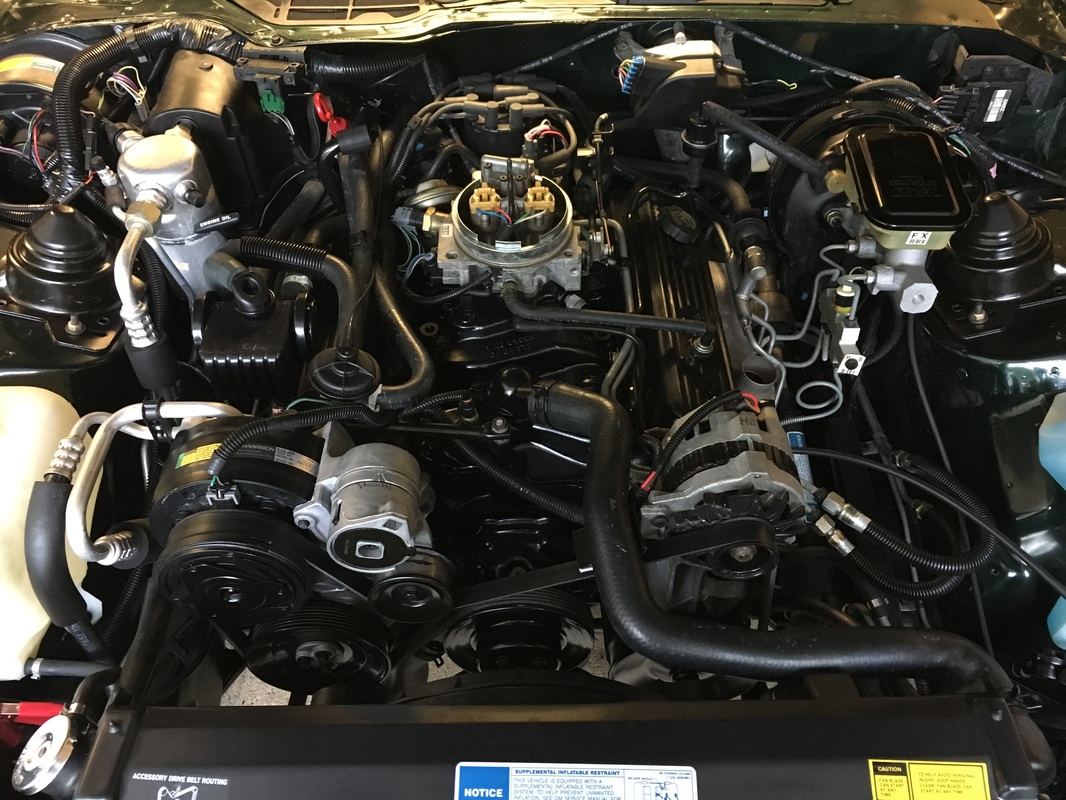
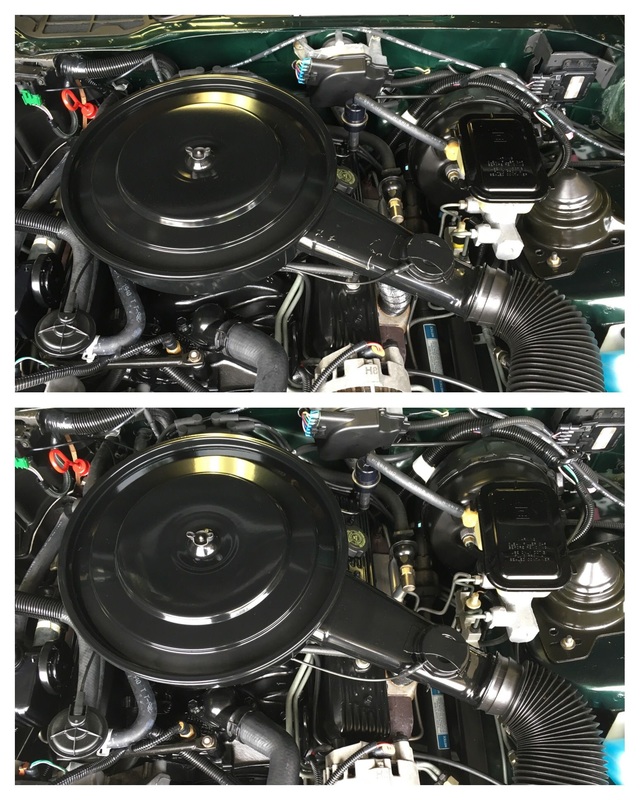
Engine bay is back together 99%, did some touch ups and a little detailing to the underside of the hood, the hinges, here and there. I'd love to say it is final, but there was a time limit factor on getting everything 100%. Thankfully virtually all the correct parts were there, but the few that were missing certainly provided their challenges to source, but Marco is close to being back to factory stock/original. Before on the left and after on the right.
|
|
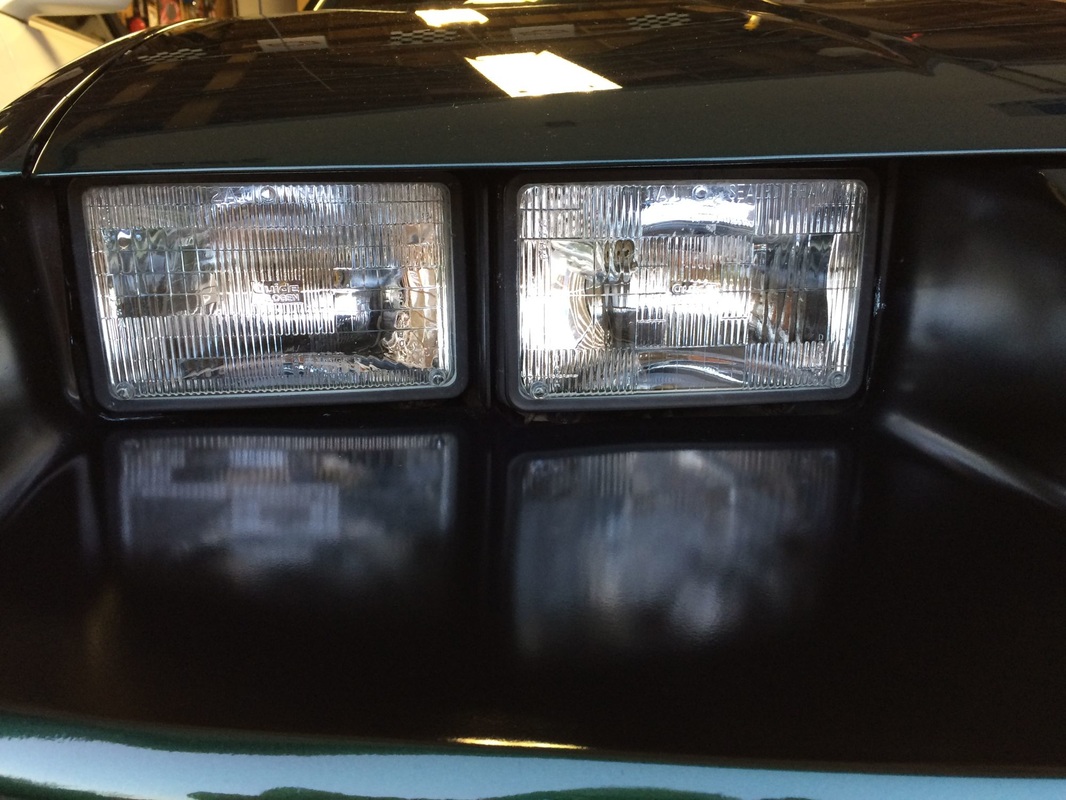
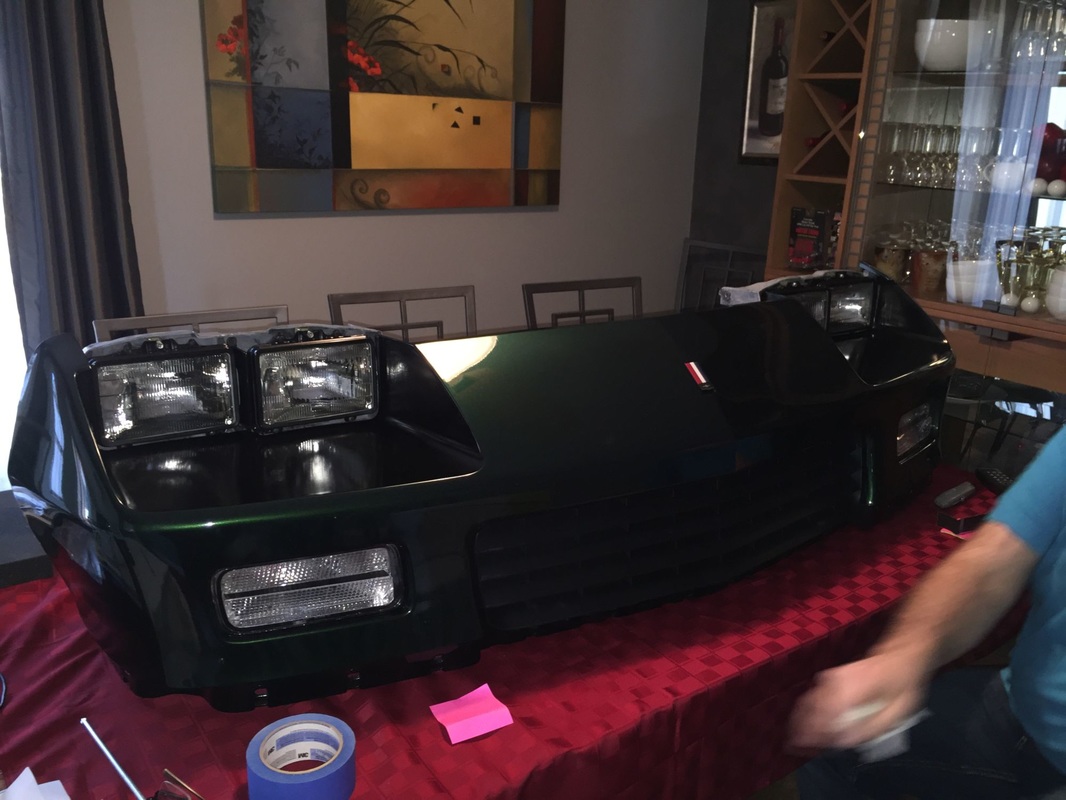
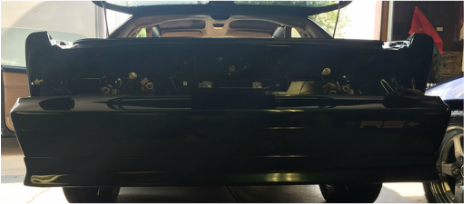
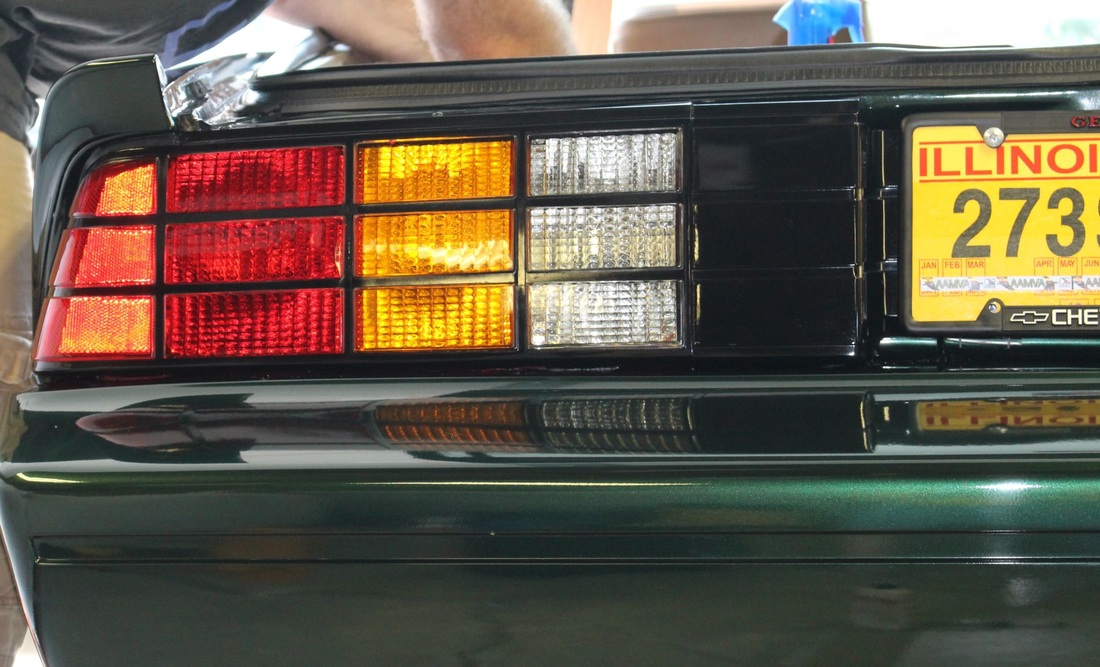
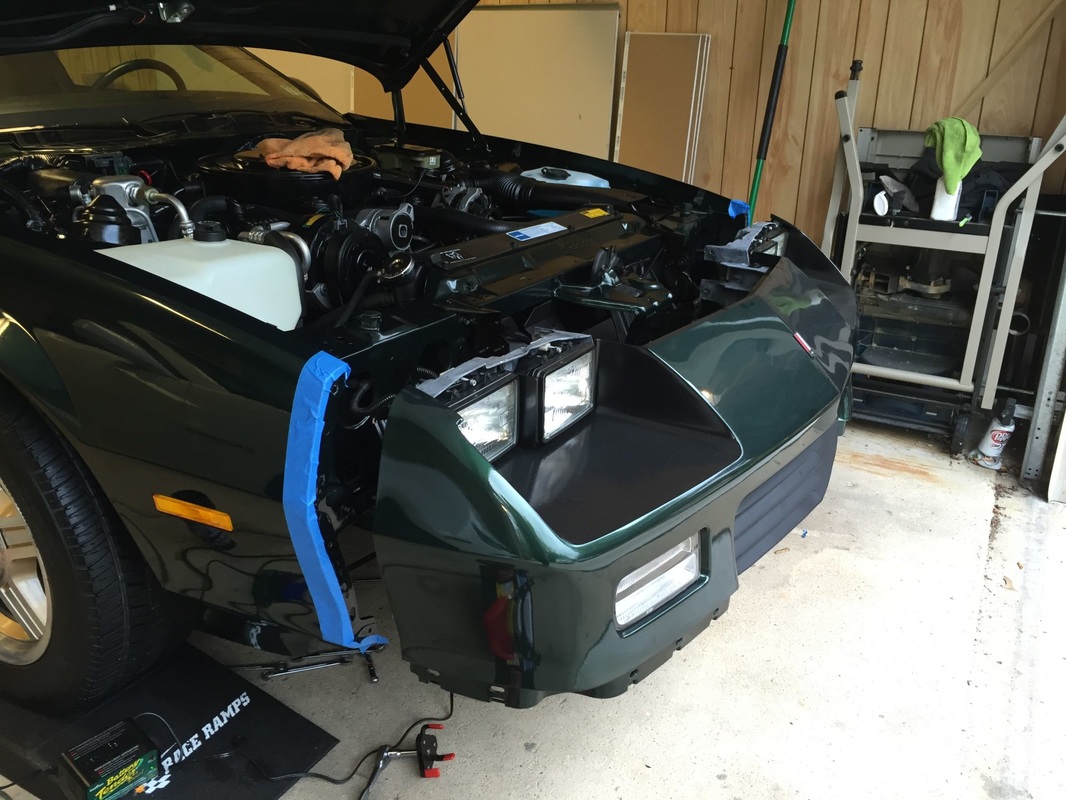
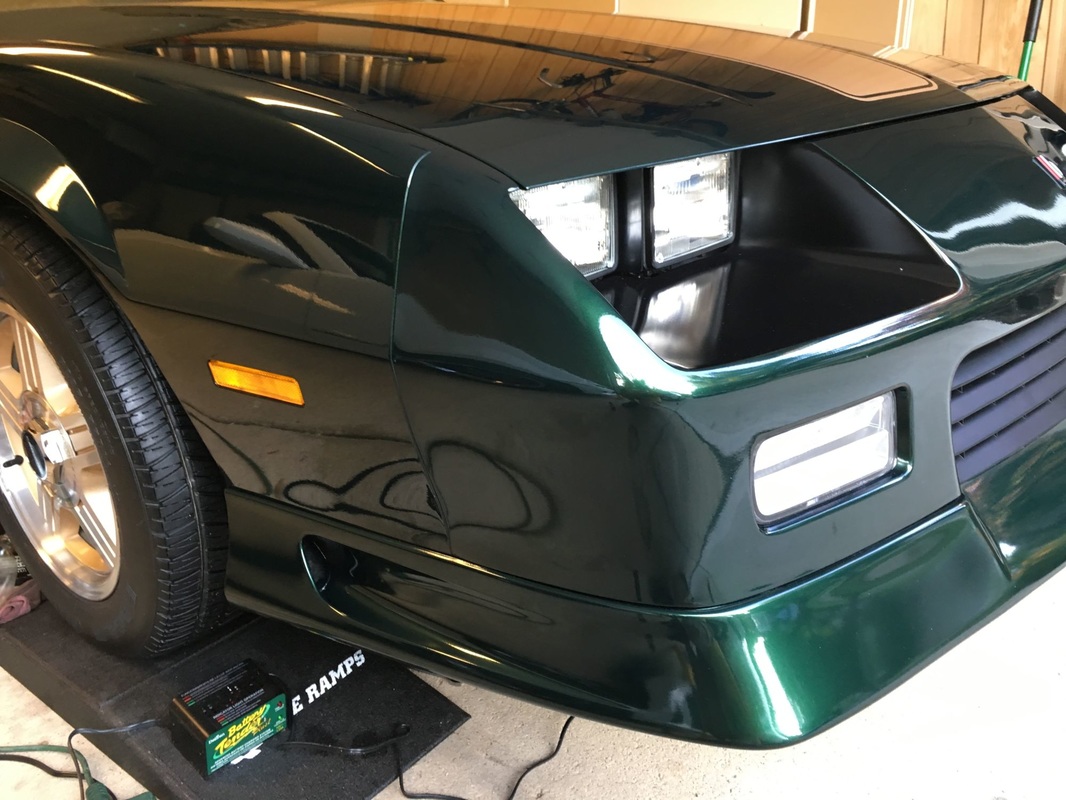
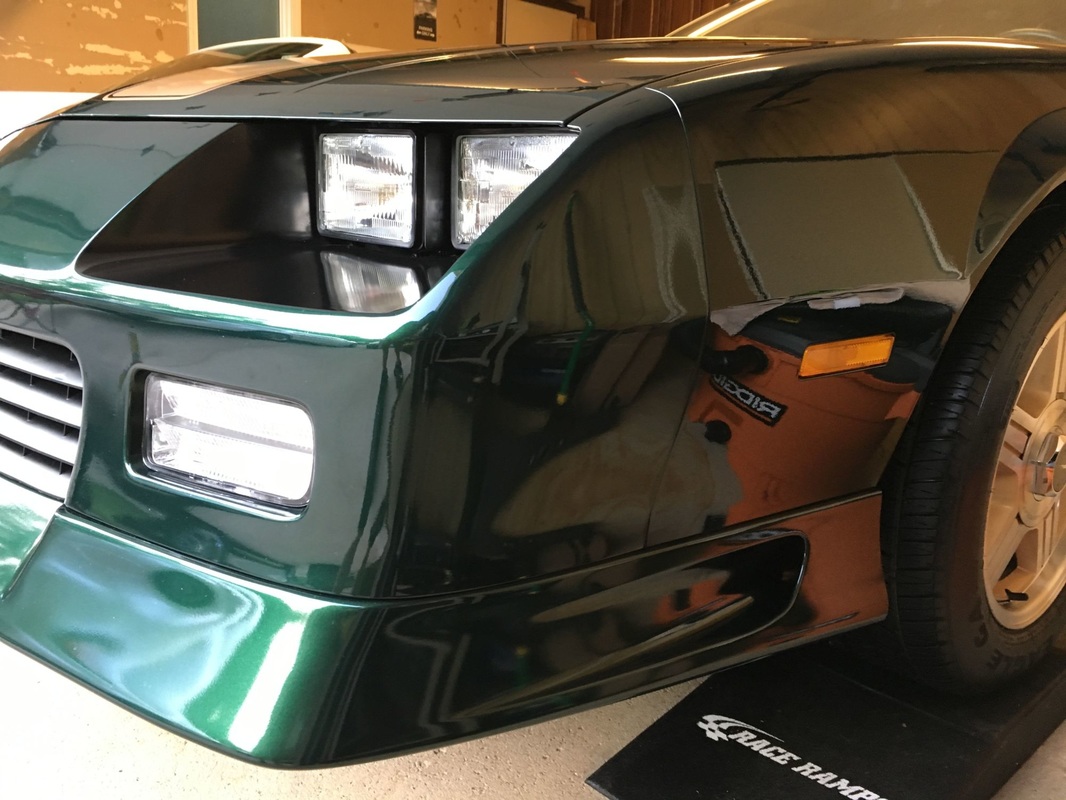
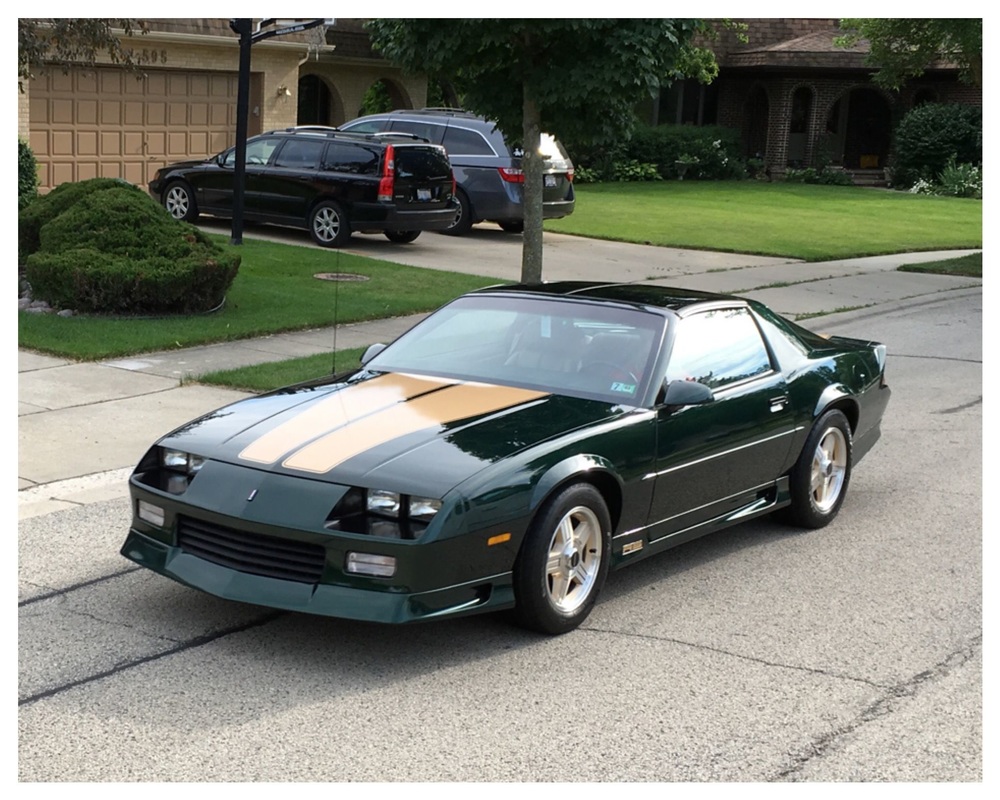
Marco has a face again!! Every component of the bumper assembly was taken apart and cleaned meticulously into every crevice. New GE Halogen (AC Delco replacement) headlamps in rebuilt buckets and a new NOS GM grille was installed. We took our time carefully tweaking each mounting point to get the cover as flush and aligned as possible. Since the original filler panel was a little warped due to the fasteners being torqued down a bit too snug, bought a NOS GM filler piece, add a little "Back to Black" and it looks perfect!
|
|
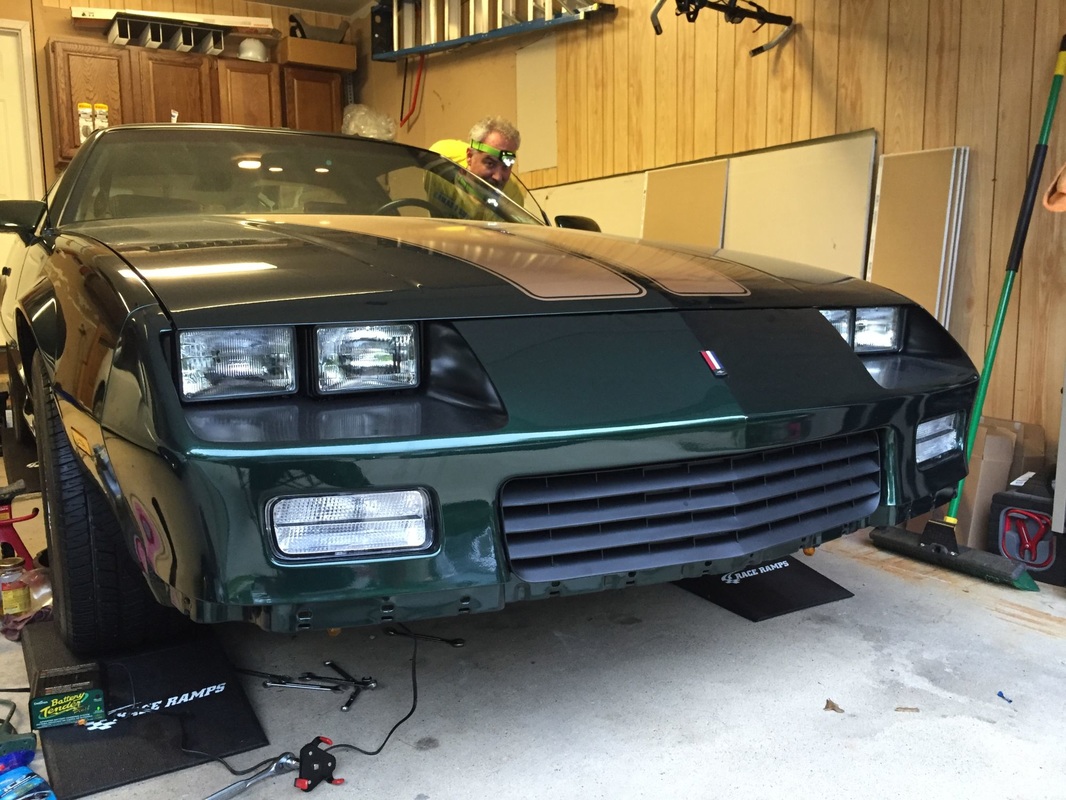
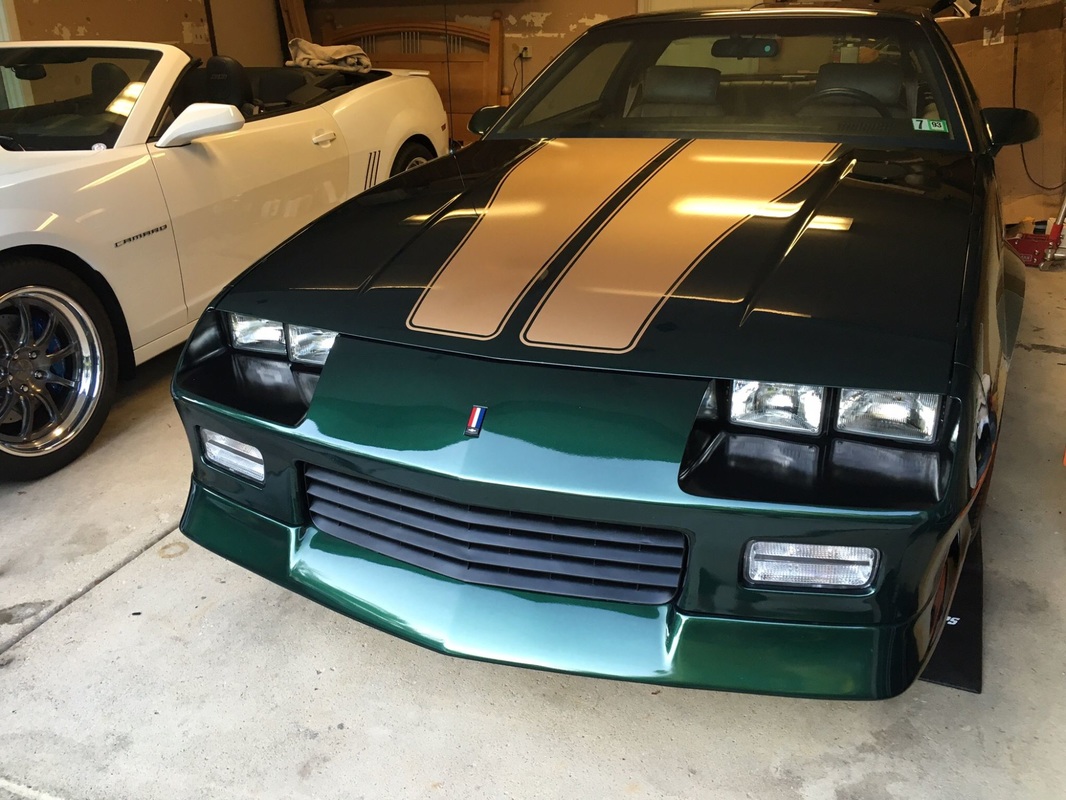
Front end of the car totally put back together. Thankfully the seams of all the parts lined back up pretty well and tight.
|
|
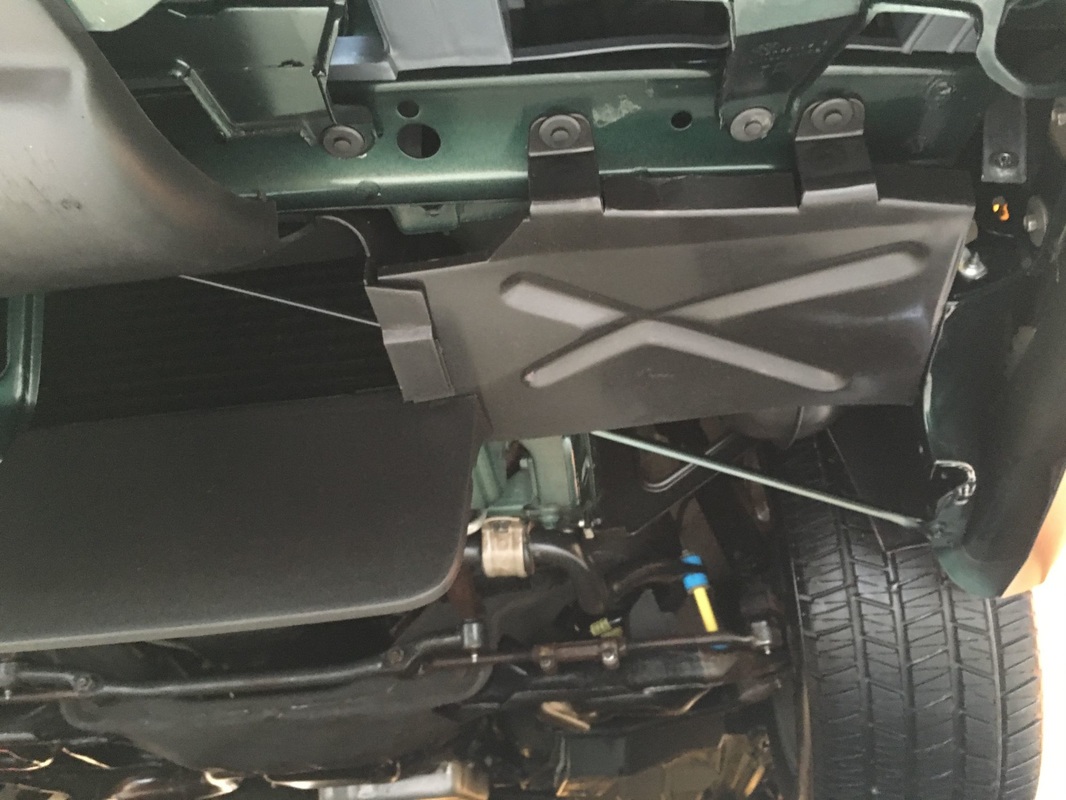
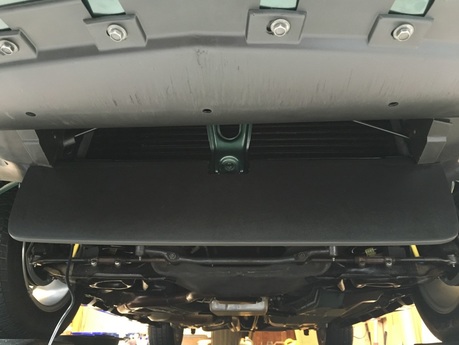
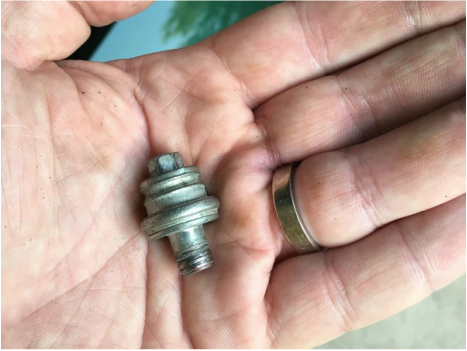
Was able to buy a NOS GM front air dam, the original was a little scuffed up, sure wish we could find the front spoiler support / deflector, but the orginal will have to do. Was dealt a small hiccup with the positive battery post bolt being stripped, thankfully my past parts hoarding I actually had a spare!
|
|
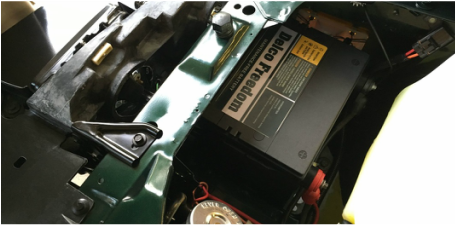
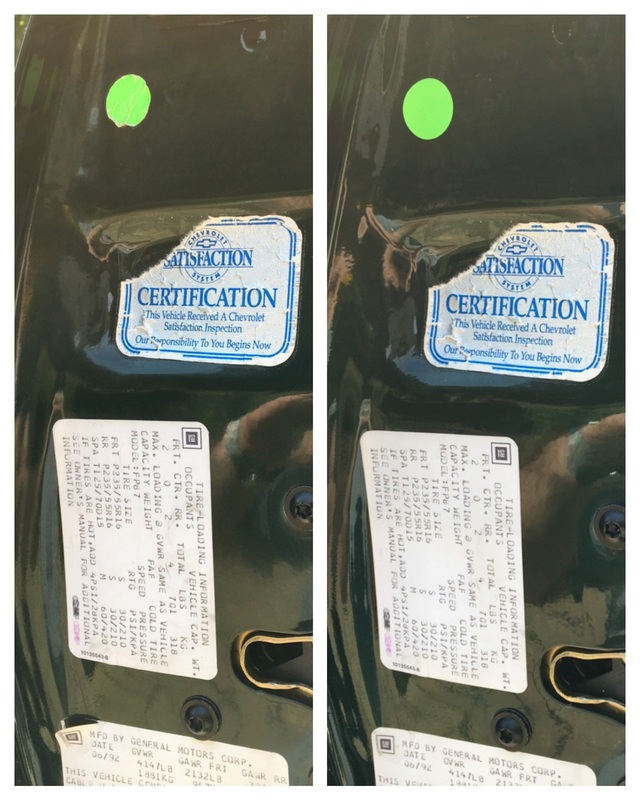
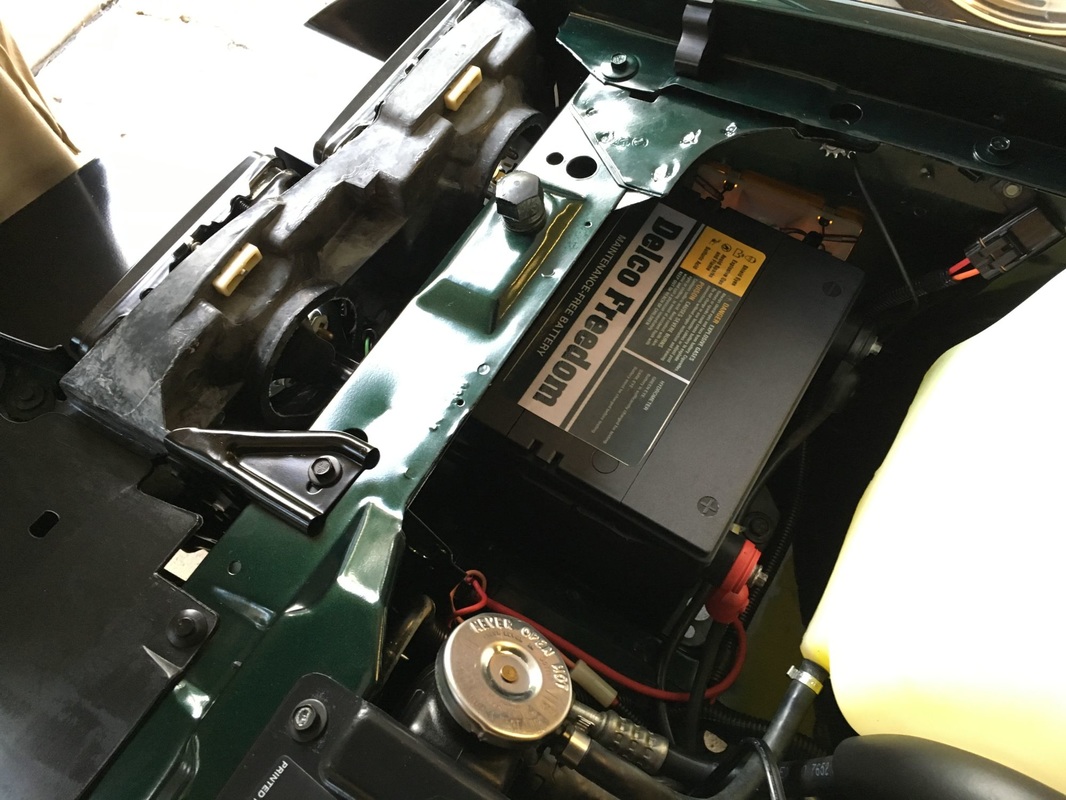
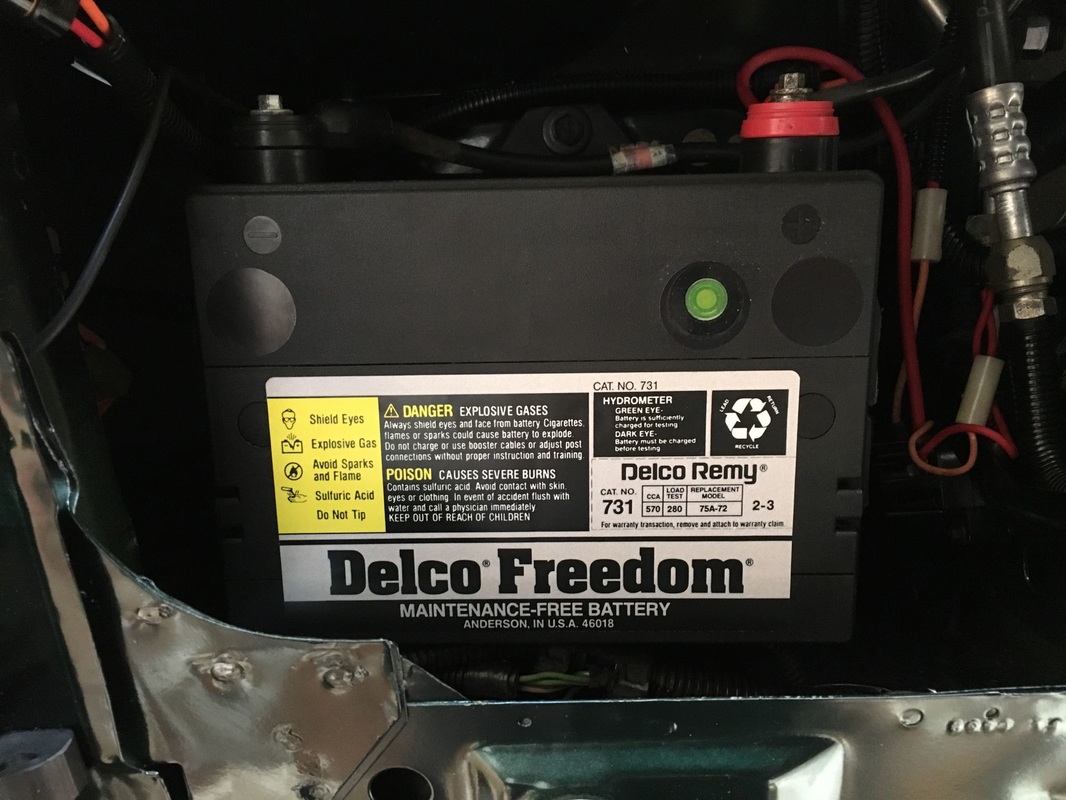
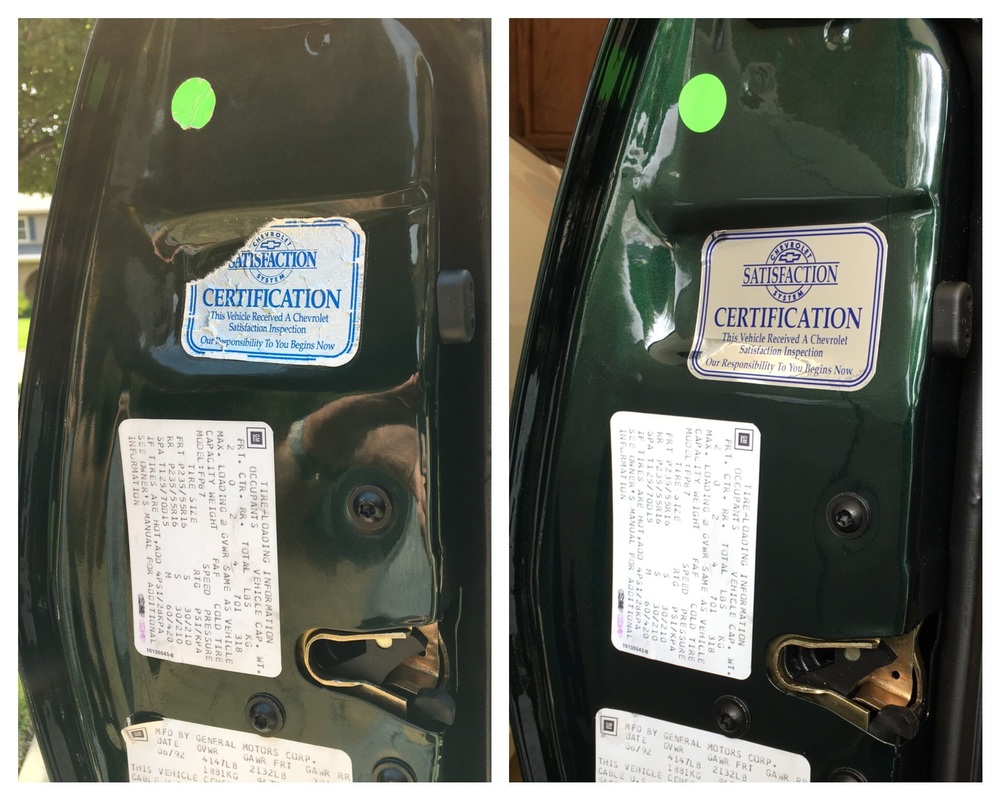
Decided to mock up a "faux" 1990s era Delco Freedom battery. Door jamb and lock strike clean up, replaced the grungy green dot stickers in the jamb, behind the rear plate and on the rear view mirror. Was able to re-secure the loose corner of the one jamb sticker, and we really hope to duplicate the "Customer Satisfaction" decal some day, but this will suffice.
|
|
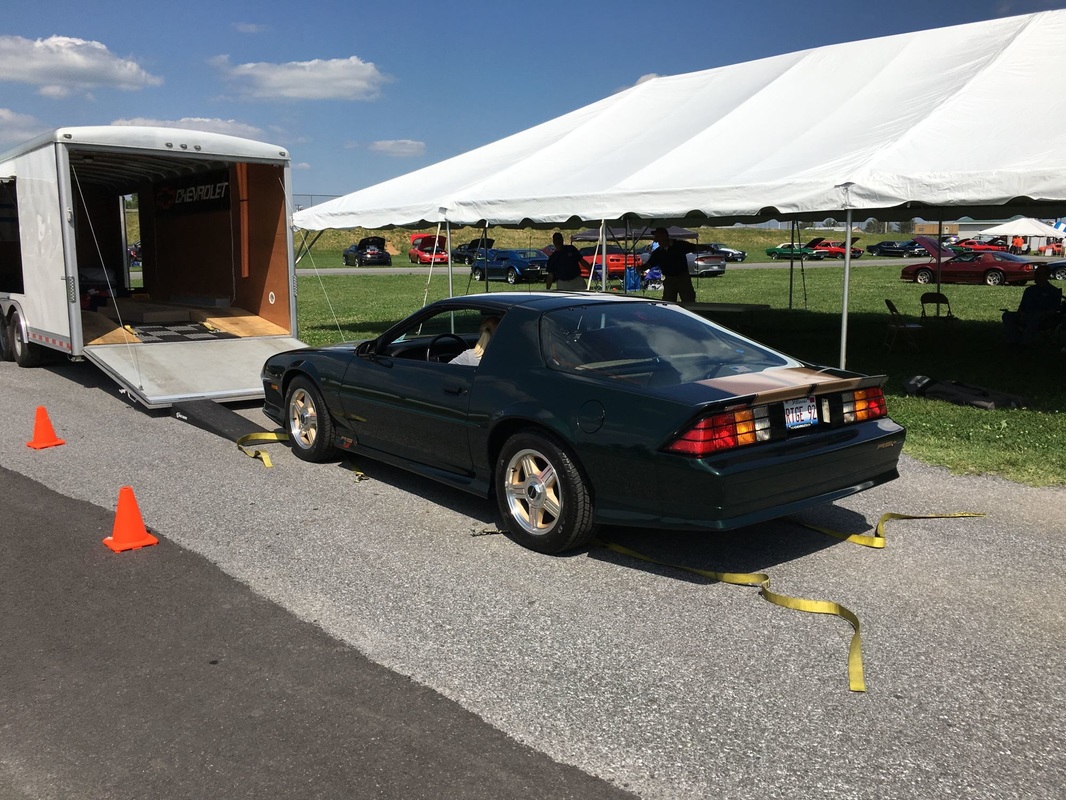
Last shots before loading on trailer to head to Camaro Nationals 2016.
|
|
Camaro Nationals 2016 Showing
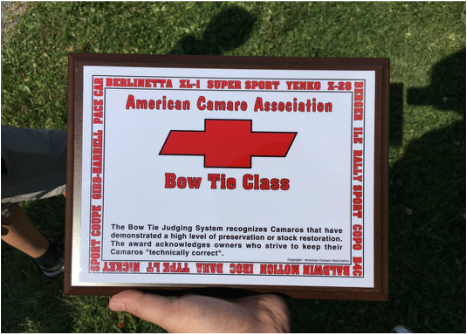
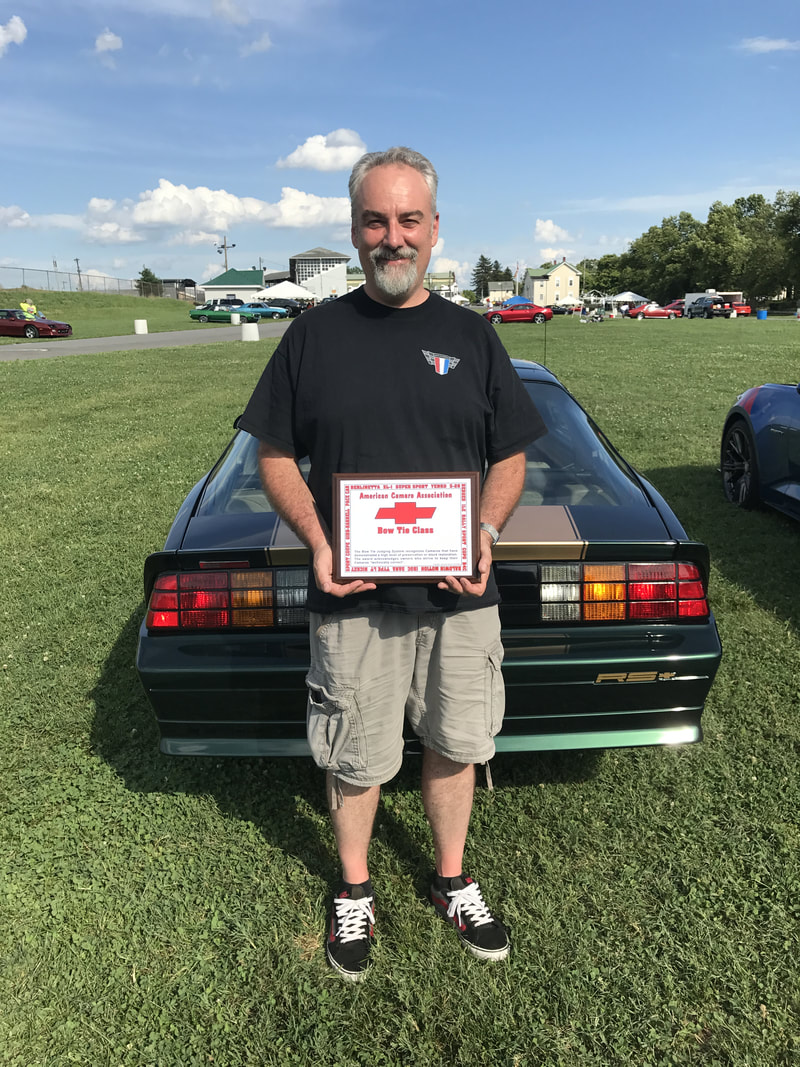
We arrived early and Marco ended up in the back corner of the building. He got his finishing touches and we waited for the judging. We were entered in the 1,000 point Bowtie Class, which is open to 1st, 2nd and 3rd generations only. This is the highest Nationals class a 3rd gen can participate in. Legends Class is a 5,000 point system open to 1st and 2nd generations only, once they have acquired at least 975 points in Bowtie Class.
In Bowtie class judges spend about 30 minutes going over the car looking for accurate parts, finishes, as well as checking for proper operation, such as starting, lights, etc. The goal of this class is to replicate as close as possible to showroom condition, originality is key.
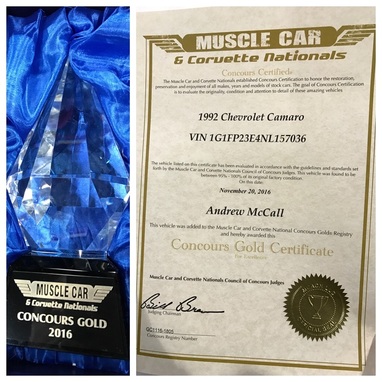
To our amazement during awards we learned that Marco won Gold, he earned a perfect score of 1,000 points, plus a bonus of 5 more points for safety equipment ( fire extinguisher, first aide and tool kit ).
In Bowtie class judges spend about 30 minutes going over the car looking for accurate parts, finishes, as well as checking for proper operation, such as starting, lights, etc. The goal of this class is to replicate as close as possible to showroom condition, originality is key.
To our amazement during awards we learned that Marco won Gold, he earned a perfect score of 1,000 points, plus a bonus of 5 more points for safety equipment ( fire extinguisher, first aide and tool kit ).
|
|
Our personalized engraved plaque will be sent to us in the mail. I guess all the crazy detailing paid off, but never in a million years did I expect a perfect score. Feeling very honored and humbled. This is end of show loading him back up in the trailer.
Improvements Continued....
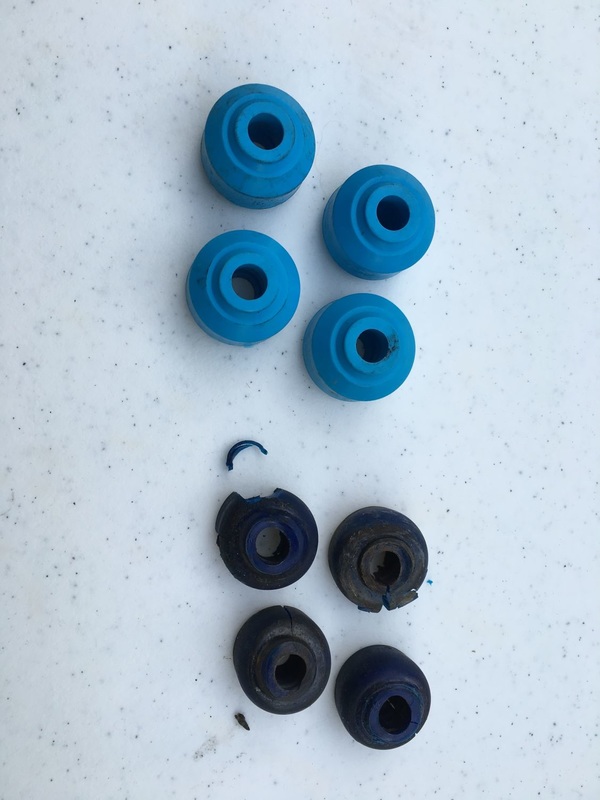
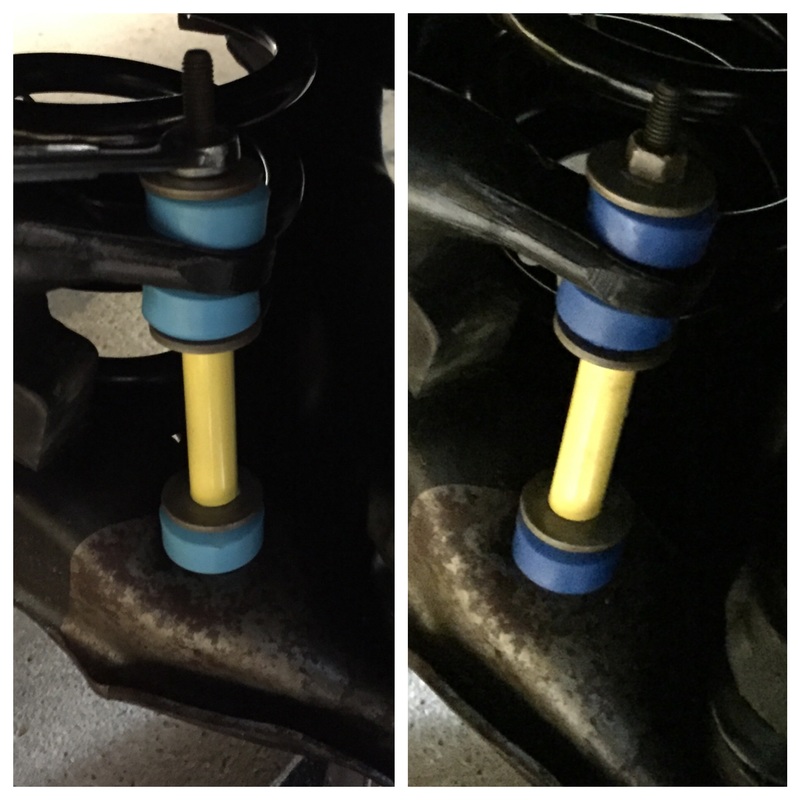
After having to use a temporary set of bushings in time for show season we finally sourced the correct AC Delco Professional set of replacement front bushings in dark blue. The old bushings were dirty but breaking them apart you can clearly see these are at long last the correct color. Thank you eBay!!
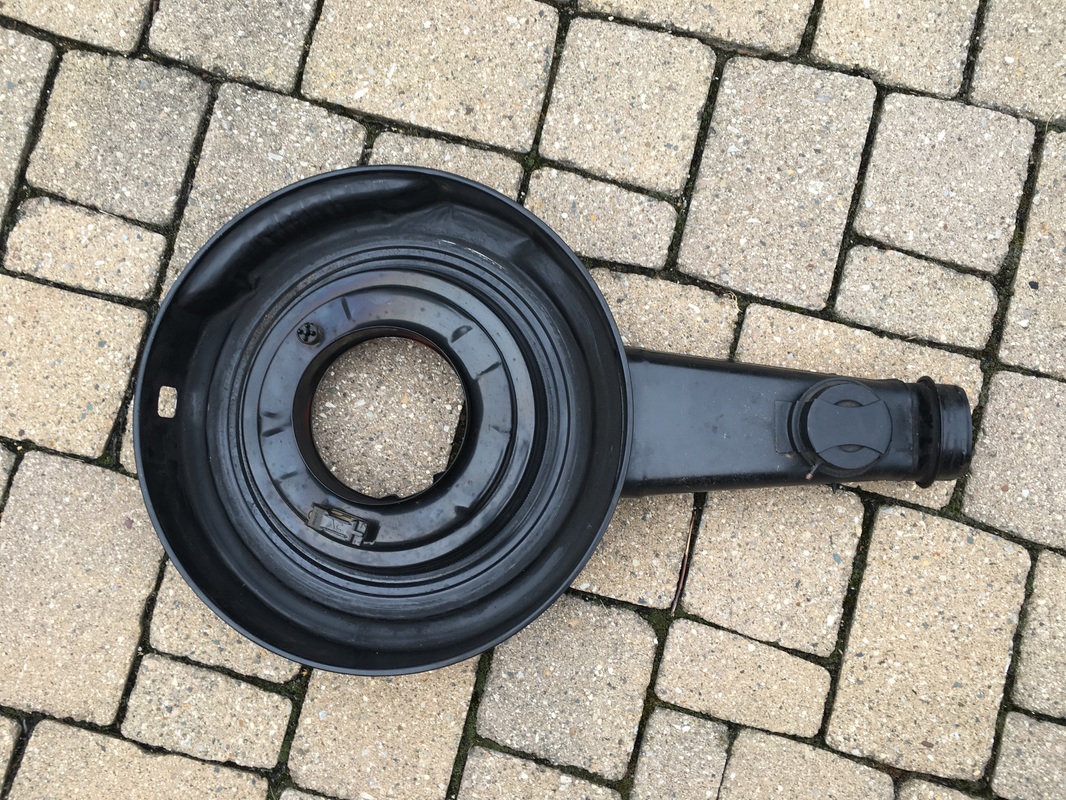
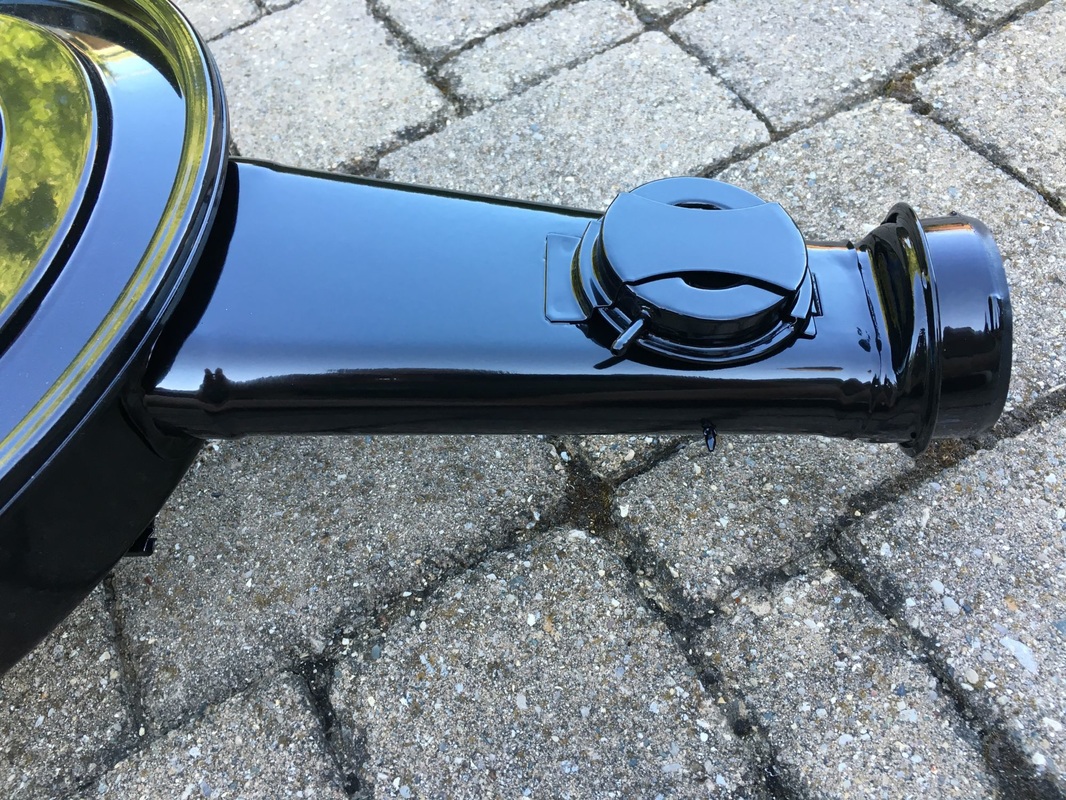
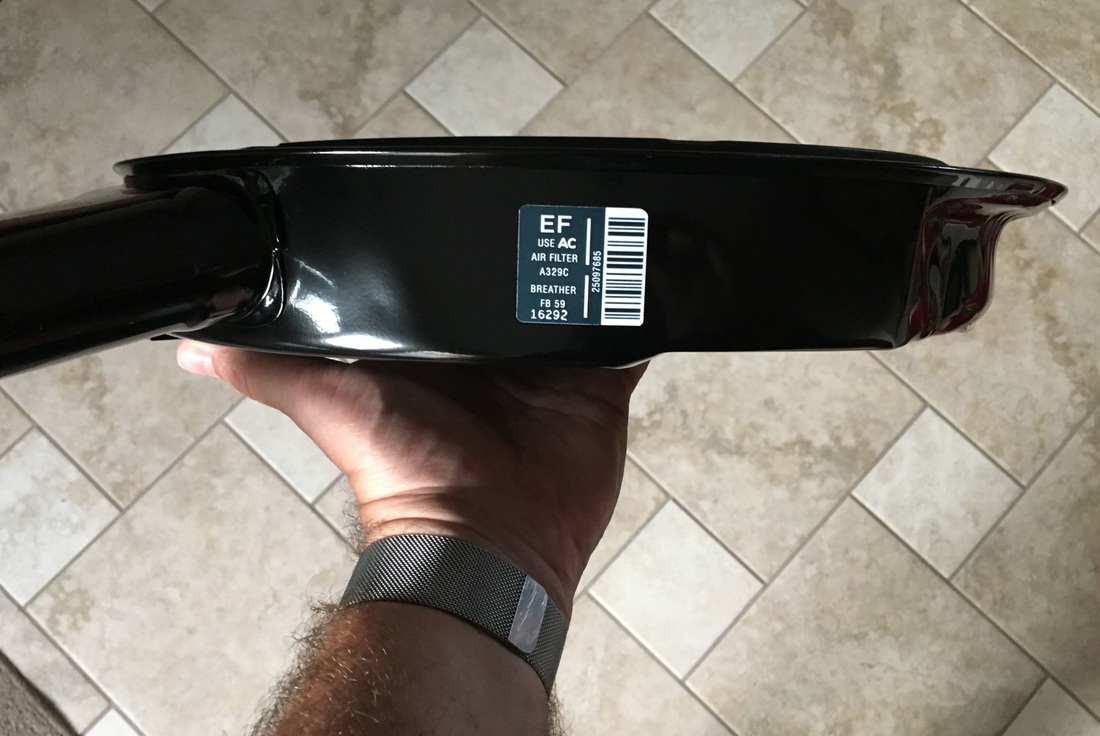
Finally the work to get the spare air intake we purchased fully restored and ready to go on the car. We cannot believe the results one can get with a rattle can of paint! Now need to find a sign shop to print my replacement decal I made.
|
|
Refinished air cleaner all installed and getting us closer to that perfect engine bay.
Did some decal restoration, some of the original engine bay decals were badly faded or damaged, so got to work in Photoshop and investigating/investing in making vinyl decals. First was this decal on the DS firewall. This is laser printed on chemical, abrasion, waterproof, UV and Tear resistant vinyl decals, really fun experiment.
|
|
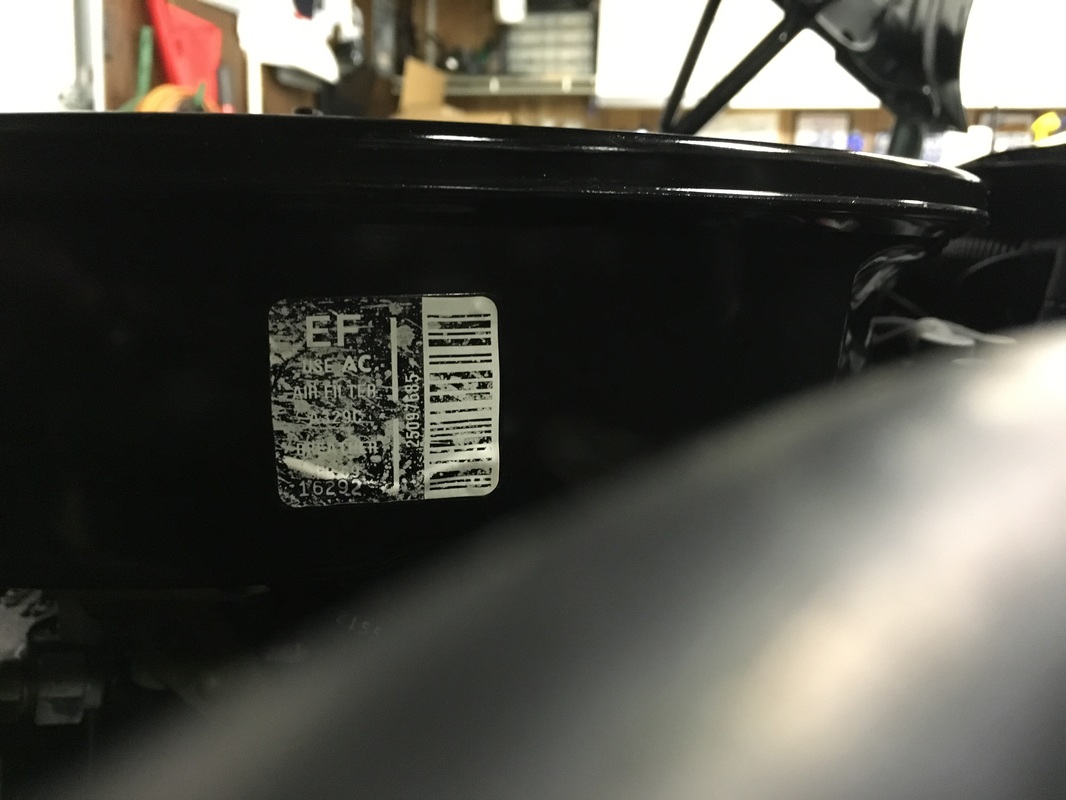
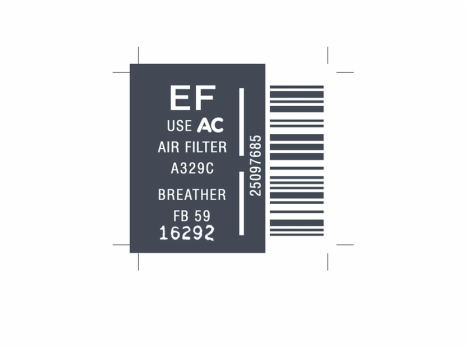
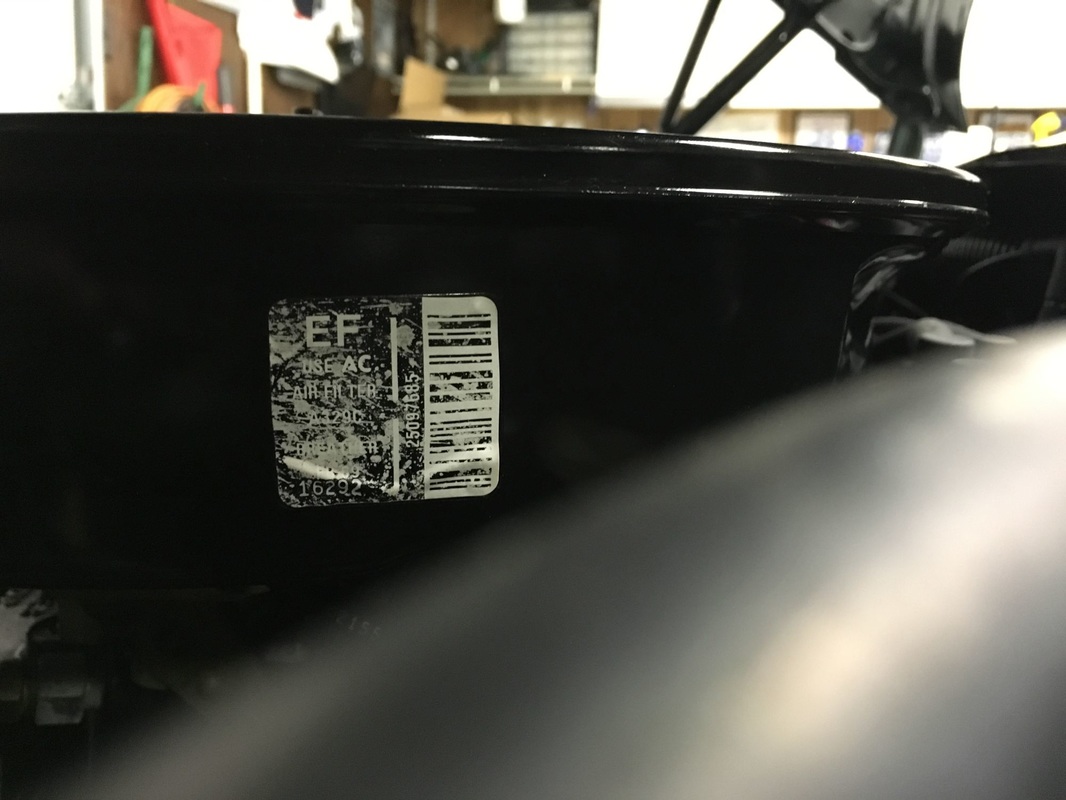
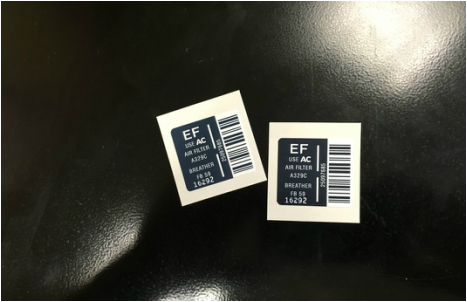
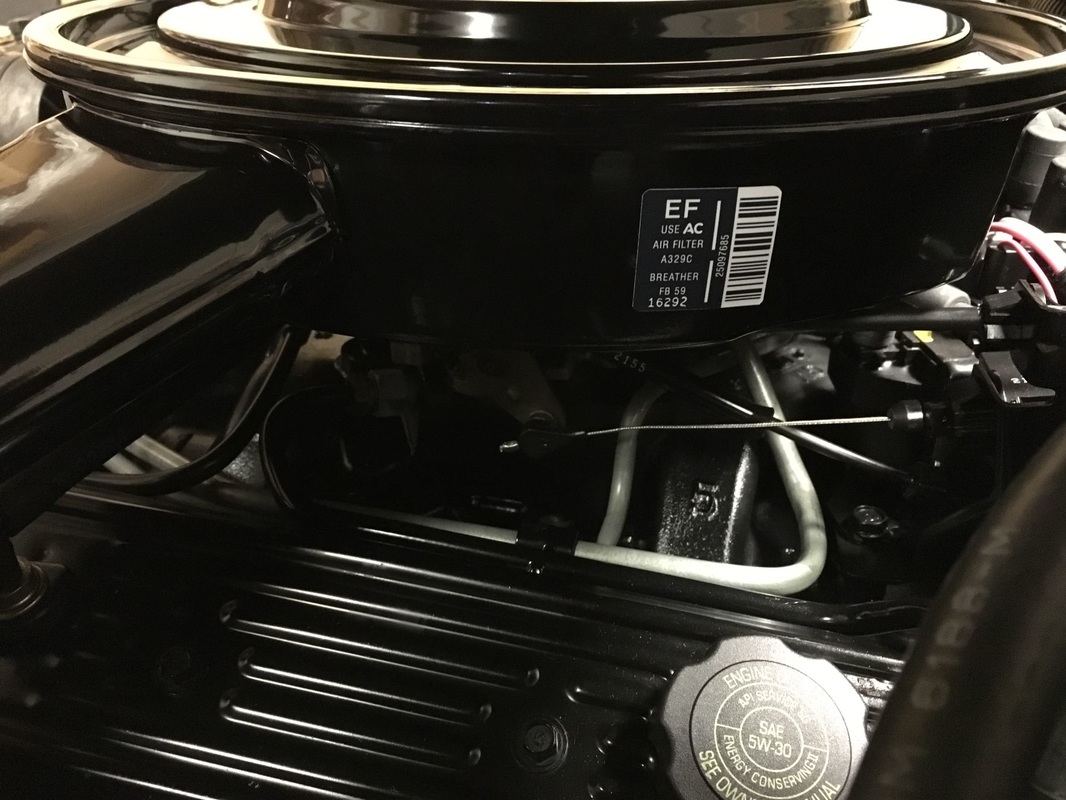
Next in the vinyl decal restoration was the air lid decal. The original decal was badly deteriorated, but was surprised to see that each decal has an additional stamp on it unique to the car, assume some kind of date stamping. Guess on mine is 16292 = Feb. 16, 1992. I'm pretty sure the stamping is unique to the car since the spare air cleaner I restored, had a different stamp, and my research had each photo I'd taken as unique as well.
|
|
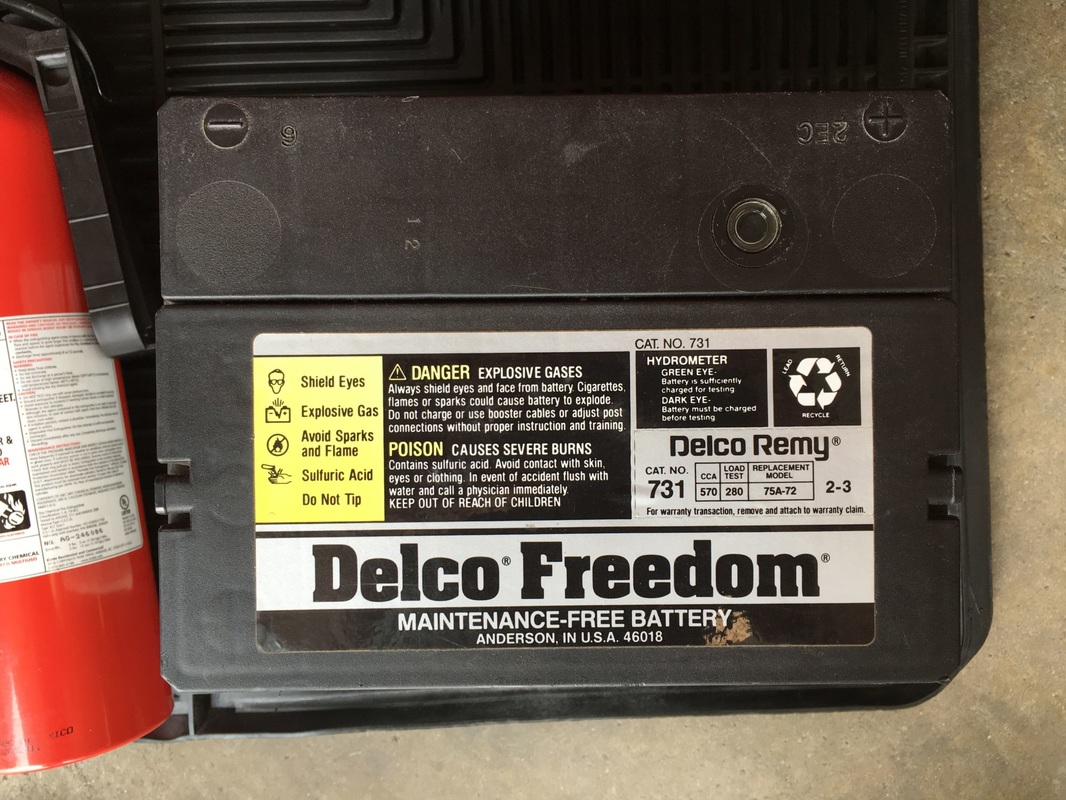
And my last endeavor for the day was replicating a 1992 era Delco Remy Freedom Battery. I had found the decal on eBay as a start. But the graphics were actually incorrect, and the quality and resolution was not up to my expectations. Luckily I found an original owner of a 1992 RS who still had their original battery, which matched their build sheet. With the correct photos in hand I went to work in Photoshop, and bought a basic class 75 flat top battery, peeled off all of the original labels, Printed my new decal on the waterproof vinyl - and here's my end result. The latest testing I'm working on is attempting to create the Hydrometer Green Eye which turned out very nice!

|
|
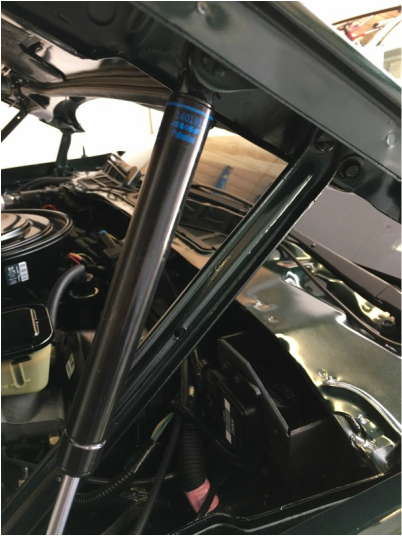
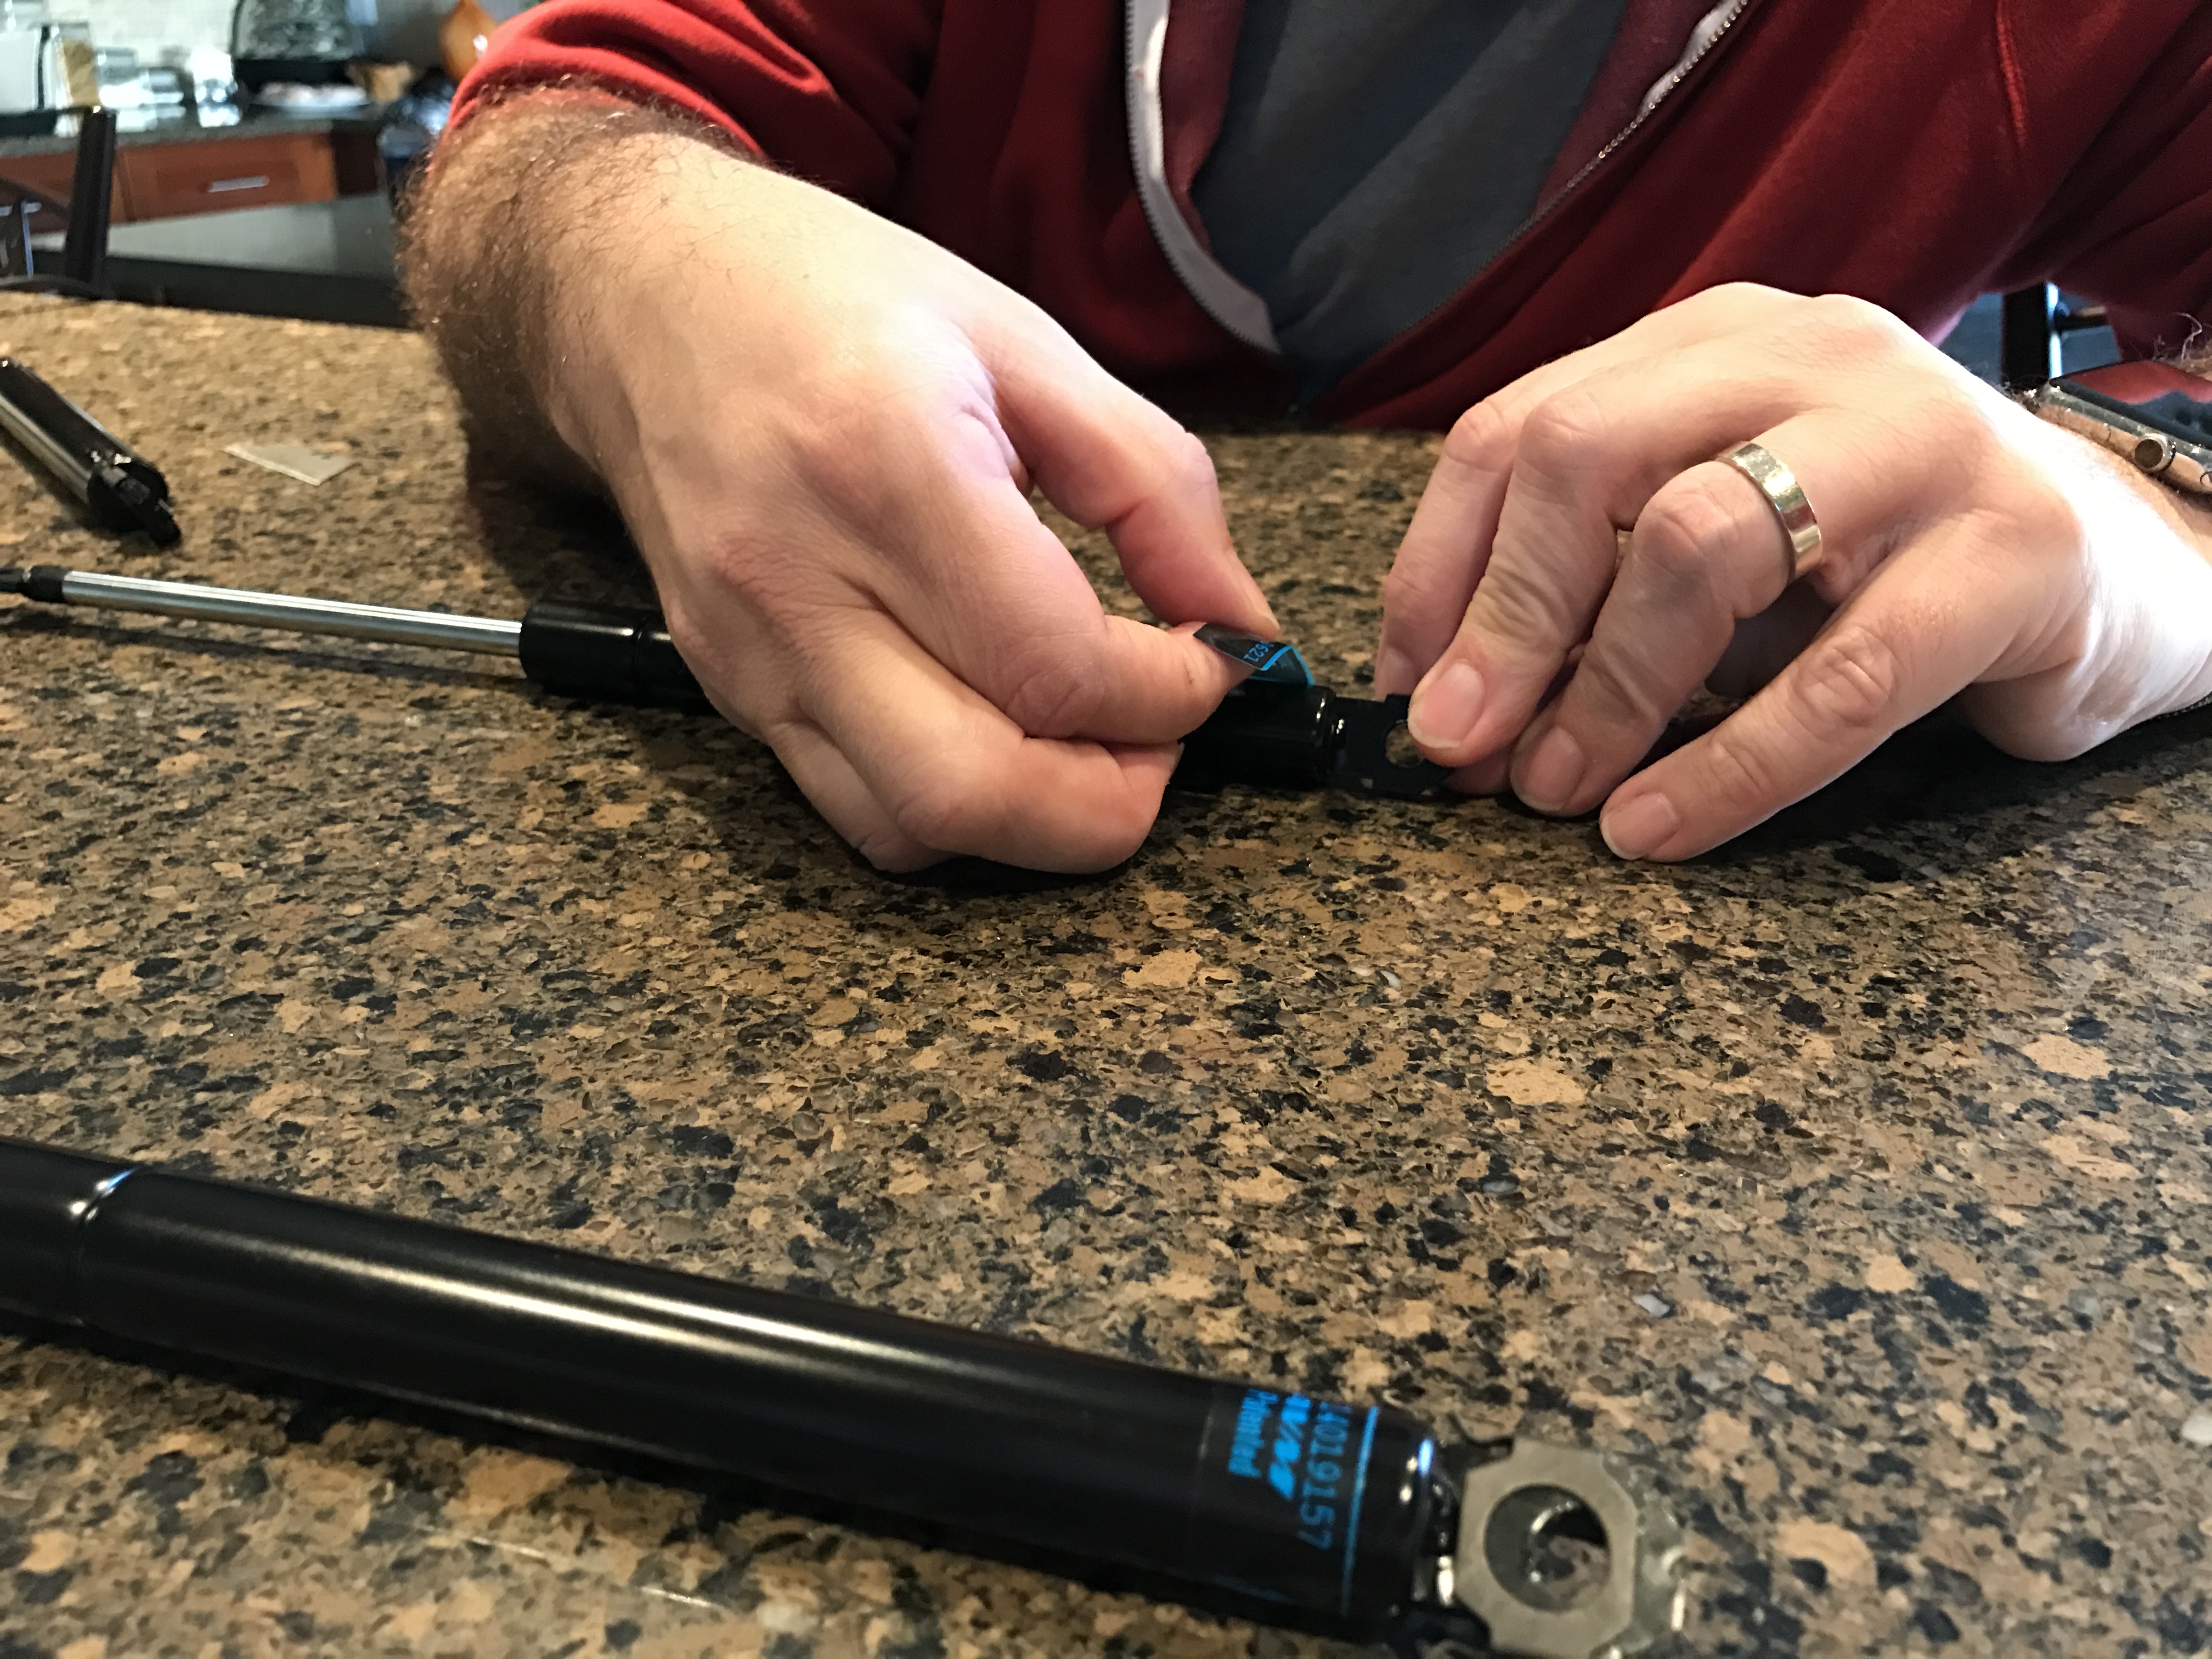
Also got an original set of genuine GM hood struts installed.
Made another decal to replace the badly deteriorated customer satisfaction decal. The blue turned out a bit dark and the chrome film does not flex in the corner, so I'll redo it a bit later. But really pleased with the result.
Was not content with the light blue sway bar bushings. Was super happy to learn that AC Delco Pro made blue poly bushings.
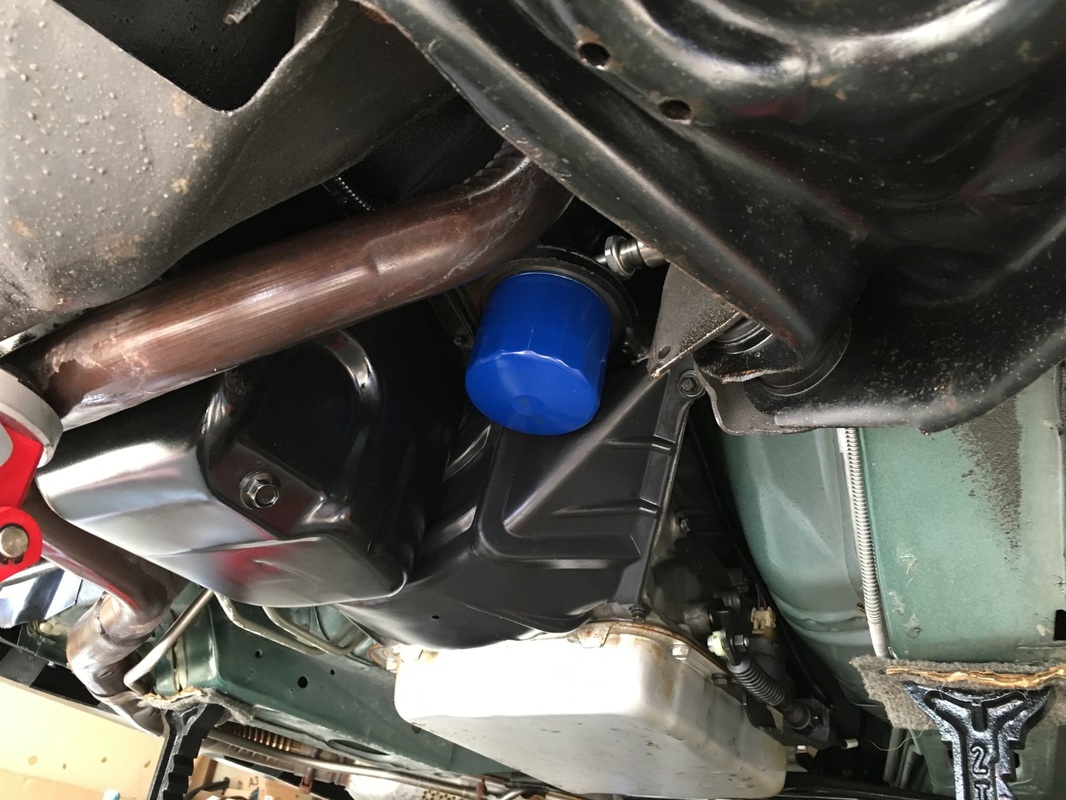
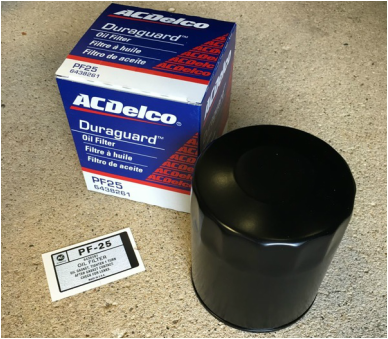
In my decal creation efforts found what the original factory oil filter looked like. So, made a laser printed chemical and water resistant replica decal. I bought some true AC Delco PF-25 oil filters, sprayed them black, and applied the decal.
|
|
The condition of my tail pipe tips always bugged me so, since the factory alumi-coat had pealed away I tried some faux finishing with high temp paints. The exhaust is coming pretty clean.
|
|
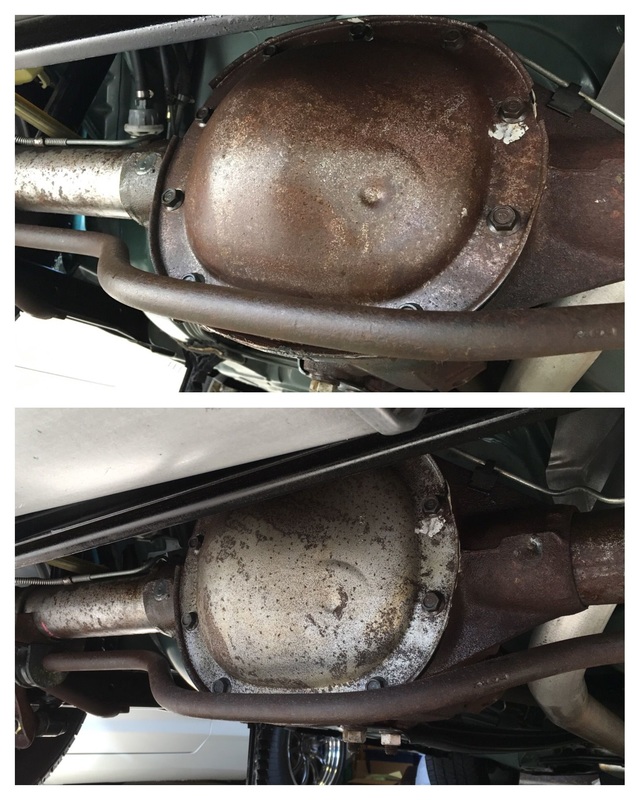
Started on the rear axle, and got this far on the diff cover. Been using gel and spray iron-x.
Refreshed the original rear end links. A little soaking, a touch of paint and clear coat.
|
|
One ongoing issue was that the hood struts were the incorrect replacement for the car. After trying multiple times to use original struts we had to admit that at 25 years old they just weren't going to work anymore. So we found the most correct replacement we could and then moved the stickers from the original struts over to the replacements to be as "correct" as possible.

|
|
Marco has achieved another milestone. Concours judging at Muscle Car & Corvette Nationals where he received a 995/1000, Gold Award. All the hard work has really paid off!!
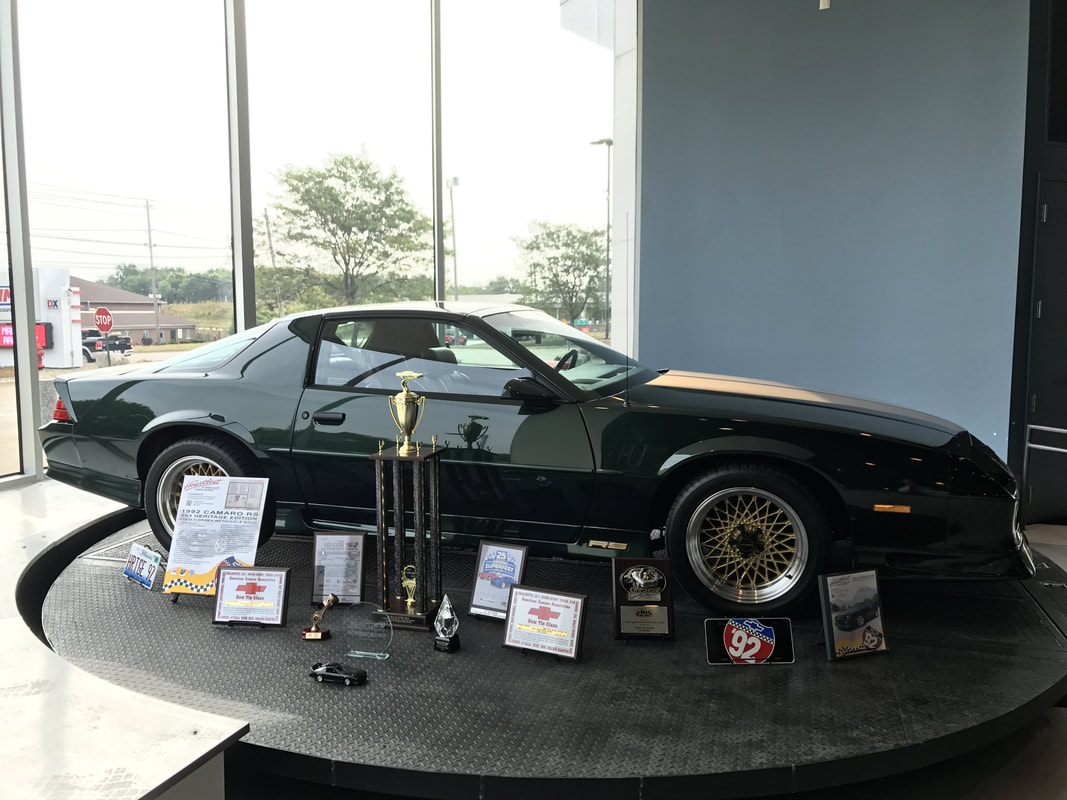
2017 was a great year for Marco, he scored another perfect score at Camaro Nationals and was chosen to be on the turntable inside Summit Racing in Talmadge, Ohio for the North Eastern Ohio Camaro Club's Fall Classic show.
|
|